
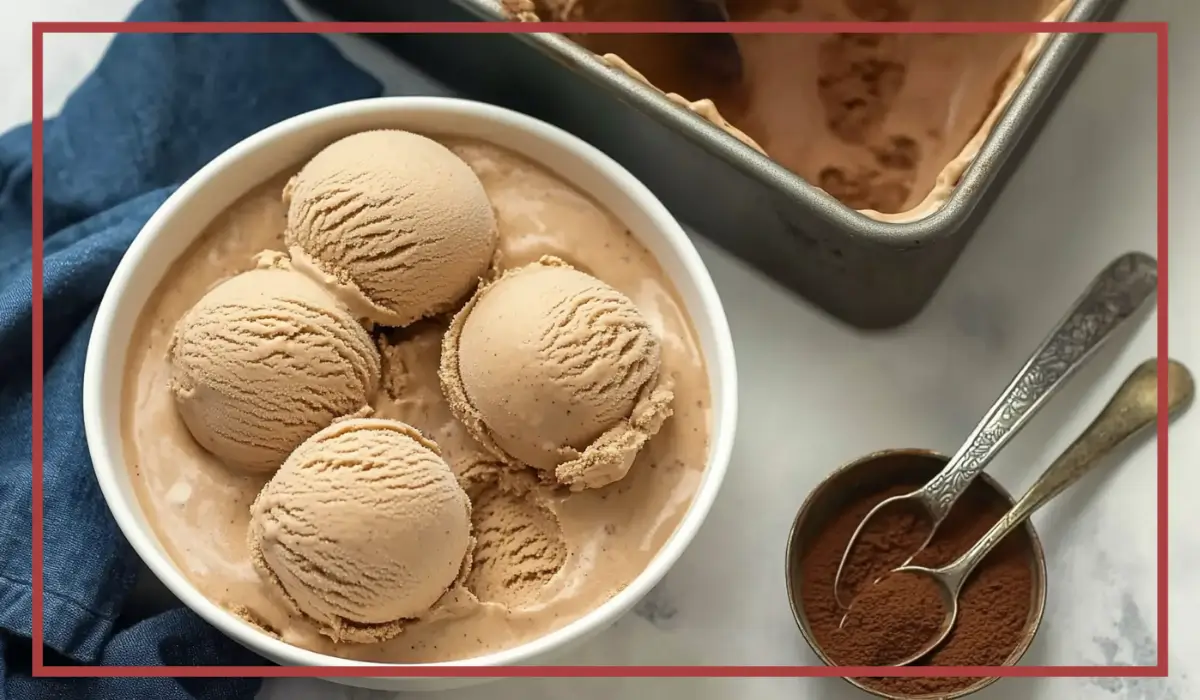
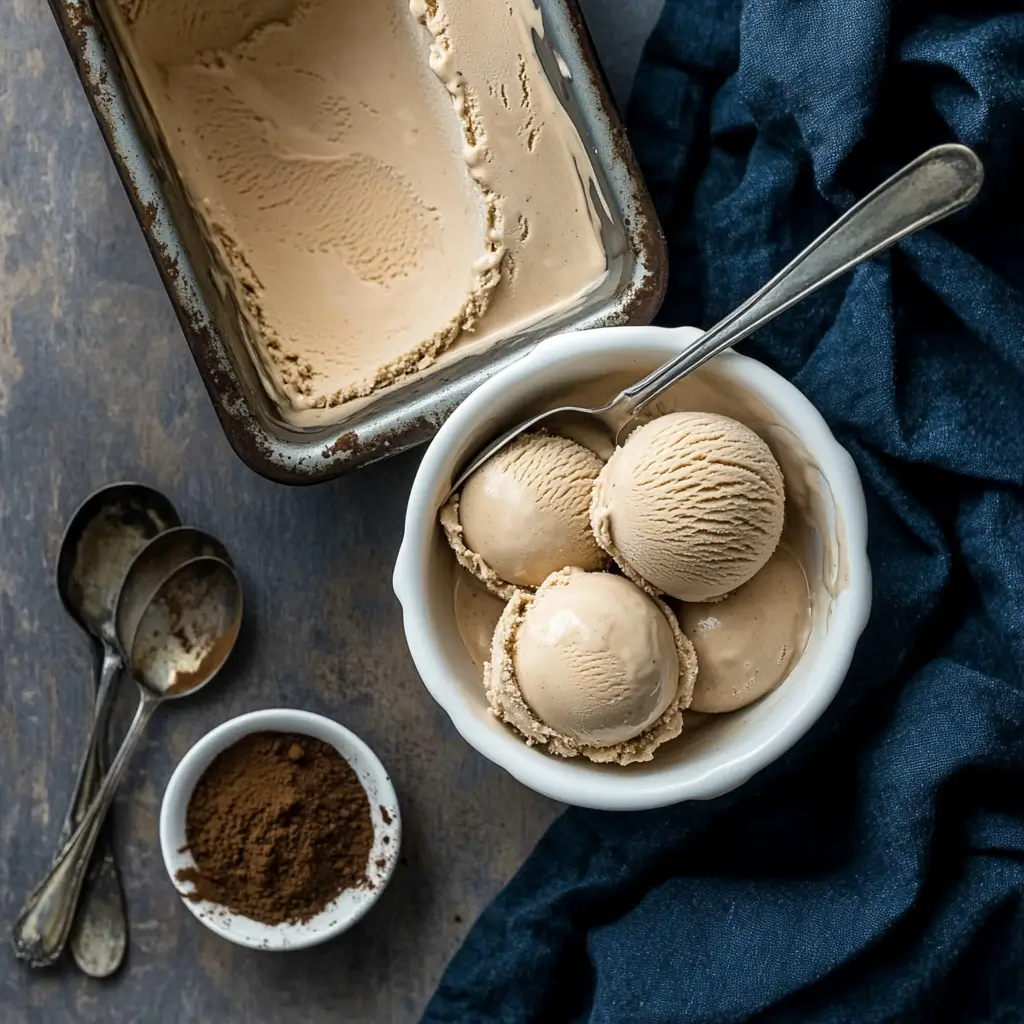
There’s something timeless about the flavor of coffee—it’s cozy, familiar, and bold all at once. But when you turn that flavor into ice cream? Now you’ve got something extraordinary. This homemade coffee ice cream takes everything you love about a warm cup of joe and spins it into a rich, velvety treat that’s perfect for hot summer days, cozy fall evenings, or honestly, anytime you’re craving dessert with a grown-up twist.
I first made this recipe during a long weekend when I was craving something indulgent but not overly sweet. Store-bought coffee ice cream was good, but I wanted to experiment and try making my own. The results? Pure magic. It was smoother, richer, and had this deep, roasted flavor that you just don’t get from the premade versions. And the best part? I knew exactly what was going into it. No artificial flavors or preservatives—just simple, real ingredients from my kitchen.
This recipe uses a custard base, which means it includes egg yolks for richness and creaminess. Don’t worry if you’ve never made custard before—I’ll walk you through every step so you feel confident. The recipe also gives you flexibility: if you’re using strong brewed coffee instead of instant granules, you’ll just slightly adjust the milk amount. And yes, this is a halal-friendly version, so you won’t find any alcohol-based extracts or non-halal ingredients here.
So, whether you’re planning a dinner party, looking to impress your family, or just want a scoop of something delicious after a long day, this coffee ice cream is your answer. It’s smooth, indulgent, and full of bold coffee flavor that makes it hard to stop at just one scoop.
Why You’ll Love This Homemade Coffee Ice Cream Recipe
If you’re someone who enjoys coffee and dessert—especially at the same time—this recipe is going to hit all the right notes. It brings the comfort of your favorite café beverage into a luxurious homemade dessert. The flavor is bold without being overwhelming, creamy without being too heavy, and just sweet enough to satisfy that post-dinner craving.
First of all, let’s talk about the texture. Thanks to the egg yolk custard base and generous dose of cream, this ice cream turns out incredibly smooth and luscious. It doesn’t get icy or overly hard like some homemade recipes can. Instead, it scoops like a dream and melts beautifully on your tongue.
Another reason to love it? It’s surprisingly easy to make. While there’s a bit of patience involved—like chilling the custard and churning the mixture—the steps themselves are totally beginner-friendly. You don’t need to be a pastry chef to make this happen in your kitchen. And with a few pantry staples, you’re well on your way to a scoop (or three) of homemade perfection.
It’s also fully customizable. You can make it decaf for an evening dessert that won’t keep you up at night, or use strong brewed coffee for a more intense flavor. Want to swirl in chocolate chunks or crushed cookies? Go for it. This recipe is your foundation for coffee ice cream bliss, and you can build on it however you’d like.
And finally, this is the kind of recipe that wins people over. Serve it after dinner and just watch your guests’ eyes light up. They’ll be amazed that something this rich and flavorful came from your own kitchen. It’s a crowd-pleaser that feels both elegant and approachable—exactly what a great homemade dessert should be.
Health Benefits of this Homemade Coffee Ice Cream
Now, ice cream isn’t typically the first thing that comes to mind when you think of “healthy food,” but let’s take a moment to appreciate the hidden benefits this homemade version has over store-bought options. First and foremost, by making it at home, you have complete control over the ingredients. That means no additives, preservatives, artificial colors, or stabilizers—just real food.
Let’s break it down further. Coffee itself actually has several health benefits when enjoyed in moderation. It’s a rich source of antioxidants, which help fight free radicals in the body. Antioxidants can support heart health, improve energy levels, and may even protect against certain diseases. Since you’re using either instant decaf coffee granules or brewed coffee, you still get those natural compounds in every spoonful—without the buzz if you choose the decaf route.
Egg yolks are another nutritional powerhouse in this recipe. While they do contain cholesterol, they’re also packed with vitamins like B12, D, and A, as well as choline, which is essential for brain function and development. They also contribute to the silky texture of the custard base, meaning you don’t need to add other thickeners or binders.
Whole milk and heavy cream add richness, but they also supply calcium and vitamin D, both of which are important for bone health. And when you’re making the ice cream yourself, you can choose dairy options that work for you—organic, hormone-free, or even lactose-free cream and milk if needed.
Additionally, homemade desserts encourage mindful eating. You’re more likely to appreciate and savor each bite when you’ve put in the effort to make it from scratch. That in itself supports a healthier relationship with food.
So while this is definitely a treat, it’s one that brings a touch of wholesomeness along with its indulgence. And that, in our book, makes it a little extra special.
Preparation Time, Servings, and Nutritional Information
Before you dive into making this dreamy coffee ice cream, let’s take a moment to go over the time commitment, how many people it serves, and what kind of nutrition you can expect from each serving. Planning ahead will help you pace the steps and serve your ice cream at the perfect moment.
Total Time:
- Preparation Time: 25 minutes
- Chilling Time: 2–12 hours (depending on how long you refrigerate the custard)
- Churning Time: 20–30 minutes
- Freezing Time (for firmer texture): 2–4 hours
- Total Time (from start to scoop): Around 4–16 hours (with most of that being inactive chilling time)
Servings:
This recipe yields about 1½ quarts of ice cream, which is roughly 10–12 servings depending on portion size.
Nutritional Information (per serving, approximate):
- Calories: 290
- Fat: 21g
- Saturated Fat: 13g
- Carbohydrates: 22g
- Sugars: 20g
- Protein: 4g
- Cholesterol: 160mg
- Sodium: 65mg
These values are estimates based on standard ingredients. If you’re substituting dairy or using different types of sugar, the numbers may vary slightly. The calorie count is in line with what you’d expect for a premium scoop of ice cream, but remember, this is a treat meant to be enjoyed in moderation.
While it does contain sugar and fat, the upside is that one small serving is rich and satisfying, meaning you don’t need a lot to feel like you’ve indulged. And because there are no artificial thickeners or corn syrup solids, it’s a dessert you can feel a little better about serving to friends and family.
Now that you know what to expect in terms of time and nutrition, let’s talk ingredients.
Ingredients List of this Homemade Coffee Ice Cream
Here’s exactly what you’ll need to bring this luxurious coffee ice cream to life. All of the ingredients are simple, easy to find, and come together to create that perfectly creamy texture and bold, roasted flavor.
Dairy Base:
- 2½ cups (600 ml) whole milk
This forms the foundation of the custard. Whole milk adds richness, but if you prefer, you can substitute with lactose-free milk or even oat milk, though the texture may change slightly. - 2¼ cups (540 ml) heavy cream
Heavy cream is what gives this ice cream its luscious, smooth texture. It’s essential for getting that scoopable, premium result.
Sweeteners and Flavor:
- 1½ cups (300 g) granulated sugar
Sugar not only sweetens the dessert but also helps with the texture by lowering the freezing point, making the ice cream softer and easier to scoop. - ⅛ teaspoon salt
Salt might seem like a minor player, but it enhances the coffee flavor and balances the sweetness. Don’t skip it. - 2 tablespoons instant decaffeinated coffee granules
Instant coffee makes it easy to infuse strong flavor without the need to brew. Make sure it’s high quality, as this is the main flavor base. - OR ½ cup strong brewed coffee (if using this, reduce milk by ½ cup)
If you prefer a more natural approach, brewed coffee works beautifully. Just remember to reduce the milk to keep the proportions balanced.
Egg Yolks and Flavoring:
- 6 large egg yolks
These add richness and create the custard base. They also contribute to the smooth, scoopable texture of the finished ice cream. - 1½ teaspoons vanilla extract
Vanilla rounds out the flavor and brings warmth to the coffee profile. If using a halal-certified vanilla extract, you’re good to go. Otherwise, opt for alcohol-free versions.
With these ingredients ready, you’re well on your way to making your own batch of café-worthy frozen dessert. Now let’s walk through the cooking process step-by-step.
Step-By-Step Cooking Instructions of this Homemade Coffee Ice Cream
This recipe may sound fancy, but I promise—it’s completely doable at home, even if you’re new to making ice cream. The key is taking it one step at a time, and I’ll be right here guiding you through the process. From making the custard base to chilling, churning, and freezing, every step serves a purpose in building the rich, creamy texture and bold flavor you’re going to love.
Step 1: Make the Custard Base
Start by gathering all your ingredients so they’re ready to go. Once the custard-making process starts, things move pretty quickly.
In a medium-sized saucepan, combine the whole milk, sugar, salt, and instant decaffeinated coffee granules. If you’re using strong brewed coffee instead of instant, remember to reduce the milk by half a cup to keep the liquid ratio balanced.
Place the saucepan over medium heat and stir the mixture occasionally. You’re looking to gently heat the mixture until it’s steaming but not boiling. Boiling could cause the milk to curdle or the sugar to caramelize too early, which we don’t want.
While the milk mixture is warming up, separate six egg yolks into a medium bowl. Whisk them gently until they’re smooth and slightly thickened. You don’t need to beat them into a foam—just break them up and whisk until they’re well blended.
Once the milk mixture is steaming, it’s time to temper the egg yolks. This step helps gradually bring the eggs up to temperature so they don’t scramble when added to the hot liquid.
Slowly pour about half of the hot milk mixture into the bowl of egg yolks, whisking constantly as you pour. This helps bring the temperature of the yolks up without shocking them. Then, pour the tempered egg mixture back into the saucepan with the remaining milk mixture, again stirring constantly to keep everything smooth.
Return the saucepan to the stove over medium heat. Continue cooking, stirring often with a wooden spoon or heatproof spatula. You’re looking for the mixture to thicken just slightly—it should coat the back of your spoon after about 4 to 6 minutes. Be careful not to let it boil at this point, as boiling can cause the eggs to curdle.
Once the custard has thickened, it’s time to strain it. This step ensures a silky-smooth texture by removing any tiny bits of egg that may have cooked. Set a fine-mesh sieve over a large heatproof bowl and pour the custard through the sieve.
Now you’ve got your custard base ready to go. Let’s move on to chilling.
Step 2: Chill the Custard
This part requires a little patience, but it’s worth it. Chilling the custard completely is essential before you churn it—it not only improves the flavor but also ensures your ice cream will freeze properly.
Cover the surface of the custard directly with plastic wrap. Pressing the wrap onto the surface helps prevent a skin from forming on top, which could affect the final texture.
Place the bowl in the refrigerator and chill for at least 2 hours, but ideally overnight. The longer it chills, the more developed and cohesive the flavors will become.
If you’re in a hurry, you can speed things up by placing the bowl over an ice bath, but overnight chilling is best for maximum flavor and creaminess.
Step 3: Finish the Ice Cream
Once your custard is fully chilled, it’s time to turn it into ice cream. At this point, you’ll whisk in the heavy cream and vanilla extract. The cream lightens the texture and adds richness, while the vanilla enhances the coffee flavor and adds depth.
Give the mixture a good stir to ensure everything is fully combined.
Now it’s time to churn. Pour the mixture into your ice cream maker and churn according to your machine’s instructions. For most machines, this will take 20 to 30 minutes. You’ll see the mixture gradually thicken and turn into a soft-serve consistency.
If you like your ice cream soft and scoopable right away, you can serve it immediately. It will have the texture of a frozen custard or soft serve—still rich and smooth, but not quite firm.
If you prefer a more traditional, scoopable ice cream texture, transfer the churned ice cream into a freezer-safe container. Cover it with a lid or press a piece of parchment paper against the surface to prevent ice crystals from forming. Freeze for at least 2 to 4 hours, or until firm.
And that’s it—you’ve just made homemade coffee ice cream from scratch! Let’s move on to how to serve it for the best possible experience.
How to Serve this Homemade Coffee Ice Cream
Serving this coffee ice cream is an experience all its own. Because it’s rich and deeply flavored, a small scoop goes a long way. But that doesn’t mean you can’t have fun with how you present it.
For a classic approach, simply serve it in bowls or cones. It stands perfectly well on its own—no toppings required. However, if you’re feeling a bit fancy or want to dress it up for guests, here are a few serving ideas that take it to the next level.
Scoop it into small glass cups and sprinkle with a touch of finely grated dark chocolate or a few chocolate-covered espresso beans. This adds a delightful crunch and a hint of bitter-sweet flavor that complements the coffee beautifully.
If you’re hosting a dinner party, serve a small scoop alongside a slice of pound cake or a fudgy brownie. The contrast of warm and cold, soft and rich, creates a dessert that feels both luxurious and comforting.
For a fun twist, drizzle a bit of halāl caramel sauce or chocolate syrup on top, and maybe even add a dollop of whipped cream. This is especially great for special occasions or family nights.
And here’s a personal favorite—sandwich a scoop between two soft chocolate chip cookies for the ultimate coffee ice cream sandwich. It’s indulgent, fun, and always a hit.
Finally, if you’re enjoying it solo, take a quiet moment for yourself, grab a spoon, and savor every bite. You earned it.
Next, let’s look at some perfect pairings that take your coffee ice cream experience up another notch.
Pairing Suggestions for this Homemade Coffee Ice Cream
Coffee ice cream has such a bold and distinctive flavor that it pairs well with a variety of textures and tastes. Whether you’re planning a full dessert course or just looking for a few delicious sides to round out your treat, here are some inspired ideas to try.
First, consider pairing it with baked goods. Soft, chewy cookies—like chocolate chip or molasses—complement the smooth creaminess of the ice cream with a gentle bite. Similarly, buttery shortbread or biscotti adds a contrasting crunch while echoing those cozy café flavors.
If you’re thinking of serving this after a meal, balance the richness of the ice cream with something light and refreshing. A citrusy arugula salad or a crisp fruit salad can cleanse the palate before diving into dessert.
For a more decadent experience, try serving it with chocolate lava cake or warm brownies. The contrast between hot and cold, soft and creamy, is nothing short of magical. Coffee and chocolate are a match made in dessert heaven.
If you want to stick with a more minimal presentation, you can pair this ice cream with a warm glass of milk or halāl chai tea. The warmth of the drink enhances the cold creaminess of the dessert, making each bite even more satisfying.
Looking for a brunch-friendly option? Scoop it onto pancakes or waffles instead of syrup. It melts into the nooks and crannies and gives your plate a grown-up twist that everyone will rave about.
And if you’re feeling adventurous, blend a scoop into your favorite milkshake or frappe for an ultra-creamy beverage with a bold coffee kick. It’s perfect for hot afternoons or anytime you need a cool pick-me-up.
Now that you know how to serve and pair it, let’s cover how to store your ice cream properly so it stays delicious every time you dip your spoon in.
Storage, Freezing & Reheating Instructions
Storing your homemade coffee ice cream properly is key to preserving its flavor, texture, and creamy consistency. Because there are no commercial stabilizers in this recipe, your storage method matters more than you might think. But don’t worry—just follow a few simple tips, and your ice cream will stay scoopable and delicious for days (or even weeks) to come.
Once you’ve churned your ice cream and reached that soft-serve consistency, you’ll want to transfer it into a freezer-safe container as quickly as possible. A shallow, wide container works best for freezing evenly and scooping easily. If possible, use one with a tight-fitting lid to prevent air exposure, which can cause ice crystals to form.
For best results, press a layer of parchment paper or plastic wrap directly onto the surface of the ice cream before sealing the container with the lid. This extra step keeps air out and helps maintain a smooth, creamy texture.
Place the container in the coldest part of your freezer—usually near the back. Let the ice cream freeze for at least 2 to 4 hours if you want a firmer texture. After that, it’s ready to serve whenever your sweet tooth strikes.
Homemade ice cream is at its best within the first week, but it can be stored for up to two weeks without a significant loss of quality. Beyond that, it might start to develop a slightly icy texture, though it will still be safe to eat.
If the ice cream has been frozen for several days, you may notice it becomes quite firm. To make scooping easier, simply let it sit at room temperature for about 5 to 10 minutes before serving. This will soften it just enough to scoop easily without melting too fast.
As for reheating—well, ice cream doesn’t exactly get reheated. However, if you’re using it as part of a dessert (like a topping on a warm brownie), just make sure your warm dessert isn’t piping hot. Let it cool slightly so your ice cream doesn’t melt instantly on contact.
By taking these small but important steps, you’ll ensure that every scoop is as good as the first. Now, let’s talk about a few common mistakes to avoid so you get it perfect every time.
Common Mistakes to Avoid in this Homemade Coffee Ice Cream
Even though this coffee ice cream recipe is relatively simple, there are a few pitfalls that can affect the final outcome. Avoiding these common mistakes will help you get the best results—whether it’s your first batch or your fiftieth.
Mistake 1: Skipping the Straining Step
Once your custard is done cooking, you might be tempted to skip straining it through a fine-mesh sieve. But this step is absolutely essential. Even the most careful cooks can end up with a few bits of cooked egg in the custard. Straining ensures a perfectly smooth texture and professional-quality finish.
Mistake 2: Not Tempering the Eggs Properly
Tempering the eggs by slowly whisking in hot milk is a must. If you pour the hot liquid in too quickly or don’t whisk constantly, the eggs can curdle and cook unevenly. Take your time during this step and pour slowly—it makes a big difference.
Mistake 3: Not Chilling the Custard Fully
Rushing the chill time can lead to problems during churning. Warm custard won’t churn properly and can lead to an icy or grainy texture. Be sure to let the custard chill for at least 2 hours—or better yet, overnight—for the smoothest, creamiest results.
Mistake 4: Over-Churning
Over-churning can cause your ice cream to become too dense or even a bit buttery. Most machines will churn your base in 20 to 30 minutes. Keep an eye on the texture, and stop when it reaches that soft-serve stage.
Mistake 5: Poor Storage
Improper storage is a big reason homemade ice cream doesn’t last. Use an airtight, shallow container, and cover the surface with plastic wrap or parchment paper. This helps avoid freezer burn and keeps your ice cream fresh and smooth.
Avoiding these mistakes will take your homemade ice cream from good to great, giving you consistent results every single time. Now let’s take things up a notch with some insider pro tips.
Pro Tips of this Homemade Coffee Ice Cream
Want to make this ice cream taste like it came from a boutique dessert shop? These pro tips will elevate your homemade creation from delicious to unforgettable.
Tip 1: Use High-Quality Ingredients
Because this recipe uses only a handful of ingredients, quality matters. Choose fresh, organic eggs if possible, and opt for high-quality cream and milk. If you’re using instant coffee, pick one with a rich, bold flavor—this is where all that coffee essence comes from, after all.
Tip 2: Bloom the Coffee
If you’re using instant coffee granules, take a moment to bloom them. Mix the granules with a tablespoon or two of hot water before adding them to the milk. This intensifies the flavor and ensures there are no clumps.
Tip 3: Chill Your Mixing Bowl
For quicker churning and a smoother consistency, place your mixing bowl (or the bowl of your ice cream maker) in the freezer 15 to 30 minutes before churning. The colder the equipment, the faster the mixture will freeze.
Tip 4: Add Mix-ins at the Right Time
Thinking of adding chocolate chips, cookie crumbles, or swirls of caramel? Wait until the last 2–3 minutes of churning to mix them in. This ensures they’re evenly distributed without disrupting the texture of the ice cream.
Tip 5: Keep Your Freezer Consistent
Avoid storing your ice cream near the freezer door, where the temperature fluctuates most. These changes can cause your ice cream to form ice crystals or harden too much. Store it toward the back for consistent, scoopable results.
Tip 6: Customize the Sweetness
If you prefer a slightly less sweet dessert, feel free to reduce the sugar by 2 to 3 tablespoons. Just keep in mind that sugar not only sweetens but also affects the texture, so don’t cut back too much or you risk an icier consistency.
With these tips in your back pocket, you’re ready to create a batch of ice cream that’s smooth, flavorful, and downright swoon-worthy. Still have questions? Let’s cover the most common ones.
Frequently Asked Questions (FAQs)
Can I make this ice cream without an ice cream maker?
Yes! If you don’t have an ice cream maker, you can still make this recipe. After chilling the custard and mixing in the cream and vanilla, pour the mixture into a shallow container and freeze. Every 30 minutes, stir vigorously with a fork or whisk to break up ice crystals. Repeat for 2–3 hours until thick and creamy.
Is there a dairy-free version of this Homemade Coffee Ice Cream recipe?
Absolutely. You can use full-fat coconut milk or oat milk as a substitute for both the milk and cream. Keep in mind, though, that the texture and flavor will be slightly different, and it may not be quite as creamy as the original.
Can I use caffeinated coffee?
Yes, you can use caffeinated instant coffee or brewed coffee if you prefer. Just remember that if you’re sensitive to caffeine or serving it in the evening, the decaf version is a better choice.
How long does homemade ice cream last?
Homemade ice cream is best enjoyed within 7 to 10 days, though you can store it for up to two weeks. After that, it may begin to develop a slightly icy texture.
Can I use egg substitutes?
You can try using pasteurized egg yolks or egg yolk replacers, but keep in mind that the custard base won’t thicken quite the same way. If you’re avoiding eggs entirely, you may want to look for a no-churn, egg-free ice cream recipe instead.
My ice cream turned icy. What went wrong?
Usually, ice crystals form when the custard wasn’t chilled enough or if the ice cream wasn’t stored properly. Be sure to chill the custard thoroughly before churning and always cover the surface before freezing.
Can I make it ahead for a party?
Yes! This ice cream is a perfect make-ahead dessert. Just prepare it up to two days in advance and store it in the freezer. Let it sit at room temperature for 5–10 minutes before serving for the best texture.
Is this ice cream halal?
Yes, this recipe is completely halal-friendly. It uses no alcohol-based extracts and avoids non-halal ingredients like gelatin or pork-derived products.
Can I double the Homemade Coffee Ice Cream recipe?
Yes, but only if your ice cream maker can handle the larger batch. Most home machines have a maximum capacity, so it’s usually better to make two separate batches.
Can I add toppings?
Definitely! Crushed nuts, halāl caramel sauce, chocolate chips, or cookie crumbles are all amazing with this coffee ice cream.
Now that all your questions are answered, let’s wrap things up with a little inspiration to get you into the kitchen.
Conclusion & Call to Action
There’s something undeniably satisfying about making your own ice cream from scratch. With this coffee ice cream recipe, you’re not just making dessert—you’re creating a flavor experience that rivals anything you can buy in the store. From the creamy, dreamy texture to the bold coffee flavor that lingers just long enough to keep you coming back for more, every spoonful is a testament to the magic of homemade food.
And the best part? You made it yourself, with ingredients you trust and flavors you love. Whether you’re planning a cozy family dinner, a weekend brunch, or just a quiet night in, this ice cream is the kind of treat that brings people together. It’s rich without being overwhelming, elegant without being fussy, and endlessly customizable to suit your own taste.
If you’ve never made ice cream before, let this be your first adventure. Follow the steps, take your time, and enjoy the process. You’ll be amazed at how simple it really is—and how much better homemade tastes.
Now I’d love to hear from you. Did you try this recipe? Did you go with decaf or full-caffeine? Add any fun mix-ins or serve it with your favorite dessert? Snap a photo and share your creation online. Tag me or leave a comment to let me know how it turned out. I always love seeing your kitchen victories!
So grab those ingredients, clear some freezer space, and treat yourself to a batch of this rich, creamy coffee ice cream. Once you try it, I have a feeling it’ll earn a permanent spot in your dessert rotation. Happy scooping!
Print
Homemade Coffee Ice Cream – Rich, Creamy & Easy to Make
- Total Time: 4–16 hours (with chilling)
- Yield: 1.5 quarts (about 10–12 servings) 1x
- Diet: Halal
Description
A creamy, bold-flavored coffee ice cream made with a rich custard base, real coffee, and simple ingredients. This halal-friendly dessert is smooth, scoopable, and perfect for coffee lovers.
Ingredients
-
2½ cups (600 ml) whole milk
-
1½ cups (300 g) granulated sugar
-
⅛ teaspoon salt
-
2 tablespoons instant decaffeinated coffee granules (or ½ cup strong brewed coffee — omit ½ cup milk if using this)
-
6 egg yolks
-
2¼ cups (540 ml) heavy cream
-
1½ teaspoons vanilla extract (halal or alcohol-free)
Instructions
-
In a medium saucepan, combine milk, sugar, salt, and instant coffee. Heat until steaming, not boiling.
-
In a separate bowl, lightly beat the egg yolks. Slowly whisk in half the hot milk to temper.
-
Pour egg mixture back into saucepan. Cook over medium heat, stirring, until mixture thickens (about 5 minutes).
-
Strain the custard through a fine-mesh sieve into a clean bowl.
-
Cover with plastic wrap pressed directly on the surface. Chill for at least 2 hours or overnight.
-
Stir in heavy cream and vanilla. Churn in an ice cream maker according to your machine’s instructions.
-
Serve soft or freeze until firm (2–4 hours) for scoopable texture.
Notes
-
Use decaf or regular coffee depending on your preference.
-
Chill custard completely before churning to ensure smooth texture.
-
Store in an airtight container, covered with parchment, up to 2 weeks.
- Prep Time: 25 minutes
- Cook Time: 10 minutes
- Category: Dessert
- Method: Churning
- Cuisine: American