
There’s something deeply comforting about the scent of Earl Grey tea swirling through the kitchen. It’s floral, slightly citrusy, and somehow both invigorating and calming at the same time. Now imagine that flavor not just in your mug, but folded into a creamy, dreamy, melt-in-your-mouth ice cream. This Earl Grey ice cream recipe is no-churn, which means absolutely no fancy equipment is needed. No ice cream maker, no special thermometers—just a saucepan, a hand mixer, and your freezer.
And let’s talk about the texture for a second. Thanks to the combination of heavy cream and sweetened condensed milk, this ice cream turns out unbelievably smooth and scoopable. The vanilla brings a warm, round depth to the tea’s brightness, and together they create something that feels almost too elegant to have come from such a simple process. It’s the kind of dessert that makes your guests pause after the first bite and ask, “Wait, you made this at home?”
This recipe was born out of my late-night obsession with tea-flavored desserts. I’ve always loved a good London Fog latte, and one evening, as I brewed a particularly fragrant cup, it hit me—why not try to capture this in ice cream? After a few test batches, I finally landed on the perfect ratio of tea to cream, sweetness to richness. Now, it’s become a go-to dessert in our house, especially when I want to serve something a little unexpected but totally crowd-pleasing.
Whether you’re new to homemade ice cream or you’ve been churning your own for years, this version is shockingly easy and so rewarding. It’s also a wonderful base for experimenting with other tea flavors or mix-ins, but honestly, the pure Earl Grey version is so delightful, you may not want to change a thing.
Why You’ll Love This Recipe
This Earl Grey ice cream brings together everything you want in a dessert: creamy texture, subtle sweetness, and that uniquely comforting flavor of steeped tea. It’s the kind of treat that feels gourmet, even though it comes together with just a handful of ingredients. What makes it especially lovable is the no-churn aspect—you don’t need any fancy machines or complicated techniques to pull this off.
First and foremost, let’s talk flavor. Earl Grey tea is known for its fragrant notes of bergamot, a type of citrus that gives it its signature floral and slightly fruity aroma. When steeped into heavy cream, the tea’s essence is gently infused into every bite of the ice cream. It’s not overpowering; instead, it’s balanced, refined, and a little mysterious in the best way. Add vanilla extract to round out the flavors, and you’ve got something that tastes like it came from a boutique dessert shop.
The texture is another win. Because the base includes both whipped cream and sweetened condensed milk, the resulting ice cream is incredibly smooth, light, and rich all at once. It holds its shape beautifully when scooped, yet melts delicately on your tongue.
You’ll also love how simple the ingredient list is—just four things, all easy to find and often already in your pantry. Plus, the steps are foolproof. If you can simmer tea and use a hand mixer, you can make this.
It’s also a great make-ahead dessert. You can prepare it a day or two in advance and simply pull it out when you’re ready to serve. No last-minute fussing, just creamy, aromatic ice cream ready to impress.
Lastly, it’s versatile. Serve it as-is, or elevate it with toppings like crushed biscuits, lemon zest, or a drizzle of honey. It works as an elegant dinner party dessert or a cozy treat for a quiet evening on the couch. Either way, you’re going to fall in love with this tea-inspired indulgence.
Health Benefits
While ice cream isn’t usually touted for its health benefits, this particular version includes one key ingredient that can actually do your body some good—Earl Grey tea. Known for its soothing properties and fragrant aroma, Earl Grey is made from black tea infused with oil from the rind of the bergamot orange, a citrus fruit with an uplifting, floral flavor profile.
Black tea itself is rich in antioxidants, particularly theaflavins and thearubigins, which are known to support heart health and reduce inflammation. Regular consumption of black tea has been linked to improved cholesterol levels and reduced risk of cardiovascular disease. When steeped in cream, the tea still imparts some of those beneficial compounds—so while this is certainly a treat, you can feel good knowing you’re also getting a touch of wellness in each bite.
Bergamot oil, the signature flavor in Earl Grey, has also been studied for its calming effects. It’s believed to support mood regulation and reduce stress, which might explain why sipping a hot cup of Earl Grey feels so comforting. Even in ice cream form, that soothing sensation translates surprisingly well. It’s the kind of dessert that not only tastes good but leaves you feeling a bit more relaxed and centered.
In addition to the tea, sweetened condensed milk provides calcium and some essential vitamins. And because the recipe doesn’t require eggs, it’s naturally free of cholesterol-heavy yolks, making it a lighter option than traditional custard-based ice creams.
Furthermore, by making your own ice cream at home, you can control the quality of your ingredients. Use organic cream and natural vanilla extract for an even cleaner version. No preservatives, no artificial flavors—just pure, delicious goodness made in your own kitchen.
Preparation Time, Servings, and Nutritional Information
When you’re planning a dessert, especially for guests or a special occasion, it helps to know exactly how much time you’ll need and what you’re getting nutritionally. Fortunately, this Earl Grey ice cream is not only simple but also quick to prepare—especially compared to traditional ice creams that require cooking a custard base and churning it for half an hour.
Total Preparation Time
– Steeping and chilling the cream: 2 hours (hands-off time)
– Whipping and mixing: 10 minutes
– Freezing time: 4 hours (minimum, preferably overnight for best texture)
Total time needed from start to scoop: About 6 hours, mostly inactive.
Servings
This recipe makes about 6 to 8 generous servings, depending on how large your scoops are. Perfect for a small gathering or a week’s worth of indulgent treats for one.
Nutritional Information (per serving, based on 8 servings):
– Calories: 310
– Total Fat: 22g
– Saturated Fat: 14g
– Cholesterol: 80mg
– Carbohydrates: 24g
– Sugars: 22g
– Protein: 3g
– Fiber: 0g
– Sodium: 55mg
Of course, nutritional values can vary depending on the exact brands and types of ingredients you use. If you’d like to lighten it up a bit, you can experiment with using reduced-fat cream or a smaller portion of sweetened condensed milk, though the texture may be slightly different.
Ingredients List
This ice cream proves that you don’t need a long list of ingredients to create something that tastes luxurious and complex. Each component plays an important role, contributing to the flavor, texture, and creaminess that make this dessert so special.
Here’s what you’ll need:
– 2 cups heavy whipping cream (35%)
This is the base of the ice cream and what gives it that rich, luscious mouthfeel. The high fat content is essential for creating a smooth, scoopable texture without churning. Avoid substituting with light cream, as it won’t whip properly or provide the same structure.
– 2 teaspoons Earl Grey tea (loose leaf or from 2 tea bags)
This is the star of the show. You can use either loose leaf or bagged tea—just make sure it’s good quality. The better the tea, the better the flavor. Loose leaf often offers a fresher, more aromatic experience, but don’t hesitate to use your favorite bagged brand if that’s what you have on hand.
– 1 cup sweetened condensed milk
This provides both sweetness and body to the ice cream. Because it’s already cooked and thickened, it helps mimic the texture of churned ice cream without requiring any eggs or additional steps.
– 1 teaspoon vanilla extract
A little vanilla rounds out the floral and citrus notes of the Earl Grey, adding warmth and depth. Use real vanilla extract if possible, rather than imitation, for the best flavor.
Optional additions might include a pinch of salt to balance the sweetness or a bit of lemon zest to accentuate the bergamot, but the core recipe is perfectly balanced as-is.
Step-By-Step Cooking Instructions
Making this Earl Grey ice cream is much easier than it seems, and once you try it, you’ll want to experiment with all kinds of tea flavors. Here’s how to do it, broken down step by step:
1. Infuse the Cream with Tea
Start by placing the heavy cream in a medium saucepan. Add the Earl Grey tea directly into the cream. If you’re using tea bags, simply snip them open and pour the leaves into the pan, or drop the whole bag in—either method works, though using loose leaves allows for stronger flavor extraction.
Warm the cream gently over medium heat. You’re aiming for a gentle simmer, not a boil. Stir occasionally to keep the cream from scalding. As soon as it starts to bubble around the edges, remove the saucepan from the heat. Let the tea steep in the hot cream for about 2 to 3 minutes, depending on how strong you want the flavor.
Next, strain the mixture through a fine mesh sieve into a bowl or large measuring cup to remove the tea leaves. Don’t skip this step, as leaving in any bits of leaf can result in a gritty texture.
Once strained, allow the cream to cool to room temperature, then cover and refrigerate until completely chilled. This usually takes at least 2 hours, but you can leave it overnight for convenience and even stronger flavor.
2. Whip the Infused Cream
After the cream is fully chilled, pour it into a mixing bowl. Use a hand mixer or stand mixer fitted with the whisk attachment to beat the cream on medium-high speed. You’re looking for soft peaks here—the point where the cream holds its shape but still has a gentle curve when you lift the beater. This usually takes about 4 to 6 minutes.
Don’t overwhip, or the cream could become grainy or start to turn into butter. Keep a close eye and stop as soon as soft peaks form.
3. Fold in the Sweetened Condensed Milk and Vanilla
Using a rubber spatula, gently fold in the sweetened condensed milk and vanilla extract. Try to preserve as much of the air in the whipped cream as possible. It’s okay if it takes a few folds to fully combine—just work slowly and gently until everything is incorporated and the mixture is light and fluffy.
If you want to add a pinch of salt or a bit of lemon zest, this is the time to do it.
4. Freeze the Ice Cream
Transfer the mixture to a freezer-safe container. A loaf pan works beautifully for this, but any deep container with a lid will do. Smooth out the top with your spatula, cover tightly, and place in the freezer for at least 4 hours.
For the best texture, freeze overnight. When you’re ready to serve, let it sit at room temperature for 5 minutes to soften slightly before scooping.
Continue to the next sections to discover how to serve this beautiful dessert, what to pair it with, and all the tips to make it perfect every time.

How to Serve
One of the best things about this Earl Grey ice cream—aside from how insanely creamy and flavorful it is—is how versatile it can be when it comes to serving. Whether you’re going for elegance or comfort, there’s no shortage of fun, creative, or downright classy ways to enjoy it.
Start simple. A plain scoop (or two) in a chilled dessert bowl is honestly all you need. Because the flavor is so fragrant and delicate, it doesn’t need a lot of bells and whistles. Let the creamy texture and subtle floral-citrus notes shine through. But of course, if you’re like me and love playing around with presentation, here are a few more ways to elevate your scoop.
Serve it with warm, buttery shortbread cookies on the side. The crumbly texture of the shortbread plays beautifully against the smooth creaminess of the ice cream. It’s a classic tea-time combo taken to dessert-level perfection.
Another lovely option is to pair it with a drizzle of honey or a swirl of lemon curd. The honey brings out the floral notes of the bergamot, while the lemon curd brightens everything up and adds a zippy, sweet contrast.
You could also serve it over a warm slice of pound cake or a freshly baked scone for a hybrid dessert that feels comforting and indulgent. The contrast between warm and cold always creates a satisfying mouthfeel, and the mild flavor of the cake lets the Earl Grey really shine.
If you want to get fancy, a quenelle of ice cream served alongside poached pears or roasted stone fruit adds a gourmet twist that’s perfect for dinner parties.
And let’s not forget the classic cone. Scoop this into a sugar or waffle cone and take it outside for a sunny afternoon treat. Just be warned—it melts quickly due to the high cream content, so eat fast or bring a napkin.
Pairing Suggestions
Pairing a dessert like this one is an opportunity to create a truly unforgettable experience. Since Earl Grey is such a nuanced flavor, it can be fun to explore what drinks and dishes enhance or complement its profile. Whether you’re serving this at the end of a dinner party or just treating yourself after a long day, pairing it with the right accompaniments can take things to the next level.
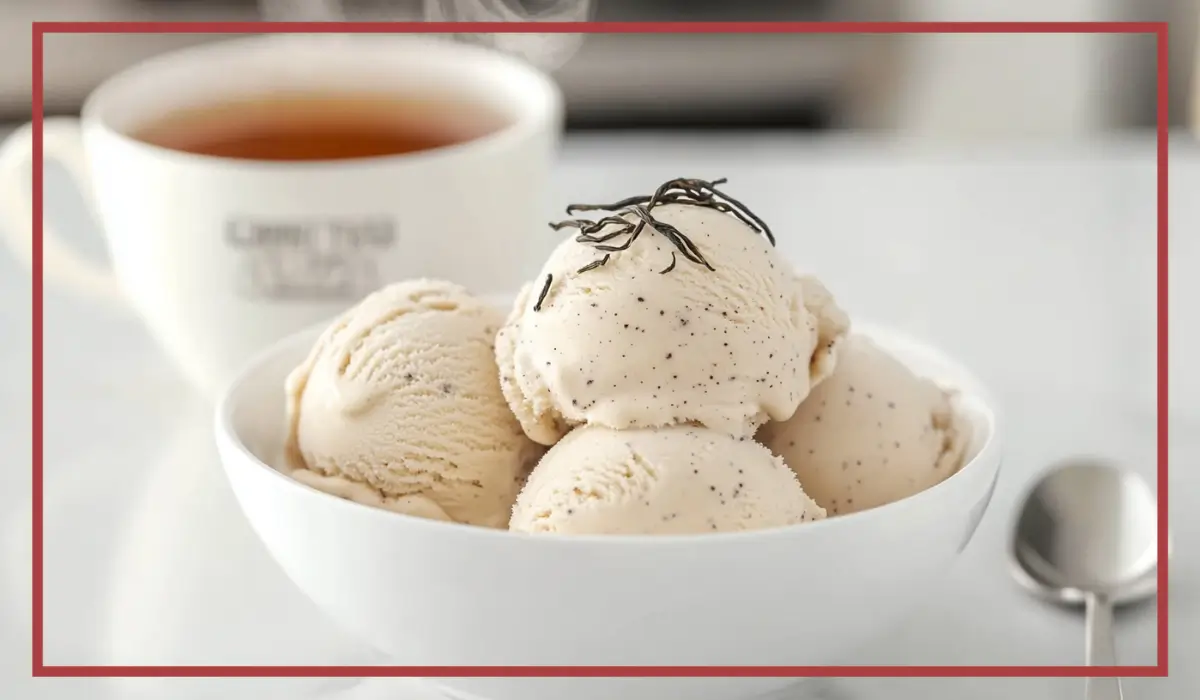
First up, more tea! Yes, really. Serving this ice cream with a cup of hot Earl Grey or another complementary black tea can deepen the flavor experience and create a cozy, layered sensory moment. You could also try it with a milder tea like chamomile or a floral blend like lavender or jasmine if you’re looking to contrast rather than match.
If you’re not in the mood for tea, consider a cup of freshly brewed coffee. The slight bitterness of coffee pairs beautifully with the soft sweetness and creaminess of the ice cream. A strong espresso or cold brew especially works well if you’re a fan of coffee-and-cream flavor combos.
Now, let’s talk baked goods. This ice cream is an ideal companion to a slice of lemon cake or almond biscotti. The citrus notes in the cake highlight the bergamot in the tea, while almond flavors provide a nice nutty base that feels grounded and warm.
If you’re going for something more casual, sandwich a scoop between two oatmeal cookies or even graham crackers for an elevated ice cream sandwich. Trust me, it’s next-level good.
For an extra special treat, serve a scoop on top of a warm fruit crumble—apple, peach, or berry. The fruit adds juicy brightness and the crumble offers that sweet-spiced, crunchy texture that balances perfectly with the smooth ice cream.
And if you’re serving this to kids or just want to go full-out fun, top it with crushed meringue, a dollop of whipped cream, or a sprinkle of edible rose petals for an Instagram-worthy finish.
Storage, Freezing & Reheating Instructions
Although you probably won’t have much left after the first serving (it’s that good), if you do happen to have leftovers, proper storage is essential to maintaining that ultra-creamy texture and delicate flavor.
Once your ice cream has been transferred to a freezer-safe container and frozen for at least 4 hours, it can be stored for up to two weeks. For best results, use an airtight container. A loaf pan covered tightly with plastic wrap and foil will do in a pinch, but containers with tightly fitting lids are even better for protecting the texture and flavor.
To avoid freezer burn, press a piece of parchment paper or plastic wrap directly against the surface of the ice cream before sealing. This minimizes exposure to air and keeps your dessert as fresh as possible.
When you’re ready to serve it again, remove the container from the freezer and let it sit at room temperature for about 5 to 10 minutes. Because this ice cream is made with real cream and no stabilizers, it tends to freeze quite solid. Letting it warm slightly softens the texture and makes it much easier to scoop.
You might be wondering about reheating, but since this is ice cream, there’s really no reheating needed. However, if you’re serving it with a warm dessert—like pound cake or pie—you can gently heat the baked good while allowing the ice cream to rest at room temperature for a few minutes before scooping.
If the texture changes after a few days and becomes a little icy (which can happen if it’s not well sealed), try letting it thaw just a bit longer before serving. A quick stir with a spoon can help bring back some creaminess, though nothing truly beats freshly frozen.
Common Mistakes to Avoid
Even though this recipe is wonderfully simple, there are a few easy missteps that could affect the final outcome. Let’s walk through some common mistakes so you can avoid them and make perfect ice cream every time.
1. Overheating the Cream During Infusion
One of the biggest issues is letting the cream boil when you’re infusing it with the tea. High heat can scald the cream and alter its taste, giving it a slightly burnt or bitter edge. You want a gentle simmer—just enough to coax the flavor out of the tea without overheating the fat in the cream.
2. Steeping the Tea Too Long
It might be tempting to steep the tea for longer to intensify the flavor, but this can backfire. Over-steeping Earl Grey can bring out tannins, making the final ice cream bitter or overly perfumed. Two to three minutes is all you need, especially if you’re using high-quality tea.
3. Not Chilling the Infused Cream Thoroughly
Trying to whip warm or even lukewarm cream is a recipe for disaster. The cream must be fully chilled—ideally for several hours or overnight—before whipping. Otherwise, it won’t form peaks and the ice cream will lack structure.
4. Over-Whipping the Cream
Another common mistake is whipping the cream too much. If you take it past soft peaks, the texture can turn grainy and eventually start separating. Keep a close eye on it and stop as soon as it holds a soft peak that gently folds over.
5. Stirring Instead of Folding the Condensed Milk
It’s important to fold the sweetened condensed milk into the whipped cream gently. Stirring too aggressively can deflate all the air you just whipped in, leading to a denser, less creamy ice cream. Use a light hand and a spatula, folding just until combined.
6. Using Low-Fat Substitutes
Trying to lighten up the recipe by using half-and-half or light cream will result in a less creamy, more icy texture. Stick to full-fat heavy cream for the best result.
Avoid these pitfalls, and you’ll be rewarded with a truly luxurious dessert every time.
Pro Tips
If you want to take your Earl Grey ice cream to the next level or just make the process smoother and more foolproof, these pro tips are for you. They’ll help you avoid common issues and get the best texture and flavor possible.
1. Use Loose Leaf Tea for Better Flavor
While tea bags will do in a pinch, loose leaf tea tends to have fresher, more aromatic ingredients. You’ll get a richer, more complex infusion when using quality loose tea. Just be sure to strain it thoroughly so you don’t get any bits in your cream.
2. Chill Everything—Including the Mixing Bowl
For maximum volume when whipping the cream, try chilling the bowl and beaters beforehand. Cold tools help the cream whip faster and hold its structure longer.
3. Add Mix-Ins for Texture
Once you’ve folded in the sweetened condensed milk, consider tossing in a few extras like crushed shortbread cookies, candied lemon peel, or a swirl of lemon curd. Just be sure any mix-ins are completely cooled and dry to prevent ice crystals.
4. Taste the Cream Before Whipping
After infusing and chilling the cream, give it a quick taste. If the flavor is too subtle, you can reheat and steep a bit more tea—but only if the cream hasn’t been whipped yet. Once you’re happy with the taste, move on to whipping.
5. Use a Silicone Spatula for Gentle Folding
To preserve the airiness of your whipped cream, use a flexible silicone spatula for folding. It’s more gentle than a wooden spoon and helps you scrape every bit of goodness from the bowl.
6. Let It Sit Before Scooping
Because this ice cream is made without stabilizers, it can freeze quite firmly. Letting it sit out for 5–10 minutes softens it just enough to scoop cleanly without turning it to mush.
These tips may seem small, but they make a big difference in how your final product turns out—both in taste and presentation.
Continue reading for the most frequently asked questions and helpful answers that will guide you through your first (or fiftieth) batch of this delightful dessert.
Frequently Asked Questions (FAQs)
When trying out a new recipe—especially something that sounds fancy like Earl Grey ice cream—it’s totally normal to have a few questions. Below are some of the most common ones I’ve received or asked myself when making this treat for the first time. Whether you’re concerned about substitutions, storage, or flavor, these answers should have you covered.
Can I use tea bags instead of loose leaf?
Yes, absolutely. While loose leaf tends to offer a slightly more nuanced and vibrant flavor, tea bags are completely fine and often more accessible. Just be sure to use two tea bags for this recipe, and if you want a stronger flavor, snip them open and steep the contents directly into the cream.
What if I don’t like Earl Grey?
No problem at all. This no-churn ice cream technique works with a wide variety of teas. You could try chai for a spiced version, matcha for something earthy and bold, or even a fruity herbal tea for a light, floral finish. Just keep in mind that different teas steep at different times, so you’ll need to adjust accordingly.
Can I make this recipe dairy-free?
You can, but the texture will be a bit different. To make a dairy-free version, use full-fat canned coconut milk instead of heavy cream and a plant-based sweetened condensed milk (which you can find in many health food stores or online). Just be aware that the coconut flavor may compete slightly with the tea, depending on your preference.
How long does this ice cream last in the freezer?
When stored properly in an airtight container with plastic wrap pressed directly onto the surface, it will keep well for about two weeks. After that, the texture may start to degrade a bit and take on ice crystals.
Why is my ice cream icy instead of creamy?
This usually happens if the mixture wasn’t whipped enough, the cream wasn’t fully chilled, or the container wasn’t airtight. Ice crystals form when too much air is present or when moisture isn’t locked out. Make sure to follow the chilling and storage steps carefully.
Can I adjust the sweetness?
The sweetened condensed milk is both a sweetener and a texture stabilizer in this recipe, so reducing it too much can affect the final consistency. However, you can reduce it slightly if you prefer a more subtle sweetness—just be cautious and maybe start by using ¾ of a cup instead of a full cup.
Is it safe to serve to children?
Yes, Earl Grey ice cream is safe for kids, though it does contain a small amount of caffeine from the tea. If you’re making it for little ones and want to avoid caffeine altogether, try using a decaffeinated Earl Grey tea or another herbal blend.
Can I double the recipe?
Definitely. If you’re serving a crowd or just want to make extra, doubling the recipe works beautifully. Just be sure to use a larger bowl for whipping and have enough freezer-safe containers to store the extra batch.
What can I do if I don’t have a fine mesh sieve?
If you don’t have a mesh sieve, a cheesecloth or even a clean coffee filter will do the job. The goal is simply to strain out the tea leaves so you’re left with a smooth, infused cream.
Can I add other flavors or spices?
Absolutely. This base is incredibly versatile. Try adding a touch of cinnamon, cardamom, or even lavender buds for a floral spin. Just be careful not to overpower the Earl Grey—it’s delicate and best when allowed to be the star.
These FAQs are based on common real-world experiences and help ensure that you’re set up for success, whether it’s your first try or you’re already dreaming up your next variation.
Conclusion & Call to Action
Earl Grey ice cream is the kind of recipe that feels like a secret gem. It’s simple to make, surprisingly elegant, and filled with the kind of layered flavors that keep people coming back for just one more scoop. Whether you’re a die-hard tea lover or someone who simply enjoys a creamy, comforting dessert, this recipe will win you over from the very first taste.
What makes it truly special is its balance—floral but not perfumey, sweet but not cloying, rich but still light enough to enjoy after a meal. And even better, you don’t need any fancy equipment or complicated steps. Just a little patience during the chilling and freezing stages, and you’re rewarded with a batch of homemade ice cream that looks and tastes like it came from a gourmet shop.
So if you’ve been thinking about making your own ice cream but felt a little intimidated, let this be the recipe that changes everything. It’s perfect for hosting, for gifting, or for those quiet evenings when all you want is something cozy, creamy, and just a little bit special.
Now, it’s your turn to bring this dreamy dessert to life. Try it out this weekend or whenever you need a pick-me-up. And once you’ve made it, I’d love to hear how it turned out. Did you add any extra mix-ins? Serve it in a fun way? Snap a picture and tag me—nothing makes me happier than seeing your kitchen wins.
Let this be your go-to recipe when you want to wow with minimal effort and maximum flavor. And don’t be surprised when it becomes a regular in your dessert rotation. After all, something this good deserves to be shared. Happy scooping!
Print
Earl Grey Ice Cream Recipe – Easy No-Churn Creamy Dessert
- Total Time: 6 hours
- Yield: 6–8 servings 1x
- Diet: Vegetarian
Description
This no-churn Earl Grey ice cream is creamy, aromatic, and unbelievably easy to make. With just 4 ingredients and no special equipment, it’s the perfect tea-infused dessert for any occasion.
Ingredients
-
2 cups heavy whipping cream (35%)
-
2 teaspoons Earl Grey tea (loose leaf or contents of 2 tea bags)
-
1 cup sweetened condensed milk
-
1 teaspoon vanilla extract
Instructions
-
Infuse the cream: In a saucepan, heat heavy cream and Earl Grey tea over medium heat until it simmers. Remove from heat and steep for 2 minutes. Strain and chill completely.
-
Whip the cream: Once chilled, beat the infused cream until soft peaks form.
-
Combine: Gently fold in sweetened condensed milk and vanilla.
-
Freeze: Pour into a freezer-safe container, smooth the top, and freeze for 4–6 hours or until firm.
Notes
-
For stronger flavor, steep tea a little longer but avoid bitterness.
-
Optional mix-ins: lemon zest, crushed shortbread, or a swirl of honey.
-
Use decaf tea for a caffeine-free version.
- Prep Time: 10 minutes
- Cook Time: 5 minutes
- Category: Dessert
- Method: Modern / Tea-Inspired
- Cuisine: Modern / Tea-Inspired