
There’s something undeniably nostalgic about a scoop of butter pecan ice cream. Maybe it’s the buttery crunch of pecans that hits just right or the smooth, almost luxurious creaminess that melts slowly on your tongue. Or maybe it’s the fact that it feels like a dessert that’s been around forever—comforting, familiar, and always welcome. Whatever it is, butter pecan ice cream is one of those timeless classics that never go out of style.
This particular recipe holds a special place in my heart. My dad loved butter pecan ice cream, and every Sunday night growing up, we’d share a bowl after dinner while watching a movie. He’d always say, “You can’t beat butter pecan,” and I’d quietly agree, even if I was secretly a cookies-and-cream kind of kid. But over the years, the warm, nutty, rich flavor grew on me, and now it’s one of my all-time favorites too.
What makes this recipe so special is how easy it is. No ice cream maker? No problem. With just a handful of ingredients, a hand mixer, and a freezer-safe container, you’re on your way to making the creamiest, dreamiest butter pecan ice cream—no churning required. And the flavor? Absolutely divine. Think buttery, caramelized pecans folded into a sweet vanilla base with a whisper of butter extract that brings everything together.
The real magic happens with the pecans. They’re toasted in butter and brown sugar until they’re fragrant, crisp, and completely irresistible. Then, once cooled, they get folded into a silky mixture of whipped cream and sweetened condensed milk. It all comes together in a matter of minutes before heading off to the freezer for a well-deserved chill. The end result? A scoopable masterpiece with the perfect balance of sweet, buttery, and nutty.
So whether you’re craving something cold on a warm summer day or just want a little nostalgic treat, this homemade butter pecan ice cream has you covered. And I promise—once you make it, you’ll never look at store-bought the same way again.
Why You’ll Love This Recipe
There are a lot of ice cream flavors out there, but butter pecan has something extra going for it—it feels like comfort in a bowl. And when you make it at home using this recipe, that comfort turns into something downright indulgent. Here’s why this recipe is a must-try, even if you’ve never made ice cream before.
First and foremost, it’s incredibly easy. There’s no churning, no complicated custard base, and no special equipment involved. All you need is a hand mixer (or stand mixer), a couple of bowls, and a freezer-safe container. That’s it. The hardest part is waiting for it to freeze.
Secondly, the ingredients are simple and familiar. We’re talking about sweetened condensed milk, cold heavy cream, vanilla, a touch of butter extract, and of course, the star of the show—pecans toasted in butter and brown sugar. The flavors blend together in a way that feels both classic and extra special.
Next, let’s talk about texture. The whipped cream base makes this ice cream unbelievably smooth and creamy. There’s no iciness, no graininess—just rich, velvety goodness in every bite. And those pecans? They add the perfect amount of crunch and toasty depth.
Another reason to love this recipe is its versatility. You can make it ahead of time, store it for weeks, and serve it straight from the freezer. It’s perfect for dinner parties, family gatherings, or just when you need a sweet treat at the end of a long day.
And let’s not forget that this recipe is totally customizable. Want a bit more crunch? Add more pecans. Prefer a stronger butter flavor? Go ahead and bump up the butter extract. Like a swirl of caramel? Drizzle some in before freezing. The base is a canvas, and you can paint it however you’d like.
Lastly, it’s the kind of dessert that makes people say, “You made this? From scratch?” It’s a crowd-pleaser with a gourmet feel, yet it’s completely doable for anyone—no ice cream experience necessary.
Health Benefits
While ice cream might not be the first thing that comes to mind when you think of healthy foods, homemade versions can actually offer a few benefits over store-bought varieties. This butter pecan ice cream recipe, while indulgent, allows you to control exactly what goes into your dessert—no preservatives, no artificial flavors, and no ingredients you can’t pronounce.
One of the more underrated health benefits of making ice cream at home is portion control and ingredient awareness. When you’re in charge of the recipe, you can scale down the sugar, use organic or local ingredients, or even switch out components to better suit your nutritional needs. For instance, using grass-fed heavy cream or organic sweetened condensed milk provides a cleaner base that’s free from unnecessary additives.
Pecans, the star mix-in of this recipe, are a powerhouse of nutrients. They’re rich in heart-healthy monounsaturated fats, which can help reduce bad cholesterol levels. Pecans also contain antioxidants like vitamin E, as well as important minerals such as magnesium, zinc, and manganese. All of these play a role in supporting metabolism, brain health, and immune function.
Additionally, pecans provide plant-based protein and dietary fiber, which can contribute to satiety. That means a scoop of this ice cream, thanks to the nuts, can feel a bit more satisfying than an ultra-processed alternative that’s just sugar and air.
Heavy cream, while calorie-dense, is a good source of fat-soluble vitamins like A, D, and K2. These vitamins support bone health, vision, and the immune system. Plus, when consumed in moderation and as part of a balanced diet, full-fat dairy has been shown in some studies to help with weight regulation and appetite control.
And let’s not forget the mental health aspect. Enjoying dessert mindfully—especially one that brings back fond memories or is made with care—can be a great way to reduce stress and increase feelings of happiness. Food is about nourishment in every sense, and sometimes that means treating yourself to something special.
So while this isn’t a low-calorie dessert, it’s made with whole, real ingredients that offer more than just great flavor. And that makes every spoonful totally worth it.
Preparation Time, Servings, and Nutritional Information
Before you dive into making this ice cream, it’s helpful to know exactly how long it takes, how much it makes, and what kind of nutritional profile you can expect from each serving.
Preparation Time
This is a quick and easy recipe with minimal prep involved. Here’s how the time breaks down:
- Toasting the pecans: 5–7 minutes
- Mixing the ice cream base: 10 minutes
- Whipping the cream and folding: 5–7 minutes
- Freezing time: At least 6 hours or overnight for best results
Total Time: 6 hours and 20 minutes (including freezing)
Hands-on Time: Approximately 20 minutes
Servings
This recipe makes about 6–8 generous servings, depending on how big your scoops are. It fills a standard loaf pan, which is perfect for slicing or scooping as needed.
Nutritional Information (per serving, based on 8 servings):
- Calories: ~400
- Total Fat: 32g
- Saturated Fat: 18g
- Cholesterol: 95mg
- Sodium: 60mg
- Total Carbohydrates: 22g
- Sugars: 20g
- Protein: 4g
Keep in mind these values are estimates and can vary based on exact ingredients and serving sizes. If you’re looking to cut back on sugar or fat, there are simple adjustments you can make, which we’ll touch on later in the recipe variations.
Ingredients List
Let’s walk through the ingredients you’ll need to make this dreamy butter pecan ice cream. Each one plays an important role in creating the rich texture and flavor this dessert is known for.
For the Ice Cream Base:
- 1 can (14 oz) sweetened condensed milk
This is the backbone of no-churn ice cream. It adds sweetness, creaminess, and helps create a smooth texture without needing an ice cream machine. - 2 cups heavy cream (cold)
The heavy cream is whipped to create volume and structure. The cold temperature helps it whip faster and hold peaks more easily. - 1 teaspoon vanilla extract
Vanilla rounds out the flavors and enhances both the dairy and nutty notes. Use a good-quality extract for best results. - 1/2 teaspoon butter extract (optional)
This adds that extra buttery flavor you expect from butter pecan ice cream. It’s optional but highly recommended.
For the Buttered Pecans:
- 1 cup pecans, chopped
You want them chopped, not finely ground. This gives you a good crunch and ensures each bite has some nutty goodness. - 2 tablespoons butter
The butter is essential for toasting the pecans and giving them their rich, indulgent flavor. - 2 tablespoons brown sugar
This adds a hint of caramelization and a subtle molasses note that pairs beautifully with the pecans. - Pinch of salt
A small amount of salt enhances the sweetness and balances the flavors.
Each of these ingredients comes together to create a dessert that feels rich, homemade, and undeniably comforting. Next, let’s walk through exactly how to make it from start to finish.
Step-By-Step Cooking Instructions
Making this no-churn butter pecan ice cream is truly as simple as it gets, especially when you follow each step closely. Even if you’re brand new to homemade ice cream, this guide will walk you through everything you need to know—from toasting the pecans to achieving that perfectly creamy texture. Take your time with each step, and don’t worry if things look a little messy at first. It all comes together beautifully in the end.
Step 1: Prepare the Buttered Pecans
This is where all the flavor begins. Toasting the pecans in butter and brown sugar not only makes your kitchen smell incredible, but it also infuses them with a caramel-like crunch that takes this ice cream to the next level.
- In a medium skillet, melt 2 tablespoons of butter over medium heat.
- Once the butter is melted and slightly bubbling, add in the chopped pecans. Stir to coat them evenly.
- Sprinkle in the 2 tablespoons of brown sugar and a pinch of salt. Stir constantly to ensure the pecans don’t burn and that the sugar melts and coats the nuts.
- Continue to cook for 3–5 minutes until the pecans are fragrant and slightly toasted. They should smell nutty and sweet, and look glossy from the butter and sugar.
- Remove from heat and transfer the pecans to a plate lined with parchment paper or a silicone mat. Spread them out so they cool evenly and don’t stick together. Let them cool completely before using.
Tip: If you use the pecans while they’re still warm, they’ll melt the whipped cream mixture and compromise the texture of your ice cream. So be patient—it’s worth the wait.
Step 2: Make the Ice Cream Base
This base is a simple mix of sweetened condensed milk, vanilla, and butter extract. It sets the foundation for a rich, creamy, and sweet ice cream that doesn’t require any cooking or eggs.
- In a large mixing bowl, pour the entire can of sweetened condensed milk.
- Add 1 teaspoon of vanilla extract.
- If you’re using it, add ½ teaspoon of butter extract. It enhances that deep buttery flavor and gives the ice cream a nostalgic quality.
- Whisk everything together until smooth. Set this bowl aside for now.
Step 3: Whip the Cream
The whipped cream is what gives the ice cream its airy texture. Without it, your dessert would be more like a frozen block of milk. Cold cream is essential here, so make sure it’s straight from the fridge before you begin.
- In a separate large mixing bowl, add 2 cups of cold heavy cream.
- Using a hand mixer or stand mixer fitted with a whisk attachment, beat the cream on medium-high speed for 3–5 minutes.
- You’re looking for stiff peaks—meaning when you lift the beaters out of the bowl, the cream should hold its shape without collapsing.
- Be careful not to overwhip. Once you see it holding peaks, stop mixing.
Step 4: Combine the Base and the Whipped Cream
Now it’s time to bring it all together. This step is crucial for keeping the ice cream light and creamy, so go slow and gentle.
- Take one-third of the whipped cream and gently fold it into the condensed milk mixture using a spatula. This helps lighten the base and makes it easier to incorporate the rest of the cream.
- Gradually fold in the remaining whipped cream, one-third at a time, being careful not to deflate it. Use slow, sweeping motions, and avoid stirring too aggressively.
- The final mixture should be smooth, fluffy, and uniform in color.
Note: Don’t worry if it’s not perfectly smooth—small lumps are okay. What matters most is that you don’t overmix and lose all that lovely air you whipped in.
Step 5: Add the Cooled Pecans
At this stage, the ice cream is ready for its nutty mix-in. Make sure the pecans are completely cool to avoid melting the base.
- Set aside a small handful of the buttered pecans for topping later.
- Add the rest of the cooled pecans to the whipped cream and condensed milk mixture.
- Gently fold them in using your spatula, distributing them evenly throughout the base.
The result should be a thick, speckled mixture that looks like something straight from an old-fashioned ice cream parlor.
Step 6: Freeze the Ice Cream
This final step is the easiest part, but it requires the most patience.
- Pour the finished ice cream mixture into a loaf pan or any freezer-safe container. A metal loaf pan works beautifully for even freezing.
- Smooth the top with your spatula.
- Sprinkle the reserved pecans evenly over the top for an eye-catching, crunchy finish.
- Cover the pan tightly with plastic wrap or an airtight lid to prevent freezer burn.
- Place it in the freezer and allow it to freeze for at least 6 hours, preferably overnight.
Once frozen, the ice cream will be firm enough to scoop but still soft and creamy. You’ll know it’s ready when the center is set and doesn’t jiggle when you tap the pan.
Optional Tip: If you want extra flair, drizzle a ribbon of homemade caramel or maple syrup across the top before freezing for added flavor.

How to Serve
Once your butter pecan ice cream is perfectly frozen, it’s time for the best part—scooping and serving. Here are a few simple yet delicious ways to enjoy your homemade creation.
- Classic Scoop in a Bowl
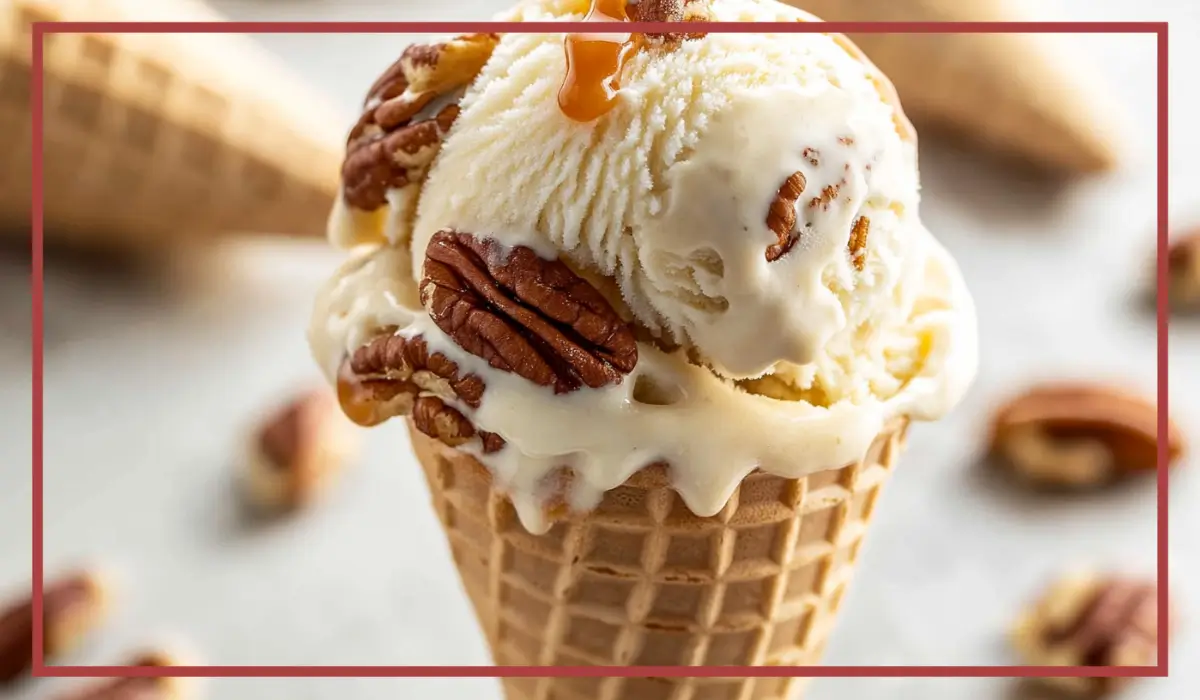
Serve it just as is, straight from the freezer. A couple of generous scoops in a chilled bowl with a few extra toasted pecans on top makes for the perfect anytime treat. - In a Waffle Cone
This ice cream holds its shape well, so it’s fantastic for cones. Use a sturdy waffle cone and serve with a drizzle of caramel sauce or a sprinkle of sea salt for contrast. - Over Warm Desserts
Butter pecan ice cream is amazing on top of warm brownies, apple crisp, or peach cobbler. The cold creaminess pairs beautifully with hot, gooey desserts. - With Fresh Fruit
Add a scoop to a bowl of sliced bananas or grilled peaches for a slightly lighter treat that still satisfies your sweet tooth. - As a Milkshake
Blend a few scoops with a splash of milk for a rich and creamy butter pecan milkshake. Top with whipped cream and chopped pecans for a fun twist.
No matter how you serve it, this homemade butter pecan ice cream is guaranteed to be a hit. Just make sure to have an extra scoop for yourself—you’ve earned it.
Pairing Suggestions
This rich and creamy ice cream is incredibly versatile and pairs well with a wide variety of flavors and textures. Here are some delicious ideas to round out your dessert experience.
Dessert Pairings:
- Caramel Drizzle
A warm drizzle of caramel sauce enhances the buttery flavor and adds a luscious texture contrast. - Chocolate Sauce or Shavings
A light touch of dark chocolate balances the sweetness and adds a touch of sophistication. - Apple Pie or Crumble
The spiced, fruity warmth of apple desserts complements the nutty pecans beautifully. - Buttermilk Biscuits or Shortbread Cookies
Crumble shortbread on top or sandwich a scoop between two biscuits for an unforgettable ice cream sandwich.
Beverage Pairings:
- Coffee or Espresso
Serve a scoop with a shot of hot espresso poured over the top for an easy affogato-style dessert. - Hot Cocoa
A sweet, rich hot chocolate served alongside a scoop of this ice cream creates a wonderful contrast of temperatures and flavors. - Chai Tea Latte
The spices in chai (like cinnamon, cardamom, and cloves) make a great partner for the buttery, nutty notes of the ice cream.
Kid-Friendly Ideas:
- Root Beer Float
Drop a scoop into a glass of root beer or cream soda for a throwback-style float that kids and adults will love. - Banana Split Bar
Let everyone customize their own sundae with toppings like bananas, cherries, whipped cream, and sprinkles.
Whether you’re serving it after a big holiday dinner or enjoying it on a quiet night in, there are so many ways to make this ice cream the star of the show.
Storage, Freezing & Reheating Instructions
One of the best parts about homemade no-churn butter pecan ice cream is that it stores beautifully. Because of its creamy base and lack of eggs, it tends to stay smooth and scoopable for longer than traditional ice creams. However, proper storage is key to keeping it fresh and flavorful for as long as possible.
How to Store in the Freezer
- Once your ice cream has fully frozen, keep it in the same container you froze it in—ideally something airtight and freezer-safe. A metal loaf pan works wonderfully, but be sure to cover it tightly with plastic wrap or a lid to prevent freezer burn and the absorption of other freezer odors.
- For best results, store it in the back of the freezer, where the temperature is most consistent. Avoid keeping it near the door where warm air rushes in each time the freezer is opened.
- Homemade ice cream is best enjoyed within 2–3 weeks. While it technically lasts longer, the flavor and texture are at their peak during this window.
Freezing Tips
- If you’re planning to keep it for more than a few days, consider transferring the ice cream into a lidded container with a snug seal. This prevents ice crystals from forming and helps the ice cream maintain its creamy consistency.
- When making a large batch or doubling the recipe, divide it into smaller containers. That way, you only thaw what you need without exposing the whole batch to air and temperature changes repeatedly.
How to Re-Scoop After Freezing
- When you’re ready to serve, remove the ice cream from the freezer and let it sit at room temperature for 5–10 minutes. This softens it slightly and makes scooping much easier.
- Use a sturdy ice cream scoop or a spoon warmed under hot water to glide through the ice cream more smoothly. Dry the scoop before using so you don’t introduce water into the container, which can cause ice crystals to form.
Can You Reheat Ice Cream?
Technically, no—but you can let it soften slightly if it’s too firm. Never microwave homemade ice cream to soften it, as it melts unevenly and can ruin the texture. A short rest at room temperature is always the best method.
Extra Storage Tip
If you’re planning to serve the ice cream at a party or gathering, pre-scoop individual portions and freeze them on a baking tray lined with parchment paper. Then just pop them into bowls when it’s time to serve. This not only makes serving quicker but keeps things mess-free.
Common Mistakes to Avoid
Even though this recipe is easy, there are a few common missteps that can affect the final texture or flavor. Avoiding these pitfalls will help you make the best butter pecan ice cream every time.
Using Warm Ingredients
- It’s essential that the heavy cream is cold before whipping. If it’s too warm, it won’t whip properly, which means your ice cream will lack structure and may freeze too hard or become icy.
Over-whipping the Cream
- While you want stiff peaks, going beyond that point can cause the cream to curdle or become grainy. Stop whipping as soon as the peaks hold their shape when the beaters are lifted.
Folding Too Aggressively
- Folding whipped cream into the base mixture should be done gently and gradually. Stirring too hard or too fast can deflate the air, resulting in denser, less creamy ice cream.
Not Letting Pecans Cool
- Warm pecans will melt the whipped cream base, throwing off the texture and potentially leading to ice crystals. Always make sure they’re fully cooled before adding them to the mix.
Undertoasting the Pecans
- Toasting brings out the full depth of flavor in the pecans. If you skip this step or only warm them slightly, the nuts will taste flat and lack that delicious buttery crunch.
Skipping the Butter Extract
- While optional, butter extract really helps drive home the “butter” in butter pecan. If you omit it, you’ll still have a tasty ice cream, but it may lack that signature depth.
Using Low-Fat Cream
- Substituting low-fat or half-and-half instead of heavy cream will not give the same results. The fat content is what gives the ice cream its creamy, luxurious texture.
Not Covering During Freezing
- Leaving your ice cream uncovered in the freezer can lead to freezer burn and unwanted odors. Always use plastic wrap or a proper container lid to seal it tightly.
By steering clear of these common mistakes, you’re setting yourself up for success—and for a batch of butter pecan ice cream that tastes like it came from a premium scoop shop.
Pro Tips
When it comes to homemade ice cream, small details can make a big difference. These pro tips will help you elevate your dessert from good to absolutely unforgettable.
1. Toast Pecans Ahead of Time
- If you know you’ll be short on time, go ahead and toast the pecans a day ahead. Store them in an airtight container at room temperature once cooled. This way, they’re ready to go when you start mixing.
2. Freeze Your Mixing Bowl and Beaters
- For an even faster whip, place your mixing bowl and beaters in the freezer for 10–15 minutes before using. Cold tools help cream whip faster and result in a more stable foam.
3. Use Full-Fat Ingredients Only
- Always opt for full-fat heavy cream and real sweetened condensed milk. Avoid “light” or low-fat versions as they won’t yield the same creamy texture.
4. Add a Swirl
- For added visual appeal and flavor, consider swirling in a ribbon of caramel sauce, maple syrup, or even a thin layer of fudge just before freezing. Don’t mix it in fully—just fold gently for a marbled effect.
5. Experiment with Add-Ins
- Want to mix it up? Add chopped dark chocolate, a hint of cinnamon, or crushed shortbread cookies. As long as the base remains the same, you can get creative with textures and flavors.
6. Use Silicone Spatulas for Folding
- When folding the whipped cream into the base, a silicone spatula is your best friend. It helps you scrape the sides of the bowl and fold without losing volume.
7. Chill the Loaf Pan Before Filling
- Pop your loaf pan into the freezer for 20 minutes before pouring in the ice cream mixture. This helps prevent melting and gives the mixture a head start on setting.
8. Portion with an Ice Cream Scoop Dipped in Hot Water
- For clean, smooth scoops, dip your scoop in hot water, then dry it off before each use. This cuts through the frozen cream more easily and makes serving effortless.
9. Label and Date Your Container
- If you’re storing your ice cream for more than a few days, label it with the date you made it. This ensures you enjoy it at its freshest and avoid freezer burnout.
10. Serve Slightly Softened for Best Flavor
- Let your ice cream sit out for 5 minutes before serving. The slightly softened texture releases more aroma and makes the flavor feel even richer and more complex.
These tips aren’t just about convenience—they’re about enhancing the experience. Ice cream making should be fun, creative, and rewarding, and with these tricks up your sleeve, you’ll be scooping like a pro in no time.
Frequently Asked Questions (FAQs)
Even though this butter pecan ice cream recipe is simple and beginner-friendly, a few common questions tend to pop up—especially if it’s your first time making no-churn ice cream at home. Below are detailed answers to some of the most frequently asked questions to help you troubleshoot and perfect your frozen masterpiece.
Can I use store-bought whipped cream instead of whipping it myself?
Technically, yes, but it’s not ideal. Store-bought whipped topping (like Cool Whip) contains stabilizers and artificial ingredients that can affect the final texture and flavor. Whipping heavy cream yourself results in a fresher, creamier ice cream with a more natural taste. If you’re in a pinch, you can use whipped topping, but the outcome may be a bit less luxurious.
What if I don’t have butter extract?
No problem at all. The butter extract is optional, though it adds an extra buttery depth that makes the flavor more authentic. If you don’t have it on hand, your ice cream will still be absolutely delicious. You could also try using a tiny splash of browned butter (cooled) for a natural buttery flavor, but be careful not to melt your base.
Can I substitute half-and-half for heavy cream?
Unfortunately, no. Half-and-half doesn’t have enough fat content to whip into stiff peaks, which are essential for creating the creamy, airy texture of no-churn ice cream. Full-fat heavy cream (also labeled as whipping cream) is the only way to go here.
How long does this ice cream keep in the freezer?
When stored properly in an airtight container, this homemade ice cream stays fresh for about 2 to 3 weeks. After that, the texture might begin to degrade slightly, and ice crystals may form. It’s still safe to eat, but it may not taste as fresh.
Why is my ice cream too hard to scoop?
If your freezer is set very low or the container isn’t airtight, the ice cream can become extra firm. Letting it sit at room temperature for 5 to 10 minutes before scooping usually solves the problem. Also, try storing it in a shallow container, which helps it freeze more evenly and stay more scoopable.
Can I make this ice cream nut-free?
Yes, you absolutely can. If you have a nut allergy or just don’t enjoy pecans, you can substitute them with crushed pretzels, toffee bits, or even cookie chunks for a different twist. Just be sure any replacements are dry and well-chopped to avoid affecting the texture.
Is there a way to make it less sweet?
Since the sweetness primarily comes from the sweetened condensed milk, reducing the sugar isn’t as straightforward as just cutting an ingredient. However, you can balance it out by adding a pinch more salt to the pecans or swirling in an unsweetened element like dark chocolate. You could also try using a homemade version of low-sugar sweetened condensed milk.
Can I double the recipe?
Definitely! This recipe scales very well. Just make sure you have enough space in your freezer and that you use a large enough mixing bowl to handle the whipped cream and condensed milk. You might want to divide the final mixture into two pans for more efficient freezing.
Can I make this recipe dairy-free?
It’s possible, though it takes a few ingredient swaps. Use full-fat coconut milk or coconut cream in place of heavy cream, and a dairy-free condensed milk (many stores now carry coconut-based versions). Keep in mind that the flavor will change—expect a coconut twist.
What kind of container is best for freezing?
A metal loaf pan works wonderfully because it conducts cold well and helps the ice cream freeze evenly. However, any airtight, freezer-safe container will do. Avoid containers with loose lids or those that aren’t freezer-rated, as they can lead to freezer burn or uneven texture.
By knowing what to expect and how to adjust as needed, you’ll feel more confident every step of the way. If more questions come up as you go, don’t hesitate to make a note—homemade ice cream is a craft you can keep refining.
Conclusion & Call to Action
If you’ve made it this far, you’re more than ready to dive into one of the creamiest, most flavorful ice cream recipes you’ll ever make. This no-churn butter pecan ice cream is proof that you don’t need fancy tools or complicated steps to create something truly special. With just a handful of ingredients and a little patience, you’ll have a dessert that feels nostalgic, indulgent, and incredibly rewarding.
The beauty of this recipe isn’t just in its simplicity—it’s in how customizable and accessible it is. Whether you’re making it for a family celebration, a casual night at home, or just because you had a craving, it’s sure to bring smiles and second helpings. And it’s the kind of recipe that sticks with you, not just in flavor but in memory.
What’s even better is how adaptable it is. Want to make it your own? Go ahead and experiment. Try adding chocolate chunks, swirling in caramel, or even using different nuts like walnuts or almonds. The base is sturdy and forgiving, making it perfect for creative spins.
Now it’s your turn. I encourage you to give this butter pecan ice cream a try—especially if you’ve never made homemade ice cream before. It’s a fantastic introduction to the world of no-churn desserts, and I promise, once you taste that first scoop, you’ll be hooked.
And when you do make it, I’d love to hear how it turns out! Leave a comment to let me know what you think, or share your version online and tag me so I can see your creations. Nothing makes me happier than seeing home kitchens turn into tiny scoop shops.
Here’s to creamy, nutty, buttery perfection in every bite. Happy scooping!
Print
Butter Pecan Ice Cream Recipe (No-Churn, Extra Creamy & Easy)
- Total Time: 6 hours 25 minutes (including freeze time)
- Yield: 6-8 servings 1x
- Diet: Vegetarian
Description
A rich, creamy no-churn butter pecan ice cream with buttery toasted pecans, sweet vanilla flavor, and a velvety texture—made in minutes, no ice cream maker needed.
Ingredients
-
1 can (14 oz) sweetened condensed milk
-
2 cups heavy cream (cold)
-
1 teaspoon vanilla extract
-
1/2 teaspoon butter extract (optional)
-
1 cup pecans, chopped
-
2 tablespoons butter
-
2 tablespoons brown sugar
-
Pinch of salt
Instructions
-
In a skillet, melt butter and toast chopped pecans with brown sugar and salt for 3–5 minutes. Let cool.
-
In a bowl, mix condensed milk, vanilla, and butter extract.
-
Whip cold heavy cream to stiff peaks in a separate bowl.
-
Fold whipped cream into the condensed milk mixture gently.
-
Stir in cooled pecans (reserve a few for topping).
-
Pour into a loaf pan, top with reserved pecans, cover, and freeze at least 6 hours or overnight.
Notes
-
Be sure pecans are fully cooled before mixing into the ice cream base.
-
For extra richness, drizzle with caramel or maple syrup before freezing.
-
Let ice cream sit at room temp for 5–10 minutes before scooping.
- Prep Time: 20 minutes
- Cook Time: 5 minutes
- Category: Dessert
- Method: No-Churn / Freezer
- Cuisine: American