
There’s something truly magical about BBQ Chicken Sliders. They’re the kind of food that’s effortlessly fun to eat, endlessly customizable, and always a hit at gatherings. But when you combine tender, juicy shredded chicken with smoky barbecue sauce, gooey melted cheddar cheese, and buttery, herb-topped Hawaiian rolls, you take sliders to an entirely new level of irresistible.
What makes these BBQ Chicken Sliders stand out is how effortlessly they come together. Whether you’re hosting a casual game night, preparing a make-ahead weeknight dinner, or bringing something crowd-pleasing to a potluck, this recipe always delivers. It’s the perfect balance of savory, sweet, cheesy, and comforting—all tucked inside those pillowy-soft Hawaiian rolls that everyone loves.
I still remember the first time I made these for a family movie night. The tray was devoured within minutes, and I had people asking for the recipe before the credits even rolled. Since then, they’ve become a go-to in our household. The best part is, you can customize them to your heart’s content—make them a little spicier, use a different cheese, or even swap out the chicken for turkey if that’s what you have on hand.
And don’t let the layers of flavor fool you—these sliders are incredibly simple to put together. You’ll need just a few everyday ingredients and less than an hour from start to finish. It’s truly one of those recipes that looks and tastes like you put in way more effort than you actually did.
So if you’ve been craving something warm, comforting, and deliciously satisfying, these BBQ Chicken Sliders might just be the answer. Ready to learn why this recipe has become a favorite in so many kitchens? Let’s dig into what makes these little sandwiches such a big deal.
Why You’ll Love This Recipe
There are so many reasons these BBQ Chicken Sliders are worth keeping in your meal rotation. Whether you’re cooking for your family, prepping for a party, or just want a cozy, no-fuss dinner, this recipe hits all the right notes.
First, let’s talk about ease. This is one of those recipes where you can use leftover chicken or even a store-bought rotisserie chicken to save time. Once you’ve got the chicken shredded, it’s just a matter of stirring in your favorite barbecue sauce, layering the mix onto soft Hawaiian rolls, and topping everything with cheese. Then a quick trip to the oven does the rest. No complicated steps, no hard-to-find ingredients—just straightforward cooking that anyone can pull off.
Next is the flavor. Between the smoky barbecue sauce, the rich cheddar cheese, and the buttery, herbed topping, every bite is layered with savory, satisfying goodness. Hawaiian rolls add a slightly sweet contrast that balances the smoky and tangy notes from the sauce. When everything bakes together, the cheese melts into the chicken, the bread gets just a little toasty, and the flavors meld in the most comforting way.
You’ll also love how versatile this recipe is. Want to make it spicier? Add a few slices of jalapeño or a pinch of red pepper flakes. Prefer mozzarella or Monterey Jack to cheddar? Go for it. You can even swap the chicken for shredded beef or turkey depending on what you have on hand.
Lastly, these sliders are incredibly family-friendly. Kids love them. Grown-ups love them. They’re easy to hold, easy to eat, and perfect for sharing. I’ve brought them to potlucks, served them at birthday parties, and even made them for casual dinner nights when I want something a little indulgent without a lot of work.
In short, they’re the kind of recipe that you can make once and be confident it will become a household favorite.
Health Benefits
While sliders aren’t typically the first food that comes to mind when you think “healthy,” these BBQ Chicken Sliders offer more nutritional value than you might expect—especially with a few simple tweaks or mindful ingredient choices.
To start with, the foundation of this recipe is shredded chicken. Chicken is a fantastic lean protein source, especially if you’re using skinless breast meat. Protein is essential for muscle repair, immune function, and keeping you full longer. It also makes these sliders more satisfying, so you may find yourself feeling full after just one or two, rather than overeating.
The barbecue sauce, depending on the brand you choose, can be high in sugar and sodium. However, many healthier options are available, including low-sugar, low-sodium versions made with natural ingredients. If you’re up for making your own sauce, that’s an even better way to control the sugar and salt content.
Cheddar cheese adds flavor and creaminess while also offering calcium and a bit more protein. Opting for a sharp cheddar allows you to use less while still getting that strong cheesy flavor. You can also choose a reduced-fat cheese if you’re looking to cut calories.
The herb butter topping includes thyme, which not only adds a fresh, earthy flavor but also comes with its own set of health benefits. Thyme contains vitamins C and A, as well as anti-inflammatory and antimicrobial properties. Parmesan cheese, while used in a small amount, is also rich in calcium and offers a flavorful punch that goes a long way.
When it comes to the bread, Hawaiian rolls are soft and sweet, which helps balance the smoky and savory ingredients. While they do contain more sugar than traditional rolls, using whole wheat or low-sugar rolls is an easy substitution for those seeking a more health-conscious option.
Finally, portion control plays a big role here. These sliders are small by design, so it’s easy to enjoy one or two without going overboard. Pair them with a side salad or roasted veggies, and you’ve got a balanced meal that doesn’t feel like you’re compromising on taste or comfort.
Preparation Time, Servings, and Nutritional Information
Before we dive into the ingredient list and step-by-step instructions, let’s take a quick look at what you can expect in terms of time and nutritional breakdown. One of the best things about this recipe is how quick and easy it is to throw together.
Total Time:
Prep Time: 15 minutes
Cook Time: 25 minutes
Total: 40 minutes
Servings:
This recipe yields 12 sliders, which comfortably serves 4 to 6 people depending on appetite and sides. If you’re serving this as a main dish, plan for about 2 to 3 sliders per person.
Calories and Nutritional Information (per slider):
Calories: 275
Protein: 17g
Carbohydrates: 20g
Fat: 13g
Saturated Fat: 5g
Sugar: 6g
Sodium: 520mg
Fiber: 1g
Cholesterol: 48mg
Keep in mind that these numbers are approximate and can vary based on the specific brands and ingredients you use. For a lighter version, you can use reduced-fat cheese, lower-sugar BBQ sauce, or serve the chicken on lettuce wraps instead of rolls.
Now that we know what we’re working with, let’s get into the ingredient list.
Ingredients List
Here’s everything you’ll need to make these delicious BBQ Chicken Sliders. The ingredients are straightforward and easy to find at any grocery store. Be sure to check the tips under each item to see how they contribute to the overall flavor and how you can modify them to suit your taste.
For the Chicken Filling:
- 3 cups shredded chicken – This can be leftover cooked chicken, rotisserie chicken, or freshly boiled and shredded. It forms the base of the sliders, and its texture holds the BBQ sauce beautifully.
- 1 cup barbecue sauce (adjust to taste) – Choose your favorite brand or make your own. A smoky, slightly sweet sauce works best to contrast with the cheese and rolls.
For the Sliders:
- 12 Hawaiian bread rolls (1 package) – Soft, slightly sweet, and perfectly sized. These hold everything together without overpowering the filling. You can substitute with whole wheat dinner rolls for a healthier twist.
- 6 slices sharp cheddar cheese – Sharp cheddar adds bold flavor and melts beautifully. You can substitute with Monterey Jack or mozzarella if you prefer a milder cheese.
For the Garlic Herb Butter Topping:
- ⅓ cup melted salted butter – This helps the tops of the rolls get golden and crisp. Salted butter adds a little extra flavor, but unsalted works too if that’s what you have.
- ¼ teaspoon beef broth base (or substitute with Worcestershire sauce) – Adds a savory depth and umami to the topping. Choose halal-certified beef broth base or Worcestershire sauce if needed.
- 3 sprigs fresh thyme, stems removed – Fresh thyme brings an herby brightness that cuts through the richness of the cheese and butter.
- 1 tablespoon grated Parmesan cheese – A final flavor boost on top. It crisps up slightly in the oven and adds a slightly salty, nutty bite.
Once you’ve gathered all your ingredients, it’s time to start cooking. Let’s walk through the steps one by one.
Step-By-Step Cooking Instructions
Making these BBQ Chicken Sliders is all about layering flavors and textures in a way that feels indulgent without being fussy. The whole process is broken down into simple, manageable steps so you can feel confident even if you’re new to cooking. Below, I’ll guide you through each part, offer tips along the way, and explain exactly how to get the most flavor out of every bite.
Step 1: Preheat the Oven and Prepare Your Baking Dish
Before you do anything else, preheat your oven to 350°F (175°C). Giving your oven time to heat up while you prep everything else ensures you don’t have to wait around once the sliders are ready to bake.
Next, line a 9×13-inch baking dish or a large rimmed baking sheet with foil. This step makes cleanup so much easier—trust me, you’ll thank yourself later. Lightly grease the foil with nonstick spray or a little butter to make sure the bottoms of the rolls don’t stick.
Step 2: Prepare the Chicken Mixture
In a large microwave-safe bowl, add the 3 cups of shredded chicken. Pour in the barbecue sauce—start with 1 cup, then add more to taste if you prefer a saucier filling. Stir everything together until the chicken is fully coated in the sauce.
If your chicken is cold from the fridge, warm the mixture in the microwave for 1–2 minutes until it’s heated through. This step is important because it helps the cheese melt evenly once the sliders go into the oven. Plus, starting with warm filling means less baking time overall.
Tip: If your shredded chicken is a little dry, don’t worry. The barbecue sauce adds moisture back into the meat, so the final result will be juicy and flavorful.
Step 3: Slice the Hawaiian Rolls
Without separating the individual rolls, use a serrated knife to slice the entire loaf of Hawaiian rolls in half horizontally. You should now have one large top half and one large bottom half—like a giant sandwich bun. Keep the rolls connected to make assembly easier and tidier.
Place the bottom half of the rolls into your prepared baking dish or pan. This is your base layer for building those delicious sliders.
Step 4: Build the Sliders
Spoon the warm BBQ chicken mixture evenly over the bottom halves of the rolls. Spread it out all the way to the edges so every bite is loaded with saucy chicken.
Now it’s time to add the cheese. Lay the slices of sharp cheddar over the chicken, overlapping slightly if needed to cover the surface. Don’t worry if some cheese goes over the sides—it’ll melt down beautifully in the oven.
Once your cheese layer is on, carefully place the top halves of the rolls over everything. Gently press them down to help the filling settle in and create a more cohesive sandwich structure.
Step 5: Make the Garlic Herb Butter Topping
This is where the magic really happens. In a small bowl, combine the melted butter with the beef broth base (or Worcestershire sauce), thyme leaves, and grated Parmesan cheese. Stir until well mixed.
Using a pastry brush or spoon, generously brush this buttery herb mixture all over the tops of the rolls. Be sure to get into the corners and edges. The butter will soak into the bread slightly and help it turn golden and crisp as it bakes.
Optional Tip: If you love garlic, feel free to add a minced garlic clove or a pinch of garlic powder to the butter mixture for an extra layer of flavor.
Step 6: Bake the Sliders
Cover the baking dish loosely with foil—this prevents the tops from browning too quickly while allowing the cheese to melt and the sliders to heat through. Bake in the preheated oven for 20 minutes.
After 20 minutes, remove the foil and bake for another 3 to 5 minutes. This last step lets the tops get perfectly golden brown and a little crispy, while the cheese finishes melting.
Keep an eye on them during these last few minutes, as every oven is different. If you want a slightly crunchier top, you can broil them for 1 to 2 minutes—but watch carefully so they don’t burn.
Step 7: Slice and Serve
Once the sliders are golden and the cheese is gooey and melted, take them out of the oven. Let them sit for 2 to 3 minutes before slicing—this helps everything settle a bit and keeps the cheese from oozing out too much.
Use a sharp knife or spatula to cut between each roll, creating 12 individual sliders. Serve them warm for the best taste and texture.
Bonus Tip: If you’re serving a crowd, place some toothpicks in each slider to make them easier to grab and serve.
These sliders are now ready to be devoured—but before we talk about how to serve them, let’s take a moment to explore a few delicious ideas for presentation.

How to Serve
These BBQ Chicken Sliders are delicious on their own, but there are so many ways you can serve them to make a full meal or buffet-style spread. Whether you’re hosting friends or just making dinner for the family, here are a few ideas to make your sliders the star of the table.
Serve as a Main Dish
- With a side salad: A crisp green salad with a light vinaigrette helps balance the richness of the sliders. Think arugula with lemon dressing or a classic chopped garden salad.
- Add some veggies: Roasted broccoli, green beans, or sweet potato wedges pair beautifully with the sliders and add some nutritional value to the plate.
- Make it a platter: Serve the sliders with pickles, carrot sticks, or coleslaw on the side for a finger-food feast.
Serve for Parties and Gatherings
- Appetizer-style: Place them on a large serving board or tray with toothpicks in each one so guests can grab and go.
- Buffet or game day spread: Pair the sliders with chips, dips, wings, and other crowd-pleasers. You can even cut each slider in half for more servings.
Family Dinner Upgrade
- Comfort food night: Serve with mac and cheese, baked beans, or oven fries for a cozy, satisfying dinner that both kids and adults will love.
No matter how you serve them, these sliders are bound to be a hit. But to elevate them even more, let’s talk pairings.
Pairing Suggestions
Pairing your BBQ Chicken Sliders with the right sides and drinks can elevate your meal from simple to sensational. Whether you’re planning a family dinner or feeding a crowd, the right combo brings balance to your table.
Sides That Complement the Sliders
- Coleslaw: A creamy or vinegar-based coleslaw adds crunch and tang, which pairs perfectly with the rich, smoky chicken and cheese.
- Roasted vegetables: Try roasted carrots, Brussels sprouts, or cauliflower for a hearty, healthy complement.
- Corn on the cob: Simple and sweet, corn on the cob offers a buttery contrast to the savory sliders.
- Potato salad: Whether classic or mustard-based, it adds a creamy, cooling element.
Drink Pairings
- Sparkling water with citrus: A refreshing, non-alcoholic option that cuts through the richness of the sliders.
- Sweet iced tea: The sweetness works well with the smoky barbecue flavors, especially when served cold.
- Lemonade or limeade: Bright, tart flavors provide a refreshing contrast.
Kid-Friendly Options
- Fruit skewers: Easy to hold and eat, plus they add color to the plate.
- Baked sweet potato fries: A healthier alternative to regular fries with a touch of sweetness.
- Apple slices with peanut butter: Adds crunch, protein, and natural sweetness.
These pairings ensure your sliders aren’t just the main event—they’re the start of a balanced and delicious meal.
Storage, Freezing & Reheating Instructions
One of the best things about these BBQ Chicken Sliders is that they’re just as tasty the next day. Whether you’re making them ahead for a party, meal prepping for the week, or saving leftovers, they store and reheat beautifully with just a few simple steps.
How to Store Leftover Sliders
Once your sliders have cooled slightly (but not too long—don’t let them sit out for more than two hours), you’ll want to transfer them to an airtight container or wrap them tightly with foil. You can store the entire batch together or slice them into individual portions for grab-and-go convenience.
Refrigerator Storage:
Place the wrapped or containerized sliders in the fridge, where they’ll stay fresh for up to 3 days. Be sure to use a container that seals well to keep the bread from drying out.
Tip: If you know ahead of time that you’re making these for future use, you can underbake them by a few minutes. Then, finish baking when you’re ready to serve for a freshly-baked taste.
How to Freeze BBQ Chicken Sliders
Freezing is a great option if you want to prepare a batch ahead of time. The key is to freeze them in a way that preserves both texture and flavor.
To Freeze Cooked Sliders:
- Allow the sliders to cool completely after baking.
- Slice them into individual sandwiches.
- Wrap each slider in foil or plastic wrap, then place them all in a large freezer-safe zip-top bag or airtight container.
- Label the bag with the date and use within 2 to 3 months for best results.
To Freeze Unbaked Sliders:
- Assemble the sliders as usual, stopping before the baking step.
- Wrap the entire tray in plastic wrap and then foil.
- Freeze the tray flat for even freezing.
- When ready to bake, thaw in the fridge overnight and bake as directed.
How to Reheat Sliders
If frozen, allow the sliders to thaw overnight in the refrigerator for the best texture.
Oven Reheating (Best Option):
- Preheat your oven to 325°F (165°C).
- Place sliders in a baking dish and cover loosely with foil.
- Heat for 10–15 minutes or until warmed through.
- For a crispier top, remove the foil during the last 2–3 minutes.
Microwave Reheating (Quick Option):
- Wrap an individual slider in a damp paper towel.
- Microwave on medium power for 30–45 seconds.
- Be cautious not to overheat, as the bread can become rubbery.
These storage and reheating methods ensure you never have to worry about leftovers going to waste. Now that you’ve got your storage game down, let’s talk about what to avoid when making this recipe in the first place.
Common Mistakes to Avoid
Even the simplest recipes can go off track without a little guidance. To help you avoid common slip-ups and make the best BBQ Chicken Sliders every time, here are a few mistakes to watch out for—and how to fix them.
1. Using Cold Chicken
If you use cold, straight-from-the-fridge shredded chicken without warming it up first, the sliders won’t heat evenly in the oven. The cheese might melt, but the center could still be cool. Always warm your BBQ chicken mixture slightly before assembling for the best results.
2. Overloading with Sauce
Barbecue sauce is delicious, but too much of it can make your sliders soggy. Use just enough to coat the chicken well. If you prefer a saucier slider, serve extra sauce on the side for dipping.
3. Not Covering the Sliders During Baking
Skipping the foil in the first half of baking can cause the tops to brown too quickly before the cheese has a chance to melt. Always bake covered first, then uncover for the last few minutes to get that golden, crispy finish.
4. Using Pre-Sliced Rolls
Try to buy Hawaiian rolls that come as a whole slab rather than ones that are individually pre-sliced. This makes it easier to slice them evenly in half and build your sliders without everything falling apart.
5. Forgetting to Grease the Pan
Even with foil, a lightly greased surface helps prevent sticking, especially if cheese oozes out during baking. A quick spray of nonstick cooking spray or a bit of butter goes a long way here.
6. Not Letting Them Rest After Baking
It’s tempting to dig in immediately, but letting the sliders rest for 2–3 minutes after baking helps the cheese set slightly and makes them easier to cut and serve.
Avoiding these common mistakes will ensure you get delicious, gooey, crisp-topped sliders every single time. And speaking of making things better, let’s talk about how to take your slider game to the next level.
Pro Tips for Perfect BBQ Chicken Sliders
Want to make sliders like a pro? These tips and tricks will elevate your sliders from really good to restaurant-quality.
1. Use Fresh Herbs for More Flavor
While dried herbs can work in a pinch, fresh thyme truly shines in this recipe. It brings a bright, herby contrast to the rich cheese and sweet rolls. You can even experiment with rosemary or parsley for a different twist.
2. Make Your Own BBQ Sauce
Homemade BBQ sauce lets you control the sugar, spice, and salt content while adding a personal touch. Try a base of tomato paste or ketchup with a bit of vinegar, honey, and your favorite spices.
3. Toast the Bottoms Before Assembling
Want to avoid soggy bottoms? Lightly toast the bottom half of the rolls in the oven for 2–3 minutes before adding the filling. This helps them hold up better against the sauce.
4. Add a Layer of Pickles
A few thin slices of dill pickles between the chicken and cheese add a tangy bite that cuts through the richness and adds texture. This is especially great if you’re looking for a little zing.
5. Try a Cheese Blend
Combining sharp cheddar with mozzarella, provolone, or even pepper jack can add depth and variety. Melty cheeses make everything feel gooier and more indulgent.
6. Broil at the End (Carefully)
If you want an extra golden top, broil the sliders for 1–2 minutes after baking. Just keep a close eye so they don’t burn—things move fast under the broiler.
7. Double the Batch for Parties
These go fast, especially at gatherings. If you’re feeding a crowd, double the recipe and use a large baking sheet or two smaller ones.
Using these tips will not only enhance the flavor but also help you troubleshoot as you go. Now, let’s answer some frequently asked questions to cover anything else you might be wondering about.
Frequently Asked Questions (FAQs)
1. Can I use store-bought rotisserie chicken?
Yes, absolutely. Rotisserie chicken is a great time-saver and works beautifully in this recipe. Just shred it and warm it up with the BBQ sauce.
2. What if I don’t have Hawaiian rolls?
You can use any soft dinner rolls or even slider buns. Brioche or potato rolls are great alternatives.
3. Can I prepare these ahead of time?
Yes. You can fully assemble the sliders (minus the butter topping) and refrigerate them for up to 24 hours. Add the butter topping just before baking.
4. Are these sliders halal?
They can be! Just make sure your chicken, cheese, and BBQ sauce are halal-certified. Use halal Worcestershire sauce or beef broth base for the butter topping.
5. How can I make them spicier?
Add sliced jalapeños to the filling or use a spicy BBQ sauce. A dash of hot sauce mixed into the chicken works great too.
6. Can I freeze these sliders?
Yes, both baked and unbaked sliders can be frozen. See the “Storage” section above for detailed instructions.
7. What cheese substitutes can I use?
Mozzarella, provolone, Monterey Jack, or a blend of your favorites. Sharp cheddar adds the most flavor, but use what you love.
8. Can I add veggies to the filling?
Sure! Diced bell peppers, onions, or mushrooms sautéed beforehand work well. Just be sure to avoid adding too much moisture.
9. How do I keep the rolls from getting soggy?
Lightly toasting the bottom halves before assembling, and not overloading with BBQ sauce, helps a lot.
10. Can I serve these cold?
While they taste best warm, they can be served at room temperature for parties or picnics. Just be sure they’re fully cooked beforehand.
Got more questions? Feel free to drop them in the comments or message me directly. I love helping you make this recipe your own.
Conclusion & Call to Action
There’s something undeniably comforting about BBQ Chicken Sliders—something about that combination of sweet, savory, and melty goodness tucked into soft, buttery rolls that feels like a warm hug. Whether you’re making them for a weeknight dinner, a potluck, or just because you’re craving something cozy and delicious, this recipe delivers every time.
What makes this dish extra special is how customizable it is. You can tweak the heat, change the cheese, use turkey instead of chicken, or pile on extra herbs to make it your own. Plus, with simple ingredients and a short prep time, it’s totally doable even on your busiest days.
These sliders have become a favorite in my kitchen not only because they taste amazing, but because they bring people together. They’re shareable, satisfying, and always the first thing to disappear at any gathering.
So now it’s your turn—gather your ingredients, follow the steps, and get ready to serve up something unforgettable. I can’t wait to hear how your sliders turn out. If you give this recipe a try, be sure to leave a comment below and let me know what you think. And don’t forget to share a photo of your finished dish and tag me—I love seeing your creations.
Ready to make your new favorite comfort food? Let’s get cooking.
Print
BBQ Chicken Sliders on Hawaiian Rolls – Easy and Cheesy
- Total Time: 40 minutes
- Yield: 12 sliders 1x
- Diet: Halal
Description
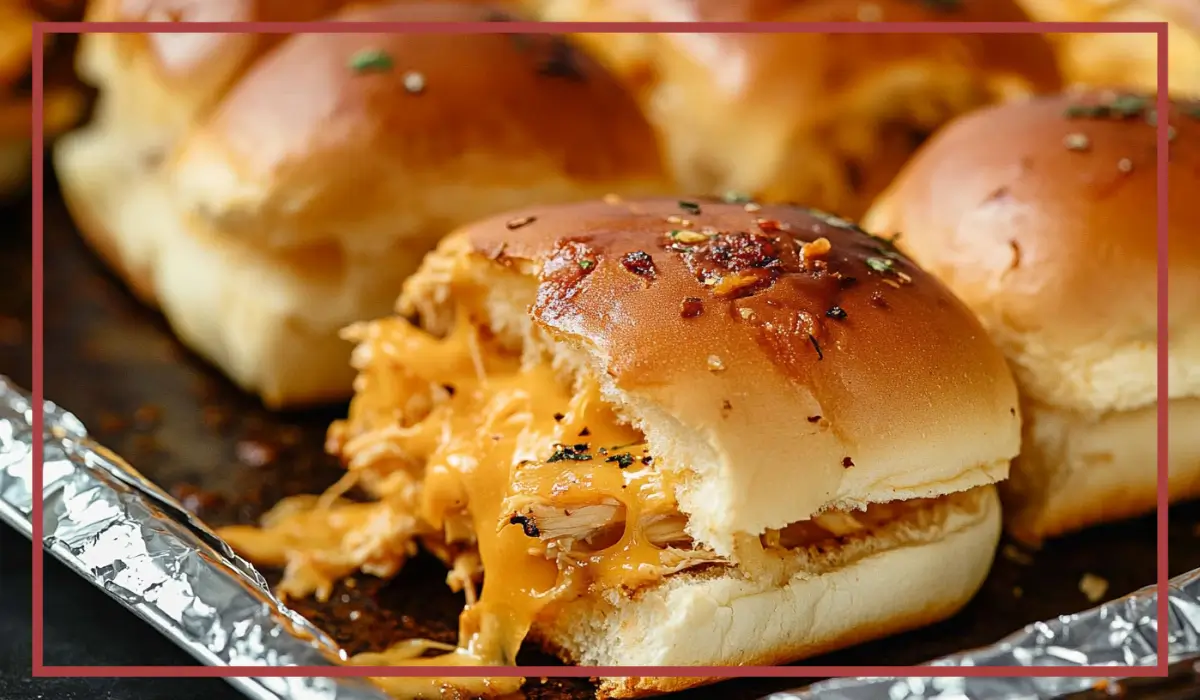
These BBQ Chicken Sliders are loaded with juicy shredded chicken, smoky barbecue sauce, melted cheddar, and buttery herb topping—all on soft Hawaiian rolls. Perfect for game day, family dinners, or parties!
Ingredients
-
3 cups shredded chicken
-
1 cup barbecue sauce (adjust to taste)
-
6 slices sharp cheddar cheese
-
12 Hawaiian bread rolls (1 package)
-
⅓ cup melted salted butter
-
¼ teaspoon beef broth base (or Worcestershire sauce)
-
3 sprigs fresh thyme, stems removed
-
1 tablespoon grated Parmesan cheese
Instructions
-
Preheat oven to 350°F (175°C). Line a 9×13 baking dish with foil and lightly grease.
-
Mix shredded chicken with BBQ sauce. Warm slightly if cold.
-
Slice Hawaiian rolls in half horizontally and place the bottom half in the baking dish.
-
Spread chicken over rolls, top with cheese, and cover with top halves of rolls.
-
Mix melted butter, beef broth base, thyme, and Parmesan. Brush over tops of rolls.
-
Cover with foil and bake for 20 minutes. Remove foil and bake another 3–5 minutes.
-
Let cool slightly, slice, and serve warm.
Notes
-
Use leftover or rotisserie chicken for convenience.
-
Add jalapeños or red pepper flakes for a spicy kick.
-
Can be made ahead and frozen.
- Prep Time: 15 minutes
- Cook Time: 25 minutes
- Category: Appetizer, Main Dish
- Method: Baking
- Cuisine: American