
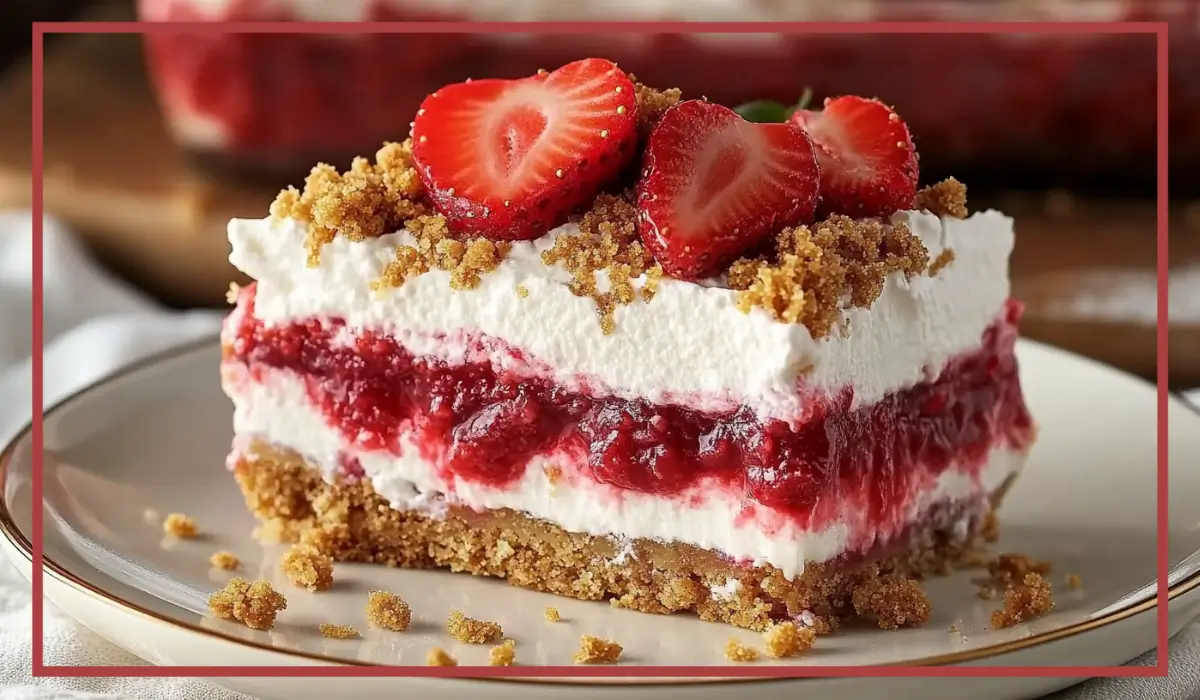
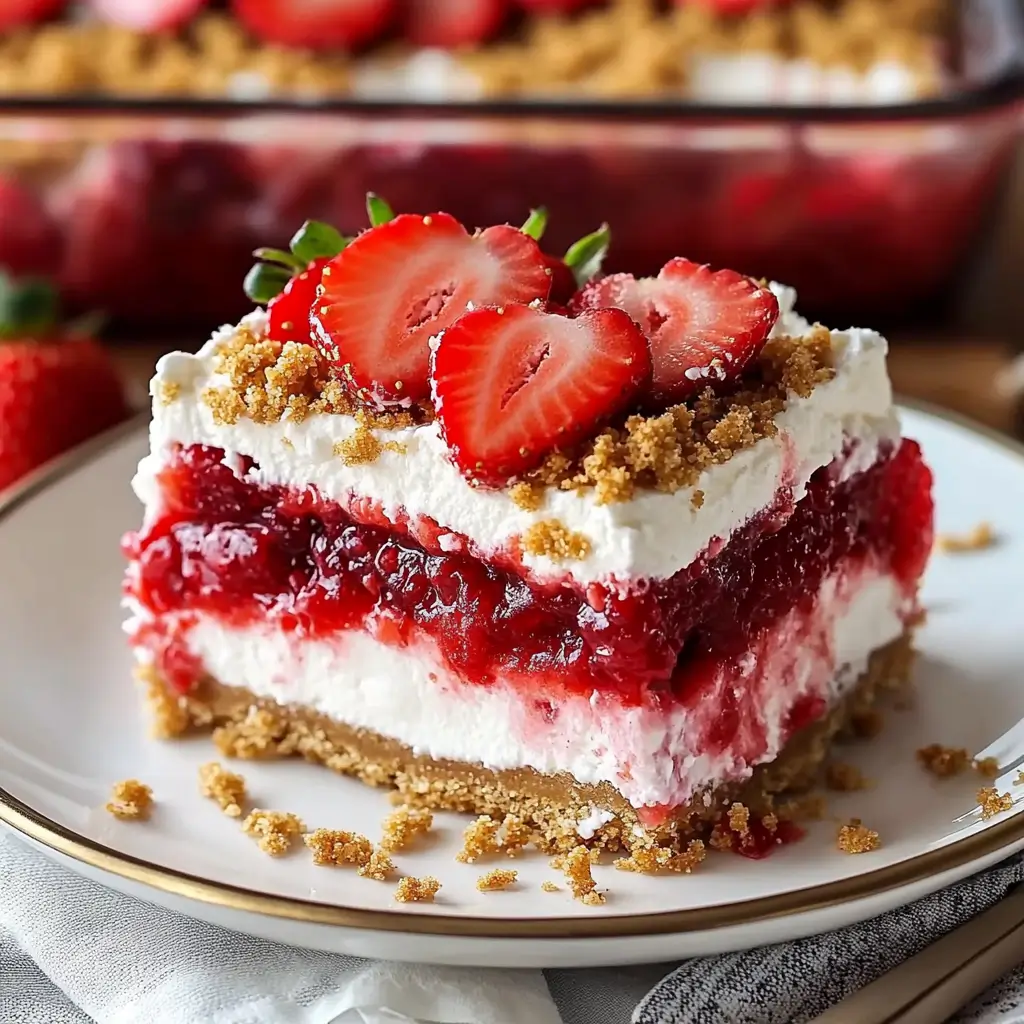
There’s something so nostalgic and joyful about a layered dessert, especially one that doesn’t require you to turn on the oven. This No-Bake Strawberry Cream Cheese Dessert is a dream come true for anyone who craves that perfect balance between sweet, creamy, and fruity. With a buttery graham cracker crust, a cloud-like cream cheese and whipped cream filling, and a glossy strawberry topping that tastes like summer in a bite, it’s hard not to fall in love at first forkful.
What really makes this dessert shine is how easy it is to pull together. You don’t need any fancy equipment or baking skills. Everything layers up in a single dish, and after a few hours in the fridge, you have a show-stopping dessert that’s as pretty as it is delicious. It’s the kind of treat that works beautifully for potlucks, BBQs, family dinners, and even holiday gatherings. There’s a certain charm to serving something chilled and refreshing when the weather is warm, and this dessert checks all the boxes.
I first discovered this recipe on a summer afternoon when I had strawberries on the verge of being overripe and no desire to turn on the oven. I needed something that was crowd-pleasing, minimal fuss, and satisfying. After one bite, I knew this was a keeper. Since then, it’s become a go-to in my house, requested by friends, neighbors, and family alike. It’s also incredibly adaptable — you can switch up the berries or even swap the crust if you want to experiment. But the core combo of strawberries, cream cheese, whipped topping, and graham crackers? That’s pure magic.
If you’ve been searching for an easy, no-bake dessert that delivers on both flavor and texture, you’re in for a treat. Let’s dive into why this dessert is about to become your new favorite.
Why You’ll Love This no-bake strawberry dessert Recipe
There are so many reasons to adore this no-bake strawberry dessert, and the first one is right in the name: no baking required. On hot days when the idea of turning on your oven feels unbearable, this dessert saves the day. It comes together with simple, accessible ingredients, many of which you probably already have in your kitchen.
One of the biggest standouts is the texture. The graham cracker crust provides a subtle crunch and a warm, buttery base. Above that, the cream cheese and whipped cream layer is unbelievably light and fluffy, with just the right amount of tang and sweetness. And then you get to the strawberry layer — juicy, slightly jelled, and absolutely bursting with fresh fruit flavor. Each bite melts in your mouth, with just enough variation in texture to keep things interesting.
Another reason to love this recipe is how family-friendly it is. Kids adore the sweet strawberries and fluffy filling, while adults appreciate the subtle creaminess and well-balanced flavors. Because there’s no alcohol or gelatin-heavy texture, it’s suitable for a wide range of dietary needs and preferences — and if you want to make it even lighter, you can use a sugar-free Jell-o and reduced-fat cream cheese or whipped topping.
It’s also one of the most make-ahead-friendly desserts you can serve. You can assemble it the night before an event, pop it in the fridge, and forget about it until it’s time to serve. No rushing, no worrying about timing, and definitely no baking disasters. Plus, it holds up beautifully in the fridge and can even be frozen for later.
Whether you’re new to the kitchen or a seasoned home cook, this dessert is virtually foolproof. And that’s something to get excited about.
Health Benefits of this no-bake strawberry dessert
While this dessert is indulgent, it also has some surprisingly wholesome components, especially when you consider how easy it is to make a few healthy tweaks without sacrificing flavor. Let’s start with the star of the show: strawberries.
Strawberries are rich in antioxidants, particularly vitamin C, which supports immune function, skin health, and overall cellular protection. They also contain manganese and folate, and are low in calories while being high in fiber. That means this dessert delivers a dose of nutrients with every fruity bite. The natural sweetness of strawberries also helps reduce the need for added sugars in the filling.
Next, we’ve got cream cheese and whipped cream. While these ingredients are known for their richness, they also offer some calcium and healthy fats — especially if you opt for versions that use fewer preservatives or lower fat content. You can even substitute with Greek yogurt cream cheese for a protein boost and less saturated fat.
Using a homemade graham cracker crust gives you control over the amount of sugar and butter, and you can further improve the nutrition profile by using whole wheat graham crackers or reducing the added sugar. The crust doesn’t require any baking or additives, making it a simpler, cleaner choice than store-bought versions.
Lastly, if you’re mindful of added sugars or calories, you can easily use sugar-free Jell-o and substitute Cool Whip Lite or a whipped coconut cream alternative. These adjustments help you cater the dessert to various dietary needs, including lower sugar or dairy-free diets.
So yes, this dessert is a treat — but it’s one you can feel good about serving. Especially when it’s made with fresh fruit and just a few thoughtful substitutions, it becomes more than just delicious — it becomes a smart, versatile choice for dessert.
Preparation Time, Servings, and Nutritional Information
Let’s talk logistics, because this dessert is incredibly low-maintenance when it comes to prep and serving time. It’s ideal for anyone who wants maximum reward with minimal effort.
Total Preparation Time:
Prep: 25 minutes
Chill Time: At least 4 hours (or overnight for best results)
No baking required
Servings:
This recipe comfortably serves 12 generous portions, making it perfect for gatherings, potlucks, or a family dessert that lasts a few days in the fridge.
Nutritional Information (per serving, based on 12 servings):
Calories: ~320
Protein: 3g
Carbohydrates: 25g
Sugars: 20g
Fat: 22g
Saturated Fat: 12g
Fiber: 1g
Calcium: 8% DV
Vitamin C: 60% DV
Keep in mind that these numbers will vary slightly depending on the exact brands and ingredient versions you use, especially if you opt for sugar-free, reduced-fat, or dairy-free alternatives.
Ingredients List of this no-bake strawberry dessert
Let’s break down exactly what you need for this dreamy dessert. The ingredients are straightforward, pantry-friendly, and flexible for customization.
For the Strawberry Filling:
- 5 to 6 cups sliced fresh strawberries (about 2 lbs or two 16 oz containers): Choose ripe, sweet strawberries for the best flavor. Fresh is ideal here, as frozen berries may release too much liquid and affect the texture.
- 1 (3 oz) package strawberry Jell-o (regular or sugar-free): This is what gives the strawberry layer that signature glossy, slightly jelled finish. It also helps bind the strawberries together and boosts the overall flavor.
For the Cream Cheese Layers:
- 2 (8 oz) packages cream cheese, softened: Softening your cream cheese helps create a smoother, creamier filling. You can use full-fat or light versions depending on your preference.
- 1 cup confectioners’ sugar: This blends easily into the cream cheese and adds a delicate sweetness.
- 4 cups whipping cream (or substitute 16 oz Cool Whip): Whipping cream will need to be whipped to stiff peaks, while Cool Whip can be folded in directly.
- 2 teaspoons vanilla extract, divided: One teaspoon goes in the cream cheese mixture, and the other goes into the whipped cream. Use real vanilla extract for the best flavor.
- 6 tablespoons granulated sugar: This adds just enough sweetness to the whipped cream layer.
For the Crust:
- Approximately 1½ cups graham cracker crumbs: You can crush your own from whole crackers or buy pre-crushed. Whole wheat graham crackers also work.
- About 6 tablespoons melted butter: Just enough to moisten the crumbs and help them hold together when pressed into the pan.
- Non-stick cooking spray: To prevent sticking and make serving easier.
Optional: You can reserve 3 tablespoons of the graham cracker mixture before pressing it into the pan to sprinkle over the top as a finishing touch.
Step-By-Step Cooking Instructions
Ready to get started? This step-by-step guide will walk you through everything from preparing the crust to layering the components and chilling the final dessert. Don’t worry — it’s easier than it looks, and the result is well worth the little bit of effort.
Step 1: Make the Strawberry Filling
Start by rinsing and slicing your strawberries. You want them to be about ¼ inch thick, so they hold their shape but also melt into the dessert a bit.
Place the sliced strawberries into a medium saucepan and sprinkle the dry Jell-o powder over them. Gently stir to coat the strawberries in the powder.
Turn the heat to medium-low and stir continuously until the Jell-o has dissolved. You’re not looking to boil or overcook — just warm enough to dissolve the powder and blend it into the fruit juices.
Once the Jell-o is fully dissolved, remove the pan from heat. Set the strawberry mixture aside to cool completely while you prepare the other layers.
Step 2: Prepare the Graham Cracker Crust
In a mixing bowl, combine the graham cracker crumbs and melted butter. Stir until the mixture resembles wet sand.
Set aside 3 tablespoons of the mixture for topping the dessert later.
Spray a 9×13-inch pan with non-stick cooking spray to help prevent sticking when slicing and serving.
Press the remaining graham cracker mixture into the bottom of the prepared pan. Use the back of a spoon or the bottom of a glass to press it firmly and evenly into the corners and across the surface.
Place the pan in the fridge while you make the filling, so the crust begins to set.
Step 3: Make the Cream Cheese Layer
In a large mixing bowl, beat the softened cream cheese with the confectioners’ sugar and 1 teaspoon of vanilla extract. Beat until smooth and lump-free.
In a separate bowl, whip the heavy whipping cream, granulated sugar, and remaining teaspoon of vanilla until stiff peaks form. This usually takes about 4 to 5 minutes with an electric hand mixer. If using Cool Whip, skip this whipping step and go straight to folding.
Gently fold the whipped cream into the cream cheese mixture in batches. Use a spatula to fold rather than stir — this keeps the mixture light and airy.
Mix until fully combined and smooth, but avoid overmixing.
Step 4: Assemble the Layers
Remove the pan with the crust from the fridge.
Spread a little less than half of the cream cheese and whipped cream mixture over the crust. Use an offset spatula to smooth it evenly into the corners.
Carefully spoon the cooled strawberry mixture over the cream cheese layer. Spread gently with the back of a spoon or spatula so you don’t disturb the layer underneath.
Top with the remaining cream cheese mixture, smoothing the surface for a neat finish.
Sprinkle the reserved graham cracker crumbs evenly over the top.
Step 5: Chill to Set
Cover the dessert with plastic wrap or a fitted lid and refrigerate for at least 4 hours, though overnight is ideal. This allows the layers to fully firm up and makes for cleaner slicing.
Once chilled, slice into squares and serve cold. Every bite is creamy, fruity, and perfectly sweet.
How to Serve this no-bake strawberry dessert
Once your no-bake strawberry cream cheese dessert has fully chilled and the layers are set, it’s ready to serve—and this part is as fun as it is delicious. Thanks to its pretty layers and vibrant strawberry topping, this dessert doesn’t need much in the way of decoration. It’s a showstopper all on its own. But there are a few serving tips and variations that can take the experience to the next level.
First, make sure to serve it cold. This isn’t the kind of dessert you want to leave out for too long, especially in warm weather. Use a sharp knife to cut it into squares or rectangles, and for the cleanest cuts, wipe the knife with a warm, damp towel between slices.
Because it’s rich and creamy, a modest portion goes a long way—though guests often come back for seconds. This dessert works well on its own, but if you want to dress it up for a party or special occasion, you can add a dollop of whipped cream on top of each serving. A small strawberry slice, a mint leaf, or even a drizzle of strawberry sauce can add visual appeal without overwhelming the flavor.
If you’re hosting a gathering, consider pre-slicing and plating the servings ahead of time. This makes it easier to serve a crowd and adds a little polish to your presentation. For more casual events like family dinners, serving it straight from the pan with a cake server or large spatula works just fine.
You can even portion it into individual cups or jars for a fun picnic or party treat. Just layer the crust, cream filling, and strawberry mixture in small mason jars or dessert glasses and chill as usual. It’s a great way to make dessert feel a little extra special with minimal effort.
Whether you’re serving this dessert on a paper plate at a picnic or on fine china at a celebration, it’s guaranteed to disappear fast.
Pairing Suggestions
While this dessert is absolutely delightful on its own, it pairs beautifully with a variety of other dishes and beverages. Because it’s rich and sweet, you’ll want to balance it out with something light, crisp, or slightly tangy. Below are some pairing ideas that can turn this simple treat into a well-rounded dessert experience.
Light Side Dishes
- Fresh Fruit Salad: A side of mixed berries, melon, or citrus offers a refreshing contrast and keeps the plate colorful.
- Cucumber Mint Salad: The coolness of cucumber and mint adds a clean, herbal note that complements the sweetness of the dessert.
- Simple Green Salad: For a dinner party or potluck, serving this after a salad dressed in lemon vinaigrette makes for a perfect sweet ending.
Beverage Pairings
- Herbal Iced Tea: A chilled hibiscus, chamomile, or mint tea pairs beautifully with the fruitiness of the strawberries and refreshes the palate.
- Sparkling Lemon Water: Effervescent and zesty, it cleanses the palate between bites and balances the sweetness.
- Fruit-Infused Water: Try a pitcher with slices of orange, lemon, and cucumber to bring lightness to the table.
- Non-Dairy Milk: A chilled glass of almond or oat milk goes surprisingly well with this dessert’s creamy texture.
Family-Friendly Additions
- Soft Dinner Rolls with Honey Butter: Serve this dessert after a meal with simple breads to keep everything feeling homey and casual.
- Mini Sandwiches or Finger Foods: At gatherings, this dessert follows mini sliders or wraps wonderfully.
- Savory Bites: Think turkey bacon-wrapped dates, cucumber bites, or cheese-stuffed cherry tomatoes to counterbalance the sweetness with something salty or savory.
Pairings really come down to contrast—light and crisp options help cleanse the palate and allow each bite of dessert to shine.
Storage, Freezing & Reheating Instructions
One of the best parts about this no-bake strawberry cream cheese dessert is how well it stores. In fact, it tastes even better the next day as the flavors meld and the layers firm up more fully.
Refrigerator Storage
Store leftovers tightly covered with plastic wrap or in an airtight container in the refrigerator. It will stay fresh for up to 4 days, though the texture is at its best within the first 2 to 3 days. After that, the strawberry topping may start to release some moisture, and the crust may soften slightly. It will still taste great, just with a slightly different texture.
Freezing Instructions
This dessert freezes surprisingly well. To freeze, first let it chill completely in the fridge and set fully. Then, slice it into portions and wrap each piece tightly in plastic wrap. Place the wrapped slices into a freezer-safe container or bag.
You can freeze it for up to 2 months. When you’re ready to enjoy it, transfer a piece to the fridge and let it thaw overnight. This slow thaw helps maintain the texture, especially for the whipped cream layer.
Reheating (If Necessary)
This dessert is served cold, so there’s no need to reheat it. However, if you find that a slice is still a little too frozen when serving, let it sit at room temperature for 15–20 minutes to soften slightly. Just don’t leave it out too long, as the whipped cream can become soft and lose its shape.
To maintain its texture and integrity, always cover the dessert well when storing or freezing, and avoid stacking anything on top of it. These little steps go a long way in keeping every layer picture-perfect.
Common Mistakes to Avoid
Even though this recipe is very beginner-friendly, there are a few common pitfalls that can affect the final outcome. Knowing what to watch out for can make all the difference.
Using Warm Ingredients
If your cream cheese or whipping cream is too warm, the filling may not set properly. Make sure your cream cheese is softened but not melted, and always whip your cream when it’s cold. Cold ingredients create better texture and stability.
Overmixing the Filling
When folding the whipped cream into the cream cheese, it’s important to use gentle, sweeping motions. Overmixing can deflate the whipped cream, resulting in a denser, less airy filling.
Skipping the Cooling Time
This dessert needs at least 4 hours in the fridge to set up properly, but overnight is even better. Rushing this step can cause the layers to slide or look messy when sliced.
Not Cooling the Strawberry Layer Enough
Pouring hot or even warm strawberry filling over the cream layer can melt it and create a sloppy result. Make sure the strawberry mixture is fully cooled before layering it on.
Using Frozen Strawberries Without Adjustments
Frozen strawberries contain more moisture than fresh ones. If using them, be sure to thaw and drain them thoroughly before adding the Jell-o powder, or the filling may end up too runny.
Inaccurate Measurements
This is especially important with ingredients like butter and whipped cream. Too much or too little can change the texture and consistency of each layer.
Avoiding these simple mistakes will keep your dessert looking beautiful and tasting just as you imagined.
Pro Tips
To make sure your no-bake strawberry cream cheese dessert turns out perfectly every single time, here are some tried-and-true tips. These come from a mix of personal experience and kitchen-tested tricks that truly elevate the final result.
Let the Cream Cheese Soften Properly
Take your cream cheese out of the fridge and let it sit at room temperature for about 30 minutes before mixing. This ensures it blends smoothly with the sugar and vanilla, preventing lumps in your filling. If you’re in a rush, you can microwave it in 10-second intervals on low power, but be careful not to melt it.
Whip Cream to Stiff Peaks
When using fresh whipping cream instead of Cool Whip, it’s essential to whip it until stiff peaks form. This not only helps create structure in the filling but also ensures it holds its shape as it chills. Under-whipped cream can make the final dessert too soft or runny.
Chill the Bowl Before Whipping Cream
A cold bowl and cold beaters help whipping cream set up faster and more firmly. Pop your mixing bowl and beaters in the freezer for about 10 minutes before whipping. It’s a small step that makes a big difference.
Press the Crust Firmly
Use a flat-bottomed glass or measuring cup to press the graham cracker crumbs into the pan. This creates an even base that holds together well when slicing, especially after chilling. Don’t forget to refrigerate the crust briefly before adding the filling.
Cool the Strawberry Layer Completely
This one can’t be overstated. Pouring a warm strawberry mixture onto the cream cheese layer will melt it and ruin the clean layers. Give the strawberry-Jell-o mix at least 30–45 minutes to cool at room temperature before adding it.
Make It a Day Ahead
For the absolute best flavor and texture, make this dessert the day before you plan to serve it. Overnight chilling allows all the layers to firm up and the flavors to meld, making it easier to cut and even more delicious.
Use Real Vanilla Extract
Opt for real vanilla extract instead of imitation. It enhances the flavor of the cream cheese and whipped layers with a richer, deeper aroma that makes a noticeable difference.
Reserve Some Crumbs for the Topping
That little sprinkle of graham cracker crumbs on top isn’t just decorative—it adds a subtle crunch and a pretty golden finish that makes the whole dish feel complete. Always remember to save a few tablespoons before pressing the crust into the pan.
Cut Clean Slices with a Warm Knife
To get neat, bakery-style slices, dip your knife in hot water and wipe it dry before each cut. This helps glide through the layers smoothly without dragging or crumbling.
Customize It to Your Taste
Don’t be afraid to get creative! You can swap the strawberries for blueberries, raspberries, or even a tropical fruit blend. The base and filling remain the same, making this dessert a great canvas for seasonal ingredients or your personal favorites.
These pro tips help ensure that your dessert isn’t just good—it’s spectacular. Whether you’re serving it to family, friends, or at a special event, a few small techniques make a big difference.
Frequently Asked Questions (FAQs)
Can I use frozen strawberries instead of fresh ones?
Yes, you can, but be cautious. Frozen strawberries tend to release more liquid as they thaw, which can affect the texture of the dessert. If you use frozen berries, be sure to thaw them completely and drain off any excess liquid before adding the Jell-o powder.
Is it necessary to use strawberry Jell-o, or can I use another flavor?
Strawberry Jell-o complements the fresh berries best, but you can definitely experiment. Raspberry or cherry Jell-o work well too and pair nicely with similar fruits. Just make sure the Jell-o flavor doesn’t overpower the natural fruit taste.
Can I make this dessert gluten-free?
Absolutely. Simply use gluten-free graham crackers for the crust. Everything else in the recipe is naturally gluten-free, so it’s an easy swap that doesn’t compromise flavor or texture.
What’s the best way to transport this dessert?
If you’re taking it to a gathering, make sure it’s well chilled before you go. Cover the dish tightly with plastic wrap or a fitted lid, and place it in a cooler bag with ice packs to keep it cold. It travels well as long as it stays chilled.
Can I use Cool Whip instead of whipping cream?
Yes, Cool Whip is a convenient substitute and makes the recipe even quicker. Use one 16 oz tub and fold it directly into the cream cheese mixture. It holds its shape well and has a consistent texture.
Is there a dairy-free version of this dessert?
You can make this dessert dairy-free by using plant-based cream cheese (like almond or cashew-based), coconut whipped cream, and vegan butter for the crust. Just be sure to check labels for any hidden dairy ingredients.
Why is my cream layer runny?
The most common reason is under-whipped cream or warm cream cheese. Make sure your whipped cream reaches stiff peaks and your cream cheese is softened but not melted. Overmixing can also break down the structure, so fold gently.
Can I freeze the whole dessert?
Yes, you can. Freeze the fully assembled dessert, tightly wrapped, and thaw it in the fridge overnight before serving. This works well if you want to make it ahead and don’t plan to serve it within a few days.
How long does this dessert last in the fridge?
It’s best enjoyed within 3–4 days. After that, the crust may start to soften and the strawberry topping might release extra moisture, slightly altering the texture. But the flavor remains lovely for several days.
Can I cut the recipe in half?
Yes! Use an 8×8 or 9×9 inch dish and halve all the ingredients. This is perfect for smaller households or when you just want a little something sweet without the big batch.
Having answers to these questions ahead of time helps make the process stress-free and gives you the confidence to tackle this dessert like a pro.
Conclusion & Call to Action
This No-Bake Strawberry Cream Cheese Dessert is one of those recipes that you’ll turn to again and again, not just because it’s easy, but because it’s genuinely loved by everyone who tries it. With its creamy filling, fresh fruit topping, and buttery graham crust, it strikes the perfect balance between indulgence and freshness.
It’s the ideal make-ahead dessert for warm days, busy weekends, or last-minute get-togethers when you want something beautiful but don’t have hours to spend in the kitchen. Even if you’re new to no-bake desserts, this recipe will walk you through each step with confidence, and the results are always worth the chill time.
If you give this dessert a try, I’d love to hear how it turned out! Feel free to leave a comment sharing your tips, your favorite tweaks, or even a photo of your finished creation. Whether you followed the recipe to the letter or added your own twist, your feedback helps others and inspires even more kitchen creativity.
And if you’re planning to make this for a party or family dinner, go ahead and bookmark or print the recipe—you’re going to want it handy. Trust me, this one’s a keeper.
Thanks for reading and happy no-baking!
Print
No-Bake Strawberry Dessert That Melts in Your Mouth
- Total Time: 4 hours 25 minutes (including chilling)
- Yield: 12 servings 1x
- Diet: Vegetarian
Description
A rich, creamy, and refreshing layered dessert made with fresh strawberries, whipped cream, and cream cheese over a buttery graham cracker crust. No baking needed!
Ingredients
-
5 to 6 cups sliced fresh strawberries (about 2 lbs)
-
1 (3 oz) package strawberry Jell-o (regular or sugar-free)
-
2 (8 oz) packages cream cheese, softened
-
1 cup confectioners’ sugar
-
4 cups whipping cream (or 16 oz Cool Whip)
-
2 teaspoons vanilla extract, divided
-
6 tablespoons granulated sugar
-
~1½ cups graham cracker crumbs
-
~6 tablespoons melted butter
-
Non-stick cooking spray
Instructions
-
In a saucepan, mix sliced strawberries and Jell-o powder. Heat on medium-low until dissolved. Let cool.
-
Mix graham crumbs and melted butter; press into greased 9×13 pan. Reserve some crumbs for topping.
-
Beat cream cheese, confectioners’ sugar, and 1 tsp vanilla until smooth.
-
Whip cream with sugar and 1 tsp vanilla until stiff peaks form. Fold into cream cheese mixture.
-
Layer half of the cream mixture over the crust. Add strawberry layer. Top with remaining cream. Sprinkle reserved crumbs.
-
Chill for at least 4 hours or overnight before serving.
Notes
-
Ensure strawberries are fully cooled before layering
-
Chill overnight for best results
-
Cut with a warm knife for clean slices
-
Use Cool Whip for quicker prep
- Prep Time: 25 minutes
- Cook Time: 0 minutes
- Category: Dessert
- Method: No-Bake
- Cuisine: American