

There’s something undeniably comforting about a batch of freshly baked brownies. The rich cocoa aroma that fills the kitchen, the warm, gooey center, and the slightly crispy edges — it’s the kind of treat that feels like a warm hug at the end of a long day. Now imagine taking all that brownie goodness, mixing it with velvety cream cheese, shaping it into little truffles, and then dipping those morsels into silky melted chocolate. Sounds like a dream, right? These fudgy brownie truffles with cream cheese are exactly that — pure dessert magic in a bite-sized form.
This recipe is one I come back to over and over again. Not only because it’s insanely easy and requires minimal ingredients, but also because it’s such a crowd-pleaser. Whether I’m bringing a batch to a family gathering, serving them up at a potluck, or keeping a stash in the freezer for a sweet treat after dinner, these little truffles never fail to impress.
What makes this recipe even more special is its simplicity. You’re starting with a boxed brownie mix (yes, really!), which means you’re already halfway to dessert heaven. Add some softened cream cheese and a quick dip in chocolate, and suddenly you’ve transformed humble brownies into decadent, bakery-worthy truffles. And if you have kids around, this is a great recipe to make together — especially the rolling and decorating part, which they always find fun.
Whether you’re a seasoned baker or just starting out, this recipe is practically foolproof. There’s no need for fancy tools or complicated steps. Just a few bowls, a baking pan, and your love for chocolate. And the best part? These truffles can be made ahead of time and stored in the fridge or freezer, so you’re always ready when a chocolate craving hits.
So if you’re looking for a dessert that’s rich, creamy, chocolatey, and guaranteed to disappear in minutes, you’re in for a treat. Let’s dive into why you’re going to love these little bites of joy.
Why You’ll Love This Fudgy Brownie Truffles Recipe
First of all, who doesn’t love brownies? The base of these truffles starts with a box of brownie mix, which means you’re guaranteed a rich, fudgy texture every time. But when you mix that baked brownie center with cream cheese, it becomes something even more indulgent — smooth, creamy, and utterly irresistible. That combination of dense brownie and tangy cream cheese gives these truffles a luxurious mouthfeel that melts in your mouth with every bite.
Another reason to love this recipe is how easy it is. You don’t need to be an experienced baker to pull this off. With just a few basic ingredients — brownie mix, cream cheese, chocolate wafers, and sprinkles — you can whip up a batch of these truffles in no time. And since you’re using a boxed mix, it cuts down on prep time while still delivering an incredibly satisfying result.
These truffles are also highly customizable. Want to mix in some crushed nuts or mini chocolate chips for extra texture? Go for it. Prefer white chocolate instead of dark? Totally your call. You can even swap the sprinkles for crushed candy canes during the holidays or drizzle with a bit of caramel for a richer finish.
Not to mention, they’re perfect for all occasions. You can serve them at birthday parties, bring them to baby showers, or gift them during holidays. They’re elegant enough for special events and casual enough for a late-night snack. Plus, their small size makes them easy to portion and perfect for sharing.
And finally, there’s the fun factor. Rolling the brownie mixture into balls and dipping them in chocolate feels like a hands-on dessert project that’s both satisfying and relaxing. Whether you’re baking solo, with a partner, or with kids, the process is engaging and the reward is, quite literally, sweet.
So whether you’re short on time, looking for a make-ahead treat, or just in the mood for something chocolatey and comforting, these brownie truffles are the answer.
Health Benefits of these Fudgy Brownie Truffles
While these brownie truffles are undoubtedly indulgent, they still offer a few surprising benefits — especially when enjoyed in moderation. First and foremost, the base of this treat is dark chocolate, which when used in moderation, has some well-documented health benefits. Dark chocolate is rich in antioxidants, particularly flavonoids, which can help support heart health by improving blood flow and reducing blood pressure.
Moreover, the cream cheese component contributes a bit of calcium and protein, both of which are essential for bone health and muscle maintenance. While full-fat cream cheese is used here for that ultra-creamy texture, it also provides some Vitamin A, an important nutrient for skin and eye health.
There’s also the emotional and mental wellness aspect to consider. Eating something sweet can be a small act of self-care, offering a moment of comfort during a hectic day. Chocolate is known to release feel-good chemicals like serotonin and endorphins, which can help elevate your mood and create a sense of relaxation.
If you’re looking to make this treat a bit lighter, you can easily modify it by using a reduced-fat cream cheese or swapping the chocolate coating for a thinner drizzle rather than a full dip. Portion control is also key. Because these truffles are individually sized, it’s easier to keep track of how much you’re enjoying — making them a smart choice when you want to indulge without going overboard.
Finally, these truffles can also be adapted to suit different dietary needs. With a few ingredient swaps, you can make them gluten-free, dairy-free, or lower in sugar. So whether you’re treating yourself or sharing with friends and family, there’s room to make this dessert work for everyone while still maintaining its delicious flavor and texture.
Preparation Time, Servings, and Nutritional Information
This recipe is designed to be both quick and convenient. From start to finish, you’re looking at about an hour of total time, most of which is passive — meaning you’re letting the brownies bake, cool, or set in the fridge.
Preparation Time:
- Mixing and baking: 30–35 minutes
- Cooling time: 20–30 minutes
- Mixing truffle base and shaping: 20 minutes
- Freezing and coating: 20–30 minutes
- Total time: Approximately 1 hour 30 minutes
Servings:
This recipe yields about 30–36 truffles, depending on how large you roll them. If you use a tablespoon-size scoop, you’ll get close to 32 uniform pieces.
Nutritional Information (Per Truffle):
- Calories: ~120
- Total Fat: 7g
- Saturated Fat: 4g
- Carbohydrates: 15g
- Sugar: 10g
- Protein: 1g
- Fiber: 1g
These values are approximate and can vary depending on the brand of brownie mix and chocolate wafers you use. For a slightly healthier version, you could use a reduced-sugar brownie mix or switch to dark chocolate wafers with a higher cacao content and less sugar.
Despite being a dessert, these brownie truffles offer a nice balance — rich enough to satisfy a craving with just one or two pieces, yet small enough to avoid overindulging.
Ingredients List of these Fudgy Brownie Truffles
Here’s everything you need to bring these delicious brownie truffles to life. The ingredient list is short, sweet, and full of pantry staples you likely already have or can easily find.
For the Brownie Base:
- 1 (18 oz) box brownie mix
- Ingredients listed on the box (usually includes oil, eggs, and water)
Why it matters:
Using a boxed brownie mix gives you a reliable, consistently fudgy texture. Choose one you love — whether it’s extra chocolaty, has chocolate chunks, or is made with real cocoa powder.
For the Truffle Filling:
- 8 oz full-fat cream cheese, softened to room temperature
Why it matters:
The cream cheese adds a luscious, tangy richness that balances the sweetness of the brownies. Full-fat is ideal for creaminess, but you can use reduced-fat if preferred.
For the Chocolate Coating:
- 3 cups chocolate melting wafers (dark, milk, or white — your choice)
Why it matters:
Chocolate wafers melt smoothly and set beautifully, giving your truffles that signature glossy, snappy shell. They also harden quickly, which makes decorating a breeze.
Optional Toppings:
- Sprinkles, crushed nuts, mini chocolate chips, or edible glitter
Why it matters:
Toppings add color, texture, and a fun, festive flair. You can match them to holidays, party themes, or simply your personal taste.
Having all your ingredients prepped and ready before starting ensures a smooth and stress-free cooking process. And don’t forget to line your baking sheet with parchment paper before freezing or coating — it makes cleanup so much easier.
Step-By-Step Cooking Instructions of these Fudgy Brownie Truffles
Now that you’ve got everything ready, it’s time to bring this dreamy dessert to life. Each step is simple and straightforward, so whether you’re baking for the first time or the hundredth, you’ll feel confident and in control from start to finish. Let’s walk through it together.
Step 1: Bake the Brownies
Start by preparing your brownie mix according to the package instructions. Most boxed mixes will require the addition of oil, water, and eggs. Preheat your oven to the temperature specified on the box, usually around 350°F (175°C).
- In a large mixing bowl, combine the brownie mix with the called-for ingredients.
- Stir until everything is just combined. Avoid overmixing, which can make the brownies tough.
- Pour the batter into a 9×13-inch baking pan that’s been greased or lined with parchment paper.
- Smooth the top with a spatula to ensure even baking.
- Bake for the amount of time listed on the box, typically 25 to 30 minutes. You’ll know the brownies are done when a toothpick inserted in the center comes out with a few moist crumbs.
Once baked, place the pan on a cooling rack and allow the brownies to cool completely. This step is crucial. If the brownies are even slightly warm, the cream cheese will melt during mixing, making the truffle base overly soft.
Step 2: Prepare the Truffle Base
After the brownies have cooled completely, it’s time to scoop out the soft center. For this recipe, we’re only using the moist, fudgy middle part of the brownie. The crusty edges can be set aside — or better yet, enjoyed as a chef’s treat.
- Using a spoon or clean hands, gently pull apart the center of the brownies and place them into a large mixing bowl.
- Avoid scraping too close to the edges, which may be too dry for rolling into truffles.
- Add the softened cream cheese to the bowl with the brownie pieces.
Using a hand mixer or stand mixer with a paddle attachment, beat the mixture until it’s completely smooth and well combined. This step takes a couple of minutes, and you’ll want to scrape down the sides of the bowl as needed to ensure all of the brownie bits are fully incorporated.
You should end up with a thick, rich, slightly sticky mixture — one that holds its shape easily when scooped.
Step 3: Roll into Balls
Once your brownie mixture is ready, it’s time to form it into truffle-sized portions.
- Line a large baking sheet with parchment paper for easy cleanup.
- Using a tablespoon or small cookie scoop, scoop out even portions of the mixture.
- Roll each portion gently between your palms to create smooth, round balls.
- Place each truffle on the prepared baking sheet, spacing them slightly apart.
Depending on how generous your scoops are, you should get about 30 to 36 truffles.
Next, transfer the baking sheet to the freezer and let the truffles chill for at least 30 minutes. This step helps firm up the truffles, making them much easier to dip in chocolate later. If you’re short on freezer space, you can refrigerate them for 1 to 2 hours instead, though freezing is more effective.
Step 4: Melt the Chocolate
Now for the most delicious part — the chocolate coating. For best results, use chocolate melting wafers, which are specifically designed for smooth melting and easy dipping.
- Place the chocolate wafers in a microwave-safe bowl.
- Heat in 20-second increments, stirring well after each burst, until the chocolate is fully melted and silky smooth.
You can also melt the chocolate using a double boiler if you prefer. Just be sure not to overheat it — burnt chocolate becomes thick and grainy, and there’s no saving it at that point.
If the chocolate seems too thick for dipping, you can add a tiny bit of neutral oil (like coconut or vegetable oil) to thin it out. Stir in just a teaspoon at a time until it reaches the right consistency.
Step 5: Dip and Decorate
With your truffles chilled and your chocolate melted, you’re ready to coat and decorate.
- Working quickly, use a fork to lower one truffle into the melted chocolate.
- Roll it gently to coat all sides.
- Lift it out, allowing any excess chocolate to drip off. Tap the fork gently on the edge of the bowl to remove extra coating.
- Place the coated truffle back on the parchment-lined baking sheet.
- Immediately top with sprinkles or other decorations before the chocolate sets.
Repeat with the remaining truffles. If the chocolate begins to thicken as you go, reheat it briefly in the microwave to restore its smoothness.
Step 6: Chill to Set
Once all of your truffles are coated and decorated, transfer the baking sheet to the refrigerator.
- Chill the truffles for 15 to 20 minutes, or until the chocolate has completely hardened.
- After the chocolate sets, you can transfer the truffles to an airtight container for storage.
And just like that, your brownie truffles are ready to enjoy. They’ll keep beautifully in the fridge for several days — though good luck making them last that long.
How to Serve these Fudgy Brownie Truffles
There are so many fun and creative ways to serve these brownie truffles, whether you’re preparing them for a casual gathering or a formal event.
- Party Platter: Arrange the truffles on a large platter or tiered dessert stand. Add fresh berries, mint leaves, or chocolate curls for an extra-elegant touch.
- Gift Box: Pack them in decorative boxes or jars with tissue paper for homemade holiday gifts or party favors.
- Mini Cupcake Liners: Place each truffle in a colorful paper liner for easy serving and a polished look.
- Dessert Buffet: Include them as part of a larger dessert spread with cookies, cupcakes, and fresh fruit.
- After-Dinner Treat: Serve chilled truffles on small plates with a drizzle of chocolate or a dusting of powdered sugar.
The beauty of these truffles is their versatility. Their small size and rich flavor make them the perfect two-bite indulgence for any setting.
Pairing Suggestions
These brownie truffles are rich and chocolaty, so pairing them with complementary flavors and textures enhances the overall experience.
Beverages
- Milk: A classic glass of cold milk is always a hit with chocolate desserts.
- Coffee or Espresso: The bitterness of coffee balances the sweetness of the truffles beautifully.
- Hot Chocolate: For a full-on chocolate experience, serve with a warm cup of cocoa topped with whipped cream.
- Iced Mocha or Latte: Refreshing and smooth, iced coffee drinks are a perfect match.
Side Treats
- Fresh Berries: Strawberries, raspberries, and blueberries offer a fresh, tart contrast to the richness.
- Mini Cookies: Add variety to your dessert spread with crispy cookies or biscotti.
- Vanilla Ice Cream: For a plated dessert, serve a brownie truffle alongside a scoop of creamy vanilla or caramel ice cream.
Pairing thoughtfully helps turn a simple dessert into an unforgettable experience, making each bite even more satisfying.
Storage, Freezing & Reheating Instructions of these Fudgy Brownie Truffles
One of the best things about these brownie truffles — besides how amazing they taste — is how well they keep. Whether you’re making them ahead for a party, prepping dessert for the week, or simply saving some for your future self, proper storage is key to keeping them fresh and delicious.
Storing in the Refrigerator
After the chocolate coating has fully set, you’ll want to store the truffles in an airtight container. Layer them with parchment or wax paper between each layer to prevent sticking.
- Refrigerator Storage: Store in the fridge for up to 7 days.
- Keep them cold until serving — especially if your home is warm — to prevent the chocolate from softening or melting.
Because they contain cream cheese, refrigeration is essential for food safety. Chilling also helps maintain their dense, chewy texture and keeps the chocolate shell nice and snappy.
Freezing for Later
These truffles freeze beautifully, making them an ideal make-ahead dessert. If you’re preparing them for holidays or special events, you can easily double the batch and freeze half.
Here’s how to do it right:
- After dipping and decorating the truffles, place the baking sheet in the freezer until the truffles are completely solid (about 1–2 hours).
- Transfer the frozen truffles to a freezer-safe zip-top bag or airtight container. Again, separate layers with parchment paper to avoid sticking.
- Label the container with the date and freeze for up to 3 months.
Thawing and Serving
To enjoy frozen truffles, simply remove the desired number from the freezer and place them in the fridge for a few hours, or on the counter for about 30 minutes.
- Important Tip: Avoid thawing them in direct sunlight or near heat sources, as this can cause condensation and make the chocolate coating spotty or sticky.
These truffles taste just as delicious cold from the fridge or thawed to room temperature. Some people even prefer them slightly chilled because of the contrast between the cold chocolate shell and the soft center.
Reheating?
This is a rare case where reheating is not necessary — and actually not recommended. These truffles are meant to be served cold or at room temp. Warming them up can cause the chocolate to melt and the filling to become too soft, which takes away from that delightful, dense texture.
So keep them cool, and they’ll stay just right.
Common Mistakes to Avoid in this Fudgy Brownie Truffles
Even a simple recipe like this can run into a few hiccups if you’re not careful. To ensure your brownie truffles turn out perfectly every time, here are the most common mistakes and how to avoid them.
1. Not Letting the Brownies Cool Completely
This is a crucial step. If your brownies are still warm when you mix them with cream cheese, the heat can cause the mixture to become too soft and greasy. That makes it harder to roll and harder to coat in chocolate. Be patient — let them cool fully before scooping.
2. Using the Edges of the Brownies
The chewy, crusty edges of brownies don’t blend as smoothly into the cream cheese. They also make the mixture harder to roll and less creamy. Stick to the soft center part of the brownie for best results. Feel free to enjoy the edges as a snack while you work.
3. Skipping the Chill Time
Freezing the truffles before dipping them is a game-changer. If they’re not chilled enough, they can fall apart when dipped into the warm chocolate. Always give them a good 30 minutes in the freezer first.
4. Overheating the Chocolate
Chocolate can be temperamental. If you overheat it, it becomes thick and grainy. Always melt in short bursts (20 seconds at a time) and stir frequently. If you’re using a double boiler, keep the heat low and don’t let any water get into the chocolate.
5. Waiting Too Long to Add Toppings
If you wait too long after dipping to sprinkle on decorations, the chocolate might start to set. This makes it harder for sprinkles or crushed nuts to stick. Always add your toppings immediately after dipping.
Being aware of these common missteps can help you avoid frustration and get picture-perfect results every time.
Pro Tips of these Fudgy Brownie Truffles
Want to take your brownie truffles from good to next-level amazing? These insider tips will help you elevate both the process and the final result.
1. Use a Cookie Scoop for Uniform Size
A tablespoon-sized cookie scoop makes it easy to get evenly sized truffles. This helps with both presentation and even chilling. Plus, it speeds up the rolling process and keeps things nice and tidy.
2. Experiment with Flavored Cream Cheese
While plain full-fat cream cheese gives you that classic richness, flavored cream cheeses can add a fun twist. Try using a chocolate, strawberry, or even pumpkin spice version for a seasonal spin.
3. Add a Hidden Center
Want to surprise your guests? Before rolling, stuff the center of each truffle with a mini marshmallow, a roasted hazelnut, or a small caramel square. It adds a fun element of surprise with each bite.
4. Use a Cooling Rack for Dipping
Place the dipped truffles on a wire rack set over a baking sheet. This allows excess chocolate to drip off and makes cleanup easier. It also helps avoid chocolate pooling at the base of each truffle.
5. Toast the Toppings
If you’re adding nuts, coconut flakes, or sesame seeds as toppings, give them a quick toast in the oven or on the stovetop first. This extra step boosts their flavor and adds another layer of texture to your truffles.
6. Flavor the Chocolate
Add a tiny splash of vanilla, coffee extract, or peppermint extract to your melted chocolate for a fun flavor twist. A little goes a long way, so start with just 1/4 teaspoon.
These tips are simple to implement but can make a huge difference in how your truffles look and taste.
Frequently Asked Questions (FAQs)
Can I use a homemade brownie recipe instead of a mix?
Absolutely! If you have a go-to homemade brownie recipe, feel free to use it. Just make sure it yields a fudgy texture rather than a cakey one, and stick to the same 9×13-inch pan size for best results.
What if I only have low-fat cream cheese?
You can use low-fat cream cheese, but keep in mind it may be slightly softer, which can affect the texture of the truffle base. If it feels too soft, chill the mixture for a bit before rolling.
Can I make these Fudgy Brownie Truffles gluten-free?
Yes, simply use a gluten-free brownie mix and check that your chocolate wafers and decorations are also gluten-free. The rest of the ingredients are naturally gluten-free.
Can I freeze the Fudgy Brownie Truffles before dipping them?
You sure can. If you’re short on time, freeze the rolled truffles and coat them in chocolate later. Just let them sit at room temp for 5–10 minutes before dipping so they don’t cause the chocolate to seize.
How long do the truffles last?
They’ll last up to a week in the fridge or up to three months in the freezer. Always store in an airtight container to keep them fresh.
Why is my truffle mixture too soft to roll?
This usually happens if the brownies were still warm or if the cream cheese was too soft. Pop the mixture in the fridge for 30 minutes to firm it up.
Can I make them without cream cheese?
Cream cheese is what gives these truffles their creamy texture, but you could try using a dairy-free cream cheese or even thick Greek yogurt (though the flavor and texture will be different).
What kind of chocolate is best?
Melting wafers are ideal because they melt easily and set quickly. You can also use high-quality chocolate bars chopped into pieces, but avoid chocolate chips — they don’t melt as smoothly.
Can I add mix-ins to the truffle base?
Definitely. Chopped nuts, mini chocolate chips, or crushed cookies can be mixed into the brownie-cream cheese base for added texture and flavor.
Do I have to use sprinkles?
Not at all. Sprinkles are just one fun option. Try crushed nuts, cocoa powder, drizzle with more chocolate, or leave them plain for a minimalist look.
Conclusion & Call to Action
And there you have it — a full guide to making the most decadent, rich, fudgy brownie truffles with cream cheese. From the warm scent of brownies baking in the oven to the final glossy dip in chocolate, every step of this recipe is packed with joy and flavor. Whether you’re making them for a birthday, a holiday, or just a cozy night in, these truffles are sure to become a favorite.
What I love most about this recipe is how flexible it is. You can dress it up or keep it simple, make it ahead or whip it up on a whim, and adapt it to suit any crowd. It’s the kind of dessert that feels fancy, even though it’s secretly easy and requires just a few ingredients.
If you give this recipe a try, I’d love to hear how it turns out. Snap a photo of your finished truffles and share them online — tag me so I can see your creations. Or leave a comment with your own twist or tip. Nothing makes me happier than seeing these treats bring a little sweetness into someone else’s day.
Now it’s your turn — head to the kitchen, turn up your favorite playlist, and start baking. Once you’ve had that first bite of fudgy, chocolatey goodness, you’ll be hooked. Happy truffle making!
Print
Fudgy Brownie Truffles with Cream Cheese – Easy Dessert
- Total Time: 1 hour 30 minutes (including chill time)
- Yield: 30–36 truffles 1x
- Diet: Vegetarian
Description
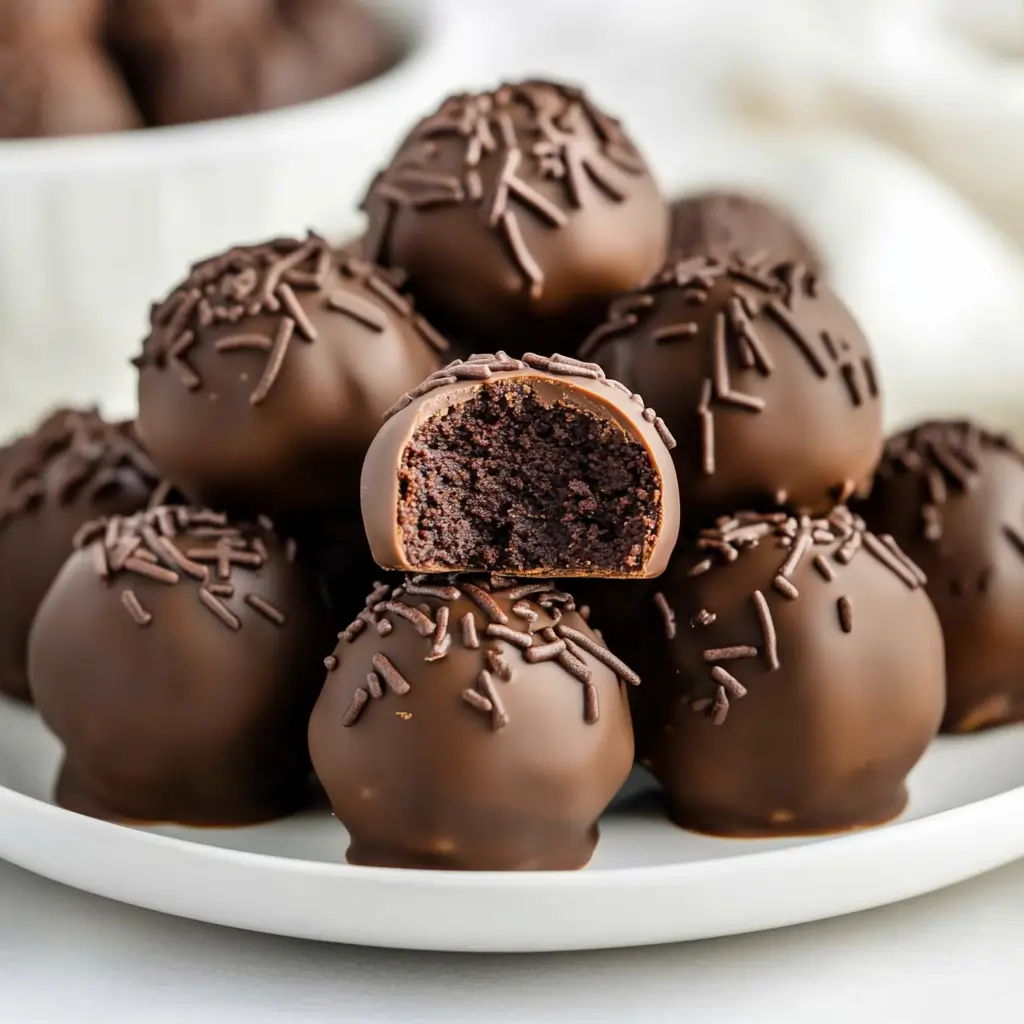
These rich, creamy brownie truffles are made with boxed brownies and cream cheese, then dipped in chocolate and topped with festive sprinkles. An easy, crowd-pleasing dessert perfect for parties or gifting.
Ingredients
-
1 (18 oz) box brownie mix (plus ingredients listed on box: oil, eggs, water)
-
8 oz full-fat cream cheese, softened
-
3 cups chocolate melting wafers
-
Sprinkles, for decorating
Instructions
-
Bake the brownies according to package directions in a 9×13-inch pan. Let cool completely.
-
Scoop out the soft center of the brownies and place in a bowl. Discard or snack on edges.
-
Add cream cheese and mix until fully combined and smooth.
-
Roll mixture into 1-tbsp balls. Place on a parchment-lined baking sheet and freeze for 30 minutes.
-
Melt chocolate wafers in microwave-safe bowl in 20-second intervals until smooth.
-
Dip each frozen truffle in melted chocolate, let excess drip off, and place back on the tray.
-
Top with sprinkles immediately and refrigerate for 15–20 minutes until set.
Notes
-
For smoother texture, use only the fudgy center of the brownies.
-
Truffles can be made in advance and frozen for up to 3 months.
-
Add crushed nuts, mini chocolate chips, or candy to customize.
- Prep Time: 20 minutes
- Cook Time: 30 minutes
- Category: Dessert
- Method: No-Bake
- Cuisine: American