
There’s something about spring that makes everything feel lighter, happier, and just a little more whimsical. Maybe it’s the blooming flowers or the sunshine peeking through after a long winter, but it’s the perfect time to bring a little color and sweetness into your kitchen. One of the easiest and most delightful ways to celebrate the season is with a batch of Spring Flower Pretzel Bites. These bite-sized treats are as cheerful as they are tasty—and the best part is, they’re ridiculously simple to make.
This recipe is one of those keep-it-in-your-back-pocket gems. It’s the kind of treat that looks impressive enough for a party, but doesn’t require any advanced baking skills, fancy equipment, or hours in the kitchen. If you’ve got a baking pan, some parchment paper, and a handful of ingredients, you’re ready to go. Whether you’re planning a spring baby shower, a garden-themed birthday party, or just need a quick and cute snack to brighten someone’s day, these flower pretzel bites check all the boxes.
The very first time I made these, I was prepping for a last-minute spring brunch with some friends. I wanted something colorful and fun that I could whip up in under 30 minutes, and these were an absolute hit. Not only did they disappear off the table in minutes, but everyone was asking for the recipe. Since then, I’ve made them for school bake sales, family gatherings, and even as sweet little gifts in cellophane bags with a ribbon. It’s a recipe that’s become a seasonal favorite in my home, and I know it will be in yours too.
So let’s get into this simple, fun, and flavorful spring treat. Whether you’re making them with kids, prepping them ahead for a party, or just sneaking a few for yourself with an afternoon cup of tea, these flower pretzel bites are guaranteed to bring a little sunshine to your snack table.
Why You’ll Love This Recipe
There are a hundred reasons to fall in love with this sweet and salty recipe, but let’s start with the obvious: it’s adorable, easy, and incredibly satisfying. If you’re someone who loves snacks that hit both the sweet and savory notes in perfect balance, you’ll appreciate how the crisp, salty pretzel base pairs with the creamy, melty candy and the pop of chocolate from the M&M’s. Every bite gives you a satisfying crunch and just the right amount of sweetness.
But beyond the flavor, the visual appeal is what really makes these treats stand out. The way the M&M’s are arranged like little flower petals makes them perfect for spring holidays, garden parties, Easter baskets, or really any event that could use a touch of fun and color. They’re the kind of snack that makes people smile just looking at them.
Another reason you’ll love this recipe is its simplicity. You don’t need any baking skills or specialty ingredients. Everything can be found at your local grocery store, and the prep time is minimal. You don’t even need a mixer or a stovetop—just an oven and a few basic tools. This makes it an ideal recipe for getting kids involved in the kitchen. They’ll have a blast placing the M&M’s to create little flowers, and it’s a great way to make memories while making something sweet.
These pretzel bites are also wonderfully versatile. You can change up the colors for different seasons or events—think red and green for winter holidays, orange and black for Halloween, or pastels for baby showers. The recipe is easily scalable too, so whether you’re making a dozen for your family or five trays for a bake sale, it works every time.
In short, you’ll love this recipe because it’s quick, easy, adorable, and delicious. It’s one of those rare combinations that checks all the boxes for a crowd-pleasing, low-effort, high-impact snack.
Health Benefits
While Spring Flower Pretzel Bites are definitely a treat, that doesn’t mean they’re entirely without some redeeming qualities. First off, the portion size is small. Each bite is just a little burst of sweetness and saltiness, so you can satisfy your sweet tooth without going overboard. If you’re someone who likes to enjoy treats in moderation, these are a great way to indulge without the guilt.
Secondly, the candy melt used in this recipe tends to be lower in fat compared to traditional chocolate, especially when using white candy melts designed specifically for baking and coating. They give you that creamy sweetness but often contain less sugar and fat per serving than full-on chocolate bars or frosted desserts.
The pretzel base, while salty, provides a crunchy, satisfying texture and includes some iron and B vitamins from the wheat flour. It’s a small boost, but when you’re comparing these to other desserts loaded with butter, cream, and sugar, it’s a lighter option overall.
Additionally, M&M’s—while candy—contain milk solids and small amounts of calcium and protein. Of course, we’re not pretending these are a health food, but in the grand scheme of desserts, they’re relatively balanced when enjoyed in moderation. And when compared to frosted cupcakes, deep-fried pastries, or heavily iced cookies, these little bites are a friendlier option for your body.
Moreover, the emotional health benefits of this recipe shouldn’t be overlooked. Making and sharing food—especially fun, creative snacks like these—brings people together. Whether you’re spending time in the kitchen with kids or delivering a plate of treats to a friend, this recipe has a way of spreading joy. And happiness, as we all know, is one of the best ingredients you can add to any dish.
So while these aren’t your go-to for daily nutrients, they’re a feel-good treat in more ways than one. A little sweetness, a little crunch, a whole lot of happiness.
Preparation Time, Servings, and Nutritional Information
Let’s talk about the practical side of this recipe—because one of its best features is how easy and efficient it is to make. These treats are incredibly quick to prepare, and you’ll be amazed at how much fun you can have in so little time.
Preparation Time: The entire process from start to finish takes about 25 minutes. You’ll spend roughly 10 minutes setting everything up—lining your baking pan, placing the pretzels and candy melts, and getting your M&M’s ready. Baking takes just 3 minutes, and after that, it’s all about decorating and chilling. You’ll need about 10–12 minutes for decorating (depending on how precise you want to be) and 15 minutes in the fridge to set.
Total Time: 25 minutes
Active Prep Time: 10–12 minutes
Bake Time: 3 minutes
Cooling Time: 10–15 minutes
Yield: Approximately 40–50 pretzel bites (depending on pan size and ingredient quantity)
Now for the nutritional breakdown. Keep in mind that this is an estimate and will vary based on the brand of ingredients you use:
Serving Size: 2 pretzel bites
Calories per Serving: 110
Carbohydrates: 16g
Sugars: 10g
Fat: 4g
Saturated Fat: 2.5g
Protein: 1g
Sodium: 120mg
Considering how delicious and satisfying these are, that’s a pretty reasonable nutritional profile for a treat. You can also adjust the serving size to fit your needs. Just one or two bites might be all you need to satisfy that sweet-and-salty craving.
And because they’re bite-sized and individually portioned, they’re also ideal for events where you want to offer a variety of snacks without overwhelming your guests with large, heavy desserts. It’s the kind of snack you can pop on a buffet table or pack into treat bags without a second thought.
Ingredients List
One of the best parts of this recipe is how simple and accessible the ingredients are. You can find everything at a standard grocery store, and you don’t need any specialty items or advanced prep work. That means you can make these on a whim or pick up the ingredients during your regular shopping trip. Here’s what you’ll need:
Waffle Pretzels
These are the base of your flower bites. Waffle pretzels are flat and grid-like, which makes them perfect for holding the candy melts and giving you a stable surface for decorating. Their salty crunch balances perfectly with the sweet toppings. If you can’t find waffle pretzels, square pretzel snaps will also work.
Wilton White Candy Melts
These are essential for creating the creamy, smooth center that holds everything together. Wilton brand melts beautifully and consistently, but you can substitute with another brand of white candy coating if necessary. Make sure they’re the flat, disc-style melts that soften evenly in the oven.
Pastel M&M’s (or Any Variety)
The M&M’s create the “flower” effect and add that fun pop of color. Pastel colors are perfect for spring, but feel free to get creative with your palette. Red, white, and blue work great for patriotic holidays, while orange and purple are ideal for Halloween. Mini M&M’s can work in a pinch, but full-size ones make the most visual impact.
Optional but helpful:
Extra Candy Melts in case a few crack or melt unevenly.
Food Tweezers for precise M&M placement (especially helpful if little hands are helping you decorate).
Cooking Spray (a light mist can help keep parchment paper in place).
Everything here is shelf-stable and can be kept in your pantry until you’re ready to use them. No refrigeration required, and no perishables to worry about. It doesn’t get more convenient than that.
Step-By-Step Cooking Instructions
Now that you’ve got your ingredients and tools ready, it’s time to get cooking—or in this case, melting and decorating. This is where the fun really starts. Even if you’re not a confident cook, you can totally nail this recipe. The steps are straightforward, and I’ll guide you through every detail so you feel completely comfortable from start to finish. Let’s walk through each part of the process so your Spring Flower Pretzel Bites come out picture-perfect.
Step 1: Preheat Your Oven
Begin by preheating your oven to 250°F (120°C). This low temperature is perfect for gently softening the candy melts without fully melting them into a puddle. While your oven is heating, you can move on to the next step.
Step 2: Line Your Baking Pan
Grab a standard baking sheet and line it with parchment paper. This step makes cleanup so much easier and also prevents any sticking. If your parchment paper curls at the edges, you can spritz a tiny bit of cooking spray on the pan first to help it stay flat.
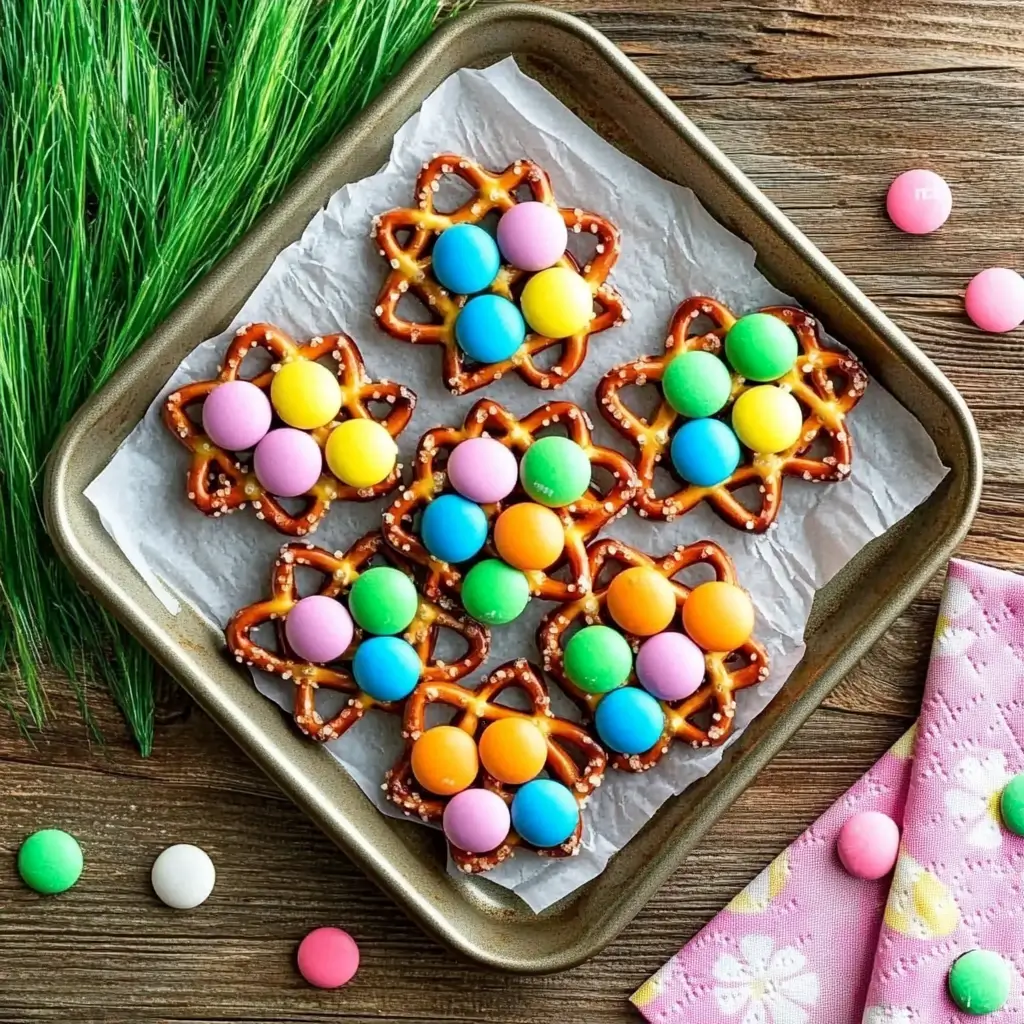
Step 3: Arrange the Waffle Pretzels
Place the waffle pretzels in a single layer across the parchment-lined baking sheet. You’ll want to leave just a little bit of space between each one so they’re not touching. This allows the candy melts to spread just a bit and makes decorating easier later on.
Step 4: Add the White Candy Melts
Now, carefully place one white candy melt on top of each pretzel. Try to center it as best you can. It doesn’t have to be perfect, but a centered melt will give you more even edges and a better “flower” shape when you add the M&M’s later.
Step 5: Bake to Soften the Candy Melts
Slide your baking sheet into the preheated oven. Set a timer for exactly 3 minutes. That’s all the time you need for the candy melts to soften just enough for decorating. You don’t want them to become completely liquid—just soft enough that an M&M can be gently pressed into them without cracking. Keep an eye on them during this step. Ovens can vary, so if you notice the melts start to get glossy and slightly lose their shape, they’re ready.
Step 6: Remove from the Oven and Work Quickly
Once the candy melts are softened, take the tray out of the oven and place it on a heat-safe surface. Now’s the time to work fast—but don’t panic. You have a good few minutes before the melts start to firm up again.
Step 7: Place the Center M&M
Begin by placing one M&M in the center of each candy melt. This will be the center of your flower. You can mix and match colors or use the same color for each one depending on your aesthetic. Press the M&M down gently so it sticks into the melted candy, but don’t press too hard or you might crack the candy or cause it to ooze over the sides.
Step 8: Add the Petal M&M’s
Next, take six additional M&M’s and arrange them around the center M&M to create flower petals. Space them evenly in a circle so they look like a daisy or sunflower. Again, press them lightly into the softened candy so they adhere. This part is especially fun for kids—they love picking out their color combinations and building each little flower.
Step 9: Let the Pretzel Bites Set
Once all the flowers are decorated, move the tray into the fridge. Chill them for about 15 minutes, or until the candy has firmed up completely. You’ll know they’re ready when the M&M’s are securely set in the candy and everything feels firm to the touch.
Step 10: Serve or Store
After chilling, your Spring Flower Pretzel Bites are ready to enjoy. You can serve them immediately or transfer them to an airtight container for later. They stay fresh for up to a week at room temperature, making them perfect for prepping ahead of time.
Extra Tips During Cooking
- If your candy melts look dry or begin to crack after baking, they may have been in the oven too long. Reduce the time slightly next batch.
- Want extra precision with M&M placement? Use clean tweezers or kitchen tongs.
- For a different look, try using mini M&M’s as petals around a regular-sized one, or create a rainbow effect with a variety of colors.
- If the candy sets too quickly before you’re finished decorating, you can pop a few pretzels back in the oven for 30 seconds to re-soften them. Just be cautious not to overheat.
This is one of those recipes where your creativity can shine. Don’t be afraid to personalize each flower, make themed batches for holidays, or let little helpers go wild with the colors. The whole process is relaxing, fun, and surprisingly therapeutic.
How to Serve
Spring Flower Pretzel Bites are as versatile to serve as they are to make. Their small size and bright appearance make them perfect for just about any kind of event, and they’re easy to transport and display.
First and foremost, they’re perfect for parties. Serve them on a white or pastel platter to make the colors pop, or scatter them across a tiered dessert tray with other spring-themed snacks. They also look adorable in cupcake liners—this makes them easy for guests to grab and adds a festive touch. For a baby shower or garden party, you can even place them inside mini mason jars or treat bags as part of a party favor.
These pretzel bites also make a sweet addition to lunch boxes or picnic baskets. Because they don’t melt easily once set, they travel well. Tuck a few into a bento box, pair them with fresh fruit, and you’ve got a cheerful little treat that’s perfect for kids and adults alike.
Want to make someone’s day? Fill a small box or tin with these flower bites and gift them to a neighbor, teacher, or coworker. They’re simple, thoughtful, and way more fun than store-bought candy. You can even personalize the colors based on the occasion—think red, pink, and white for Valentine’s Day, or green and gold for a spring St. Patrick’s Day celebration.
For casual gatherings or movie nights, set out a bowl of these on the coffee table. They’re just the right size to snack on without making a mess, and people love the mix of sweet and salty. You’ll probably notice that the bowl empties faster than you expected, so consider making a double batch if you’re serving a crowd.
They’re also a great addition to dessert charcuterie boards. Pair them with chocolate-covered strawberries, mini cupcakes, and fruit skewers for a colorful and fun spread.
No matter how you serve them, these treats are guaranteed to brighten the room and bring smiles all around.
Pairing Suggestions
Now that your Spring Flower Pretzel Bites are chilled, set, and ready to go, let’s talk about how to pair them for an even more memorable snacking or dessert experience. These little bites are incredibly versatile, so they can be enjoyed in a variety of ways depending on the occasion and what else is on your table.
Let’s start with beverages, because a sweet treat is always more fun with the perfect drink to go along with it. For something refreshing and light, serve these pretzel bites with a pitcher of fresh lemonade or a fruity iced tea. A hibiscus tea, for example, brings floral notes that complement the bright, candy-coated crunch of the M&M’s. If you’re preparing a more kid-friendly setup, fruit punch or even a light strawberry smoothie makes a fun and colorful drink option that kids will absolutely love.
For a more grown-up gathering like a brunch or spring garden party, these snacks go beautifully with mocktails such as sparkling peach juice or a mint-lime spritzer. The sweet-and-salty combo of the pretzel bites plays nicely with fizzy, citrusy drinks, making them the perfect nibble to accompany a sunny outdoor celebration.
Let’s move on to food pairings. Because these treats are sweet and salty, they sit happily next to both savory and sugary snacks. Try pairing them with fresh fruit platters—think sliced kiwi, strawberries, pineapple, and melon—for a refreshing contrast. The fruit brightens things up and brings in a fresh element to balance the richer candy.
They also pair beautifully with other spring-themed desserts. Set them out with lemon bars, vanilla cupcakes with pastel sprinkles, or sugar cookies shaped like butterflies and bunnies. On a dessert table, they add an eye-catching pop of color and bring a unique texture that contrasts with soft, baked sweets.
And if you’re planning a themed celebration—like a baby shower, Easter brunch, or birthday tea party—you can create a whole dessert spread around the color palette of your flower bites. Use complementary tones in your napkins, tablecloths, and cake decorations to tie everything together.
You can also keep things really simple. A cozy pairing would be these pretzel bites served with a warm mug of herbal tea or a cup of hot cocoa on a breezy spring day. It’s all about creating that comforting balance between the creamy, sweet candy and a warm drink in your hands.
However you pair them, these little bites will play nicely with just about anything you have planned. Their cheerful appearance and balanced flavors make them a welcome guest at any table.
Storage, Freezing & Reheating Instructions
One of the many reasons to love this recipe is how well these Spring Flower Pretzel Bites store. Whether you’re making them ahead for a party or just want to keep a stash for late-night snacking, storing them properly will help maintain their crisp texture and bright, cheerful appearance.
Let’s start with short-term storage. Once the bites are completely set and firm, transfer them from the baking tray into an airtight container. You can use a plastic food storage container or a resealable zip-top bag—just make sure to handle them gently so the candy flowers stay intact. If you’re stacking them, place a sheet of parchment or wax paper between each layer to prevent sticking or smudging.
These will stay fresh at room temperature for up to one week. Store them in a cool, dry place away from direct sunlight or heat sources. Avoid the refrigerator unless your kitchen is especially warm, as the moisture in the fridge can sometimes cause the candy coating to sweat or become tacky.
If you’re planning ahead or want to make a big batch and save some for later, freezing is totally an option. To freeze, lay the pretzel bites in a single layer on a baking sheet and place in the freezer for about 30 minutes, or until firm. Then transfer them to a freezer-safe container or bag, separating layers with parchment if needed. They can be stored in the freezer for up to 3 months.
When you’re ready to serve them, remove the container from the freezer and let them come to room temperature before opening the lid. This helps prevent condensation from forming on the candy surface. Once they’ve warmed up, they’ll taste just as delicious as the day you made them.
As for reheating, these treats really don’t require it. They’re meant to be eaten at room temperature or slightly chilled. If you somehow find yourself needing to soften a frozen or overly firm candy melt (for decorating or repurposing), you can pop a few in the oven for about 30 seconds at 250°F. But generally, once they’re made, they’re ready to eat right out of the container.
With such easy storage and long shelf life, this is a fantastic recipe to make ahead—whether you’re prepping for a busy week or stocking up for multiple springtime celebrations.
Common Mistakes to Avoid
Even though this recipe is super simple and beginner-friendly, there are still a few common mistakes that can happen along the way. Let’s walk through the most frequent ones and how to avoid them so your pretzel bites turn out perfectly every single time.
Overheating the Candy Melts
This is probably the most common pitfall. If you leave the candy melts in the oven too long, they’ll become runny or may start to burn around the edges. Remember: you’re only softening them for 3 minutes at 250°F. Any longer and the candy could lose its shape, making it harder to stick the M&M’s in place. If your oven runs hot, check them at the 2-minute mark to be safe.
Pressing Too Hard When Adding M&M’s
It’s tempting to press the candies in firmly, but that can cause the candy melt to spread too far or crack. Use just enough pressure to nestle them into the softened surface. If you press lightly, everything will stay neat and the structure will hold beautifully as it sets.
Not Working Quickly Enough
Once the tray is out of the oven, the candy melts will begin to firm up fairly quickly. It’s important to have your M&M’s sorted and ready to go before baking. Set them out in little bowls grouped by color, or prep your flower patterns ahead of time so you can decorate efficiently while the candy is soft.
Using the Wrong Type of Pretzels
Waffle-style pretzels (also called pretzel snaps) work best for this recipe because they offer a flat, even surface. If you use traditional twist pretzels, the candy melts might slide off or settle unevenly, making decorating difficult. Stick with waffle pretzels for the best results.
Skipping the Chill Step
Letting the decorated pretzel bites set in the fridge ensures that the candies stick and the structure holds. Skipping this step might result in a sticky, unstable mess—especially if your kitchen is warm. A quick 15-minute chill makes a big difference in texture and presentation.
Avoiding these common mistakes will give you more confidence in the kitchen and help you produce the prettiest, tastiest flower bites possible.
Pro Tips
Even though this Spring Flower Pretzel Bites recipe is wonderfully simple, there are always a few pro tips that can take your Spring Flower Pretzel Bites from “fun and tasty” to “absolutely flawless.” Whether you’re a seasoned baker or trying this for the first time, these helpful tricks will make the process smoother and your results even more impressive.
1. Sort Your M&M’s by Color Before You Start
This might sound a little extra, but trust me—it makes decorating so much easier. Before you even preheat your oven, take a few minutes to sort your M&M’s by color into small bowls. This allows you to quickly grab the exact shades you want for each flower. Not only does it speed up your decorating time while the melts are soft, but it also makes the whole process more fun and organized.
2. Use Food Tweezers for Precise Placement
Especially if you’re going for a neat, uniform look, using food-safe tweezers to place the M&M’s can help a ton. This is particularly handy for adults making these for events or gifts, where presentation matters. Tweezers give you better control and help prevent smudging the soft candy melt with your fingers.
3. Line Your Baking Tray Carefully
Parchment paper is key here. Not only does it keep your pretzel bites from sticking, but it also makes cleanup a breeze. You can even lightly mist the tray underneath the parchment to keep it from curling up during baking. If you don’t have parchment, a silicone baking mat is a great reusable alternative.
4. Chill the Tray Before Storing to Lock in Freshness
After decorating, be sure to chill the tray in the fridge until the candy is completely set. Once firm, transfer the pretzel bites to an airtight container. This step helps ensure that the candies stay intact and the texture holds up, especially if you’re storing them for a few days or giving them away.
5. Try Seasonal Color Combos
Want to switch things up? Experiment with color themes for different holidays or events. For example:
- Use red, white, and blue M&M’s for the Fourth of July.
- Orange, purple, and green for Halloween.
- Red and pink for Valentine’s Day.
- Pastels for spring or Easter.
By simply changing the candy colors, you can repurpose this same recipe for all kinds of celebrations.
6. Make a Decorating Station for Kids
If you’re making these with little ones, set up a mini decorating station at your kitchen table. Lay down a plastic tablecloth or sheet of parchment, give each child their own tray, and let them choose their flower designs. It’s a great way to keep them entertained and involved in the kitchen.
7. Use a Mini Muffin Tin to Portion Treat Bags
If you’re giving these as gifts or party favors, use a mini muffin tin to organize and portion them while you work. This helps keep your batches consistent and makes bagging or boxing much easier later on.
These simple but effective pro tips will make your experience more enjoyable, efficient, and creative. Once you’ve made these once or twice, you’ll be adding your own favorite tricks too.
Frequently Asked Questions (FAQs)
Can I make these Spring Flower Pretzel Bites ahead of time?
Absolutely! One of the best things about these pretzel bites is how well they hold up. You can make them up to a week in advance and store them in an airtight container at room temperature. Just make sure they’re kept in a cool, dry place to prevent any melting or stickiness.
What if I can’t find Wilton candy melts?
Wilton is a popular and reliable brand, but you can definitely use any white candy melts or candy coating discs you can find. Just make sure they are designed for melting—avoid using standard white chocolate chips, as those don’t melt and set the same way.
Can I use mini M&M’s instead?
You can, but the look will be slightly different. Mini M&M’s work best if you’re making smaller pretzel bites or if you want to create more delicate-looking flowers. Full-size M&M’s give a bolder, more colorful look, which is great for parties and gifts.
Do I need to refrigerate the pretzel bites?
Only briefly. You’ll want to refrigerate them right after decorating so the candy melts can firm up completely. After that, you can store them at room temperature. Avoid humid environments, as moisture can make the candy sticky.
Can I use different types of candy for decorating?
Definitely. While M&M’s are the classic choice for this recipe, you can also use Skittles, jellybeans, or even small gumdrops—just be aware that some candies may not adhere as well or might affect storage time. Always test a few before doing a large batch.
What if I don’t have parchment paper?
A silicone baking mat is a great substitute. If you don’t have either, lightly grease your baking tray with cooking spray, though this can sometimes affect the shape of the candy once melted. Parchment paper truly works best here.
Do the pretzels stay crunchy after baking?
Yes! The low baking temperature means the pretzels don’t soften. They keep their crisp, salty bite, which pairs so well with the sweet, creamy candy on top.
Can I freeze these Spring Flower Pretzel Bites for later?
Yes. Flash-freeze them on a baking tray for 30 minutes, then transfer to a freezer-safe container. Thaw at room temperature in a sealed container to prevent condensation from forming on the candy coating.
How long do these last?
At room temperature, they stay fresh for about a week. In the freezer, they’ll keep well for up to three months. Just make sure they’re stored in a cool, dry environment to prevent any melting or softening.
Can I make these for different holidays?
Absolutely! These are one of the most versatile treats out there. Use different colored candies to match the season or celebration. They’re a hit at everything from baby showers to Halloween parties and everything in between.
Conclusion & Call to Action
There’s something incredibly satisfying about a recipe that’s both fun to make and impossible to mess up. Spring Flower Pretzel Bites check every box: they’re cheerful, colorful, quick to make, and beyond delicious. With only a handful of ingredients and a few easy steps, you can create a snack that looks like it came straight from a bakery window but only takes 25 minutes from start to finish.
Whether you’re making these for a festive spring brunch, a school bake sale, or just because your kitchen could use a little more sunshine, this recipe delivers on all fronts. And let’s not forget how much joy they bring to the table—literally. Watching someone’s face light up when they see (and then taste) these tiny edible flowers is one of those small but memorable pleasures.
I hope this recipe brings as much joy to your home as it has to mine. It’s become a seasonal favorite in our family, and I’ve loved sharing it with friends and neighbors over the years. The best part is, no matter how many times I make them, they never fail to bring a smile—whether I’m giving them as gifts or just sneaking one with my afternoon tea.
Now it’s your turn! Head into your kitchen, gather your ingredients, and give these Spring Flower Pretzel Bites a try. Don’t be afraid to get creative with your colors and patterns—every flower you make is a tiny work of art. And if you do whip up a batch, I’d love to hear how they turned out. Feel free to share your creations, tag me if you’re sharing photos online, or leave a comment letting me know how it went.
Happy snacking, happy decorating, and here’s to a season full of colorful, delicious moments.
Print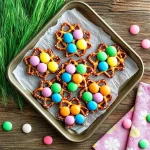
Spring Flower Pretzel Bites Recipe – Easy No-Bake Easter Snack
- Total Time: 25 minutes
- Yield: 40–50 bites
- Diet: Vegetarian
Description
Bright, colorful, and irresistibly tasty, these Spring Flower Pretzel Bites are the perfect no-bake treat for Easter, baby showers, and spring gatherings. Made with waffle pretzels, white candy melts, and pastel M&M’s, they’re easy, fast, and fun for all ages.
Ingredients
-
Waffle pretzels (1 bag)
-
Wilton white candy melts (1 bag)
-
Pastel M&M’s or any colorful variety (1–2 cups)
Instructions
-
Preheat oven to 250°F (120°C).
-
Line a baking pan with parchment paper.
-
Arrange waffle pretzels in a single layer.
-
Top each pretzel with a white candy melt.
-
Bake for 3 minutes, until soft but not runny.
-
Remove from oven and press 1 M&M in the center of each melt.
-
Surround with 6 M&M’s to form petals.
-
Chill in the fridge for 15 minutes or until set.
-
Serve and enjoy
Notes
-
Work quickly after baking before the candy sets.
-
Store in a cool, dry place for up to 1 week.
-
Perfect for kids to help decorate.
-
Easily customizable for any holiday or party theme.
- Prep Time: 10 minutes
- Cook Time: 3 minutes
- Category: Dessert, Snack
- Method: No-Bake / Oven-soften
- Cuisine: American