

There’s just something about cheesecake that makes people’s eyes light up. It doesn’t matter if it’s a full-sized baked version or a no-bake style—cheesecake is always a crowd-pleaser. And when it’s made mini, it becomes not just delicious but also adorable. Enter these Mini Oreo Cheesecake Cupcakes. They’re creamy, rich, and full of cookies-and-cream goodness with just the right touch of crunch from the classic Oreo cookie crust.
The very first time I made these, I was preparing dessert for a friend’s birthday party. I needed something easy to make ahead of time, easy to transport, and guaranteed to impress. I was short on time and definitely didn’t want to deal with slicing and plating a traditional cheesecake. So I went mini. And let me tell you—these disappeared faster than anything else on the dessert table.
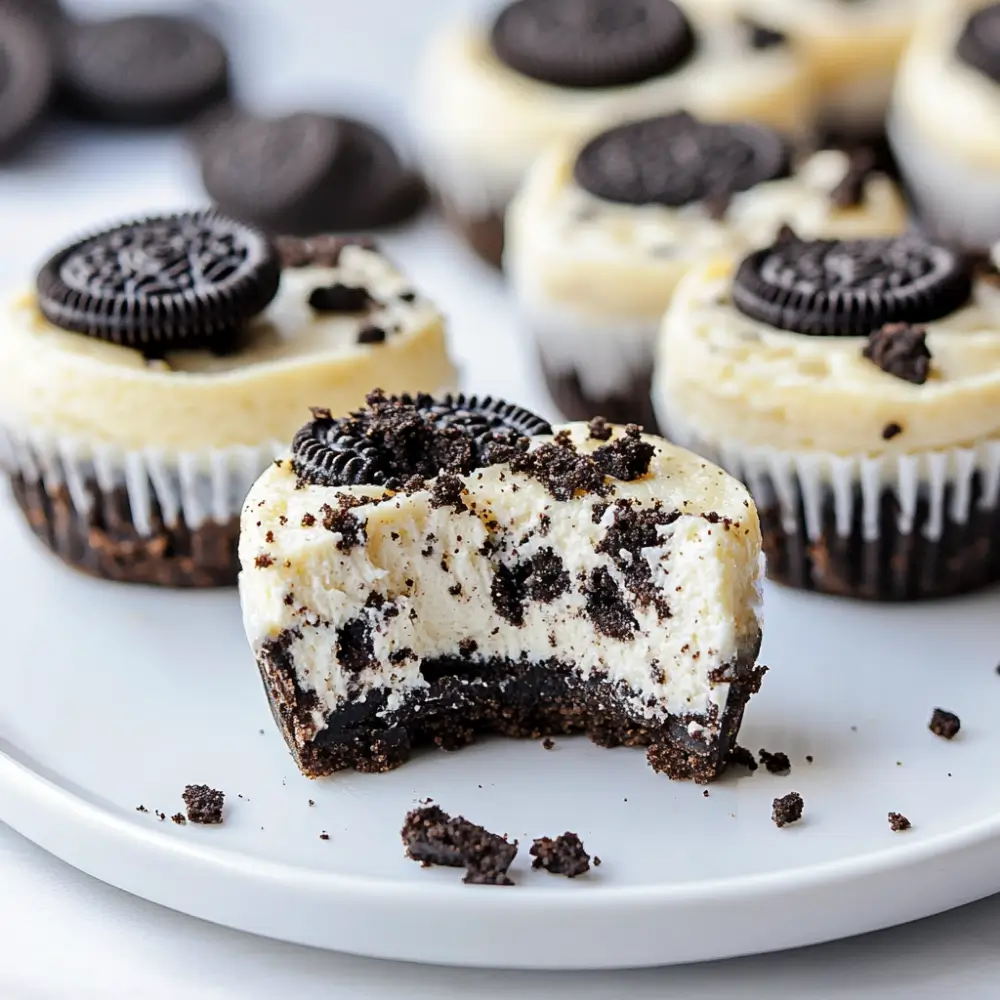
What makes them extra special is how simple they are. The crust? Just one whole Oreo, no need to crush or press anything. The filling? It’s a smooth, dreamy mixture of cream cheese, sugar, eggs, and vanilla. And the magic touch? A mix of Oreo cookie crumbs folded right into the batter so every bite is speckled with crunchy chocolate cookie bits. They bake quickly, chill easily, and are absolutely irresistible straight from the fridge.
Whether you’re prepping for a family gathering, a potluck, a holiday party, or just need a midweek treat, these mini Oreo cheesecakes are your answer. They’re low-stress, high-impact, and they make people feel like you went all out—even though they’re incredibly simple to whip up. Ready to fall in love with your new favorite dessert? Let’s dive in.
Why You’ll Love This Mini Oreo Cheesecake Recipe
There are so many reasons these Mini Oreo Cheesecake Cupcakes will become a staple in your dessert lineup. First and foremost, they are incredibly easy to make. With just a few simple ingredients and a straightforward process, this recipe is practically foolproof. You don’t need a water bath, you don’t need to make a crust from scratch, and you don’t need any special baking equipment beyond a standard muffin tin.
Another reason to love these cupcakes is that they’re made with ingredients you likely already have in your kitchen. Cream cheese, sugar, eggs, vanilla, and Oreos—basic pantry and fridge staples that come together like magic in this recipe. Plus, because the crust is made with whole Oreos placed directly into muffin liners, there’s zero fuss when it comes to preparing the base. It’s literally a one-step crust.
The texture of these little cheesecakes is another major win. The filling is smooth, creamy, and rich, with little bites of Oreo crumbs adding a bit of texture in every mouthful. The cookie on the bottom softens just enough during baking to become a chewy, chocolatey base that perfectly complements the creamy filling.
These Mini Oreo Cheesecake are also incredibly versatile. They’re perfect for birthdays, picnics, school events, office parties, or any time you need a bite-sized dessert. They can be dressed up with whipped cream and extra crushed Oreos, or served as-is for a more understated (but no less delicious) treat.
And finally, kids and adults alike absolutely love them. They’re portion-controlled, mess-free, and totally addictive. Once you make these once, you’ll find yourself coming back to this recipe over and over again. Whether you’re baking with kids, trying your hand at cheesecake for the first time, or just want a reliable treat in your recipe box, this one is a keeper.
Health Benefits of this Mini Oreo Cheesecake
While these Oreo cheesecake cupcakes definitely fall into the indulgent dessert category, they do come with a few surprising benefits—especially when enjoyed in moderation. The key is balance, and even sweet treats can offer something valuable when made with real, quality ingredients.
First off, cream cheese is the main component in the filling. It’s rich in calcium, which supports bone health, and it also contains small amounts of vitamin A, which is important for maintaining good vision, immune function, and skin health. When you use full-fat cream cheese, you also get a dose of healthy fats that help keep you feeling satisfied.
Eggs are another ingredient that contribute to the overall nutritional value of this dessert. They provide high-quality protein, along with essential nutrients like choline, which supports brain health, and vitamin D, which helps regulate calcium absorption and supports the immune system.
By making mini cheesecakes rather than a full-sized one, you’re also practicing portion control. Each cupcake is a pre-measured serving, which makes it easier to enjoy a sweet treat without going overboard. This can be especially helpful for those trying to maintain balance in their diet.
Another point in favor of these cupcakes is that they’re baked, not fried, and they don’t rely on heavy frostings or layers of added sugar. The sweetness comes primarily from the Oreos and a modest amount of granulated sugar in the filling. That means each bite is sweet and satisfying without being overly sugary.
Of course, they’re not a substitute for a plate of vegetables or a serving of fruit—but in the context of an overall healthy lifestyle, a small, satisfying dessert like this can help curb cravings and prevent overindulgence in other areas. And because they’re made from scratch, you have full control over the ingredients, with the option to use organic cream cheese, pasture-raised eggs, or even reduced-sugar Oreos if you prefer.
Preparation Time, Servings, and Nutritional Information
One of the best things about these mini Oreo cheesecake cupcakes is how quick and manageable they are from start to finish. You don’t need hours of prep time, and you definitely don’t need to be a professional baker to pull this off. Here’s what you can expect in terms of time and yield.
Total Preparation Time
Preparation: 15 minutes
Baking: 14–16 minutes
Cooling: 30 minutes
Chilling: Minimum 2 hours
Total Time: Approximately 3 hours including chilling time
Servings
This recipe makes 16 individual mini cheesecakes. That’s perfect for a small gathering or to keep a stash in the fridge for sweet snacking throughout the week. You can also easily double the recipe for larger events—just use two muffin pans and plan for a few extra minutes of prep.
Nutritional Information (Per Serving)
Calories: Approximately 215
Protein: 3.5g
Fat: 13g
Carbohydrates: 20g
Sugar: 14g
Fiber: 0.5g
Calcium: 50mg
Iron: 0.6mg
Keep in mind that these values are estimates and can vary depending on the exact brand of ingredients you use. If you’re looking to lighten things up, you can opt for light cream cheese, reduce the sugar slightly, or experiment with reduced-fat Oreos.
All in all, these cheesecakes offer a satisfying portion of dessert without the heaviness of a full slice, and they fit beautifully into a balanced approach to eating. Whether you’re making them for yourself or a crowd, you’ll love how approachable and quick this recipe is.
Ingredients List
Let’s talk ingredients. The beauty of this recipe lies in its simplicity—you don’t need anything fancy, just a few everyday ingredients that come together in the most delicious way.
For the Crust
- 16 whole Oreo cookies (1 per cupcake liner)
The whole Oreo acts as a ready-made crust. No need to crush, mix, or press—just pop one into each cupcake liner. It softens slightly as it bakes, becoming the perfect chewy base.
For the Cheesecake Filling
- 16 oz cream cheese, softened (two 8 oz blocks)
Make sure your cream cheese is softened before you begin. This ensures a smooth, lump-free filling. Full-fat cream cheese gives the best texture and flavor, but you can use reduced-fat if you prefer. - ½ cup granulated sugar
This adds sweetness without being overpowering. If you like your desserts less sweet, feel free to reduce it slightly. - 2 large eggs
Eggs are the structure builders in this recipe, helping the cheesecake set as it bakes. Bring them to room temperature for best results. - 1 tsp vanilla extract
A little vanilla goes a long way in adding warmth and depth of flavor to the cheesecake. Pure vanilla extract is ideal. - ¾ cup Oreo cookie crumbs
Roughly chop the Oreos by hand rather than blending them into dust—you want a mix of small and larger cookie pieces for the best texture in the batter.
Optional Topping
- Whipped cream
- Extra crushed Oreos for garnish
These ingredients are easy to find and budget-friendly, making this recipe ideal for last-minute baking or weekly meal planning. As long as you have cream cheese and Oreos, you’re halfway there. With everything prepped and ready, let’s move on to the fun part—baking.
Step-By-Step Cooking Instructions
Let’s break this down step by step so you feel totally confident from start to finish. Whether you’re new to baking or you’ve made dozens of cheesecakes before, these Mini Oreo Cheesecake Cupcakes are wonderfully straightforward. I’ll walk you through each phase and offer tips and reassurance along the way.
Step 1: Preheat and Prepare the Muffin Tin
Start by preheating your oven to 350°F (175°C). This gives your oven plenty of time to reach the right temperature while you get everything else ready.
Next, line a standard muffin pan with 16 paper liners. You might need to use two pans if your muffin tin only has 12 cups. Using liners helps the cupcakes hold their shape and makes removal so much easier.
Now for the easiest crust you’ll ever make—place one whole Oreo cookie into the bottom of each paper liner. That’s it. No crushing, no mixing, no pressing. It’s a perfect one-step solution that adds both structure and flavor to your cupcakes.
Step 2: Soften the Cream Cheese
This step is important. If your cream cheese is too cold, you’ll end up with a lumpy batter, and nobody wants that. The best way to soften cream cheese is to let it sit at room temperature for at least 30 minutes before using. If you’re in a hurry, you can also cut it into cubes and microwave it in 10-second intervals until just softened—not melted.
Place both blocks of softened cream cheese into a large mixing bowl.
Step 3: Make the Cheesecake Batter
Add ½ cup of granulated sugar to the bowl with your cream cheese. Using an electric mixer, beat the mixture on medium speed for about 2 to 3 minutes, or until it’s completely smooth and creamy.
Next, crack in the two large eggs and add 1 teaspoon of vanilla extract. Continue to beat on low speed just until everything is fully combined. Be careful not to overmix here, as too much air in the batter can lead to cracking. The batter should look silky and uniform at this point.
Now it’s time to fold in the Oreo crumbs. Measure out ¾ cup of chopped Oreo pieces—this is where the texture magic happens. Chop them by hand so you get a mix of fine crumbs and chunkier pieces. Use a spatula to gently fold them into the batter. The goal is to evenly distribute the cookie pieces without deflating the batter.
Step 4: Fill the Cups
Using a spoon or small cookie scoop, fill each muffin liner with about two tablespoons of the cheesecake batter. The cups should be about ¾ full.
Once filled, sprinkle a few of the reserved Oreo crumbs over the top of each mini cheesecake. This not only looks great once baked, but also adds an extra hit of cookies-and-cream flavor.
Step 5: Bake
Place the muffin tin into your preheated oven and bake for 14 to 16 minutes. You’ll know they’re ready when the centers are just set but still slightly jiggly—kind of like Jell-O. Don’t worry if they seem underdone; they’ll continue to firm up as they cool.
Avoid overbaking, which can lead to dry, cracked tops. Every oven is a bit different, so start checking around the 13-minute mark.
Step 6: Cool the Cupcakes
Once baked, remove the pan from the oven and let the cupcakes cool in the tin for about 30 minutes. This gradual cooling helps prevent sinking or cracking.
After 30 minutes, carefully remove the cheesecakes from the muffin tin. They should come out easily thanks to the liners. Place them on a wire rack or plate and let them cool to room temperature.
Step 7: Chill in the Fridge
This is the hardest part—waiting! Once they’re at room temperature, place the cheesecakes in the refrigerator and chill for at least 2 hours. Overnight is even better if you have the time. The chilling process helps the cheesecakes firm up and develop their full flavor.
You can cover them loosely with plastic wrap or store them in an airtight container while they chill.
Step 8: Add Optional Toppings
Right before serving, you can dress them up if you’d like. A swirl of whipped cream and a sprinkle of extra crushed Oreos makes them look bakery-worthy and adds an extra layer of deliciousness.
If you’re serving these for a special event or holiday, feel free to get creative—add a drizzle of chocolate sauce, a tiny mint leaf, or even a mini Oreo on top for flair.
How to Serve this Mini Oreo Cheesecake
These mini cheesecakes are the perfect handheld dessert. Because they’re baked in cupcake liners, they’re easy to grab, eat, and clean up after—making them ideal for parties, picnics, and everything in between.
Here are a few fun and delicious ways to serve them:
Serve chilled straight from the fridge with a dollop of whipped cream and a sprinkle of crushed Oreos for a classic presentation.
Plate each one on a small dessert dish with a drizzle of chocolate syrup or caramel sauce for an elegant finish.
If you’re serving a crowd, arrange them on a large platter and stack them slightly in a pyramid for a dessert centerpiece.
For birthday parties, you can top each cheesecake with a birthday candle or festive sprinkle mix.
During the holidays, try adding a dash of cinnamon or nutmeg to the Oreo crumbs, or top with red and green sprinkles for a seasonal twist.
If you’re going for a fancy dinner vibe, plate each mini cheesecake with fresh berries on the side and a dusting of powdered sugar.
No matter how you present them, these Oreo cheesecake cupcakes always deliver big flavor in a small, satisfying bite.
Pairing Suggestions for this Mini Oreo Cheesecake
Pairing desserts with the right drink or side treat can elevate the experience from delicious to unforgettable. These mini Oreo cheesecakes are rich and creamy, with a sweet crunch from the cookie crust, so you’ll want to pair them with drinks and sides that either contrast or complement their flavor profile.
Here are a few pairing ideas to inspire your dessert table:
Beverage Pairings:
A hot cup of coffee or espresso is a classic pairing that balances the richness of the cheesecake with a touch of bitterness.
Serve with a tall glass of cold milk—kids and adults alike will love this nostalgic duo.
Chai tea or spiced black tea can add a warm, aromatic contrast to the cool creaminess of the cheesecake.
For a fun twist, try serving with an iced matcha latte—the earthy flavor of matcha contrasts beautifully with the sweetness of Oreos.
Dessert Pairings:
Offer a fruit platter with strawberries, raspberries, or blueberries to bring a fresh, slightly tart element to the mix.
Pair with chocolate-dipped pretzels or chocolate bark for extra crunch and a hint of saltiness.
Add a scoop of vanilla or cookies-and-cream ice cream on the side for a dessert duo that feels indulgent but totally worth it.
Side Snack Pairings:
Serve with a plate of mini chocolate chip cookies or brownie bites to turn your table into a full dessert buffet.
If you’re going the party route, a tray of finger foods like mini éclairs, macarons, or truffles can round out your dessert offerings beautifully.
With the right pairing, these Oreo cheesecakes shine even brighter. Whether you’re keeping it simple or going all out, they fit in beautifully with just about any flavor combo.
Storage, Freezing & Reheating Instructions of this Mini Oreo Cheesecake
One of the many reasons these Mini Oreo Cheesecake Cupcakes are such a go-to dessert is how well they store. Whether you’re making them ahead for a party or hoping to save a few for later, they hold up beautifully with the right storage methods.
Storing in the Refrigerator:
Once baked and chilled, these mini cheesecakes can be stored in an airtight container in the refrigerator for up to 5 days. It’s best to separate any layers with a sheet of parchment paper if stacking them, so the toppings (if added) don’t get smushed or sticky.
If you’re planning to add whipped cream or decorative toppings, wait until just before serving. The whipped cream can lose its shape and become watery if it sits too long in the fridge.
Freezing Instructions:
Yes, you can absolutely freeze these cheesecake cupcakes—and they freeze really well. After they’ve chilled in the fridge and fully set, place them (still in their liners) on a baking sheet and freeze for about 1–2 hours, or until they’re firm. Once frozen, transfer them to a freezer-safe zip-top bag or airtight container.
You can freeze them with or without the Oreo crumb topping. If you’re planning to dress them up before serving, it’s best to freeze them plain and add toppings after thawing.
They’ll stay fresh in the freezer for up to 2 months. Label the container with the date so you don’t forget.
Reheating or Thawing:
To enjoy a frozen mini cheesecake, simply transfer it from the freezer to the fridge and let it thaw overnight. If you’re short on time, you can leave it out at room temperature for 1–2 hours.
Don’t try to microwave them—cheesecake doesn’t reheat well and can turn rubbery. Slow, gentle thawing keeps the texture creamy and delicious.
With these storage tips, you can always have a batch ready for surprise guests, weeknight cravings, or those “I need dessert now” moments.
Common Mistakes to Avoid
Even though this Mini Oreo Cheesecake recipe is easy and beginner-friendly, there are a few common pitfalls to watch out for. Being aware of these will help you bake with confidence and get perfect results every time.
1. Using Cold Cream Cheese:
This is probably the number one mistake when it comes to baking cheesecake. Cold cream cheese doesn’t blend smoothly, which means you’ll end up with a lumpy batter. Always let your cream cheese come to room temperature before mixing.
2. Overmixing the Batter:
It’s tempting to keep mixing until everything looks ultra fluffy, but overmixing can incorporate too much air into the batter. This can cause the cupcakes to rise too much while baking and then sink or crack as they cool. Mix just until everything is combined and smooth.
3. Skipping the Chill Time:
Cheesecake needs time to set, and rushing this step can lead to a soft or runny center. Make sure to let them cool completely and chill in the refrigerator for at least 2 hours—overnight is even better.
4. Baking Too Long:
Because these are mini cheesecakes, they bake much faster than a full-sized version. Don’t wait for the tops to brown—they should be pale and just set. If you bake too long, the texture can become dry or rubbery.
5. Not Letting Them Cool Gradually:
Sudden temperature changes can lead to cracks or sinking centers. Let your cheesecakes cool slowly in the pan for 30 minutes before transferring to the fridge.
Avoiding these small but impactful mistakes will ensure you get perfect, bakery-style results every single time.
Pro Tips
Want to level up your mini cheesecake game? These tips are your secret weapon for turning a good dessert into a truly unforgettable one.
Use Full-Fat Cream Cheese:
While you can use reduced-fat cream cheese, full-fat delivers the best texture and flavor. It gives your cheesecake that luscious, rich, creamy bite that just melts in your mouth.
Room Temperature Ingredients Are Key:
Not just the cream cheese, but your eggs should also be at room temperature. This helps everything blend together more smoothly and evenly, preventing lumps and improving the final texture.
Chop the Oreos by Hand:
Using a food processor might seem quicker, but you’ll end up with a uniform powder. Chopping the Oreos by hand gives you a mix of textures—some fine crumbs, some chunky bites—that add amazing character to the filling.
Line the Muffin Tin Well:
Use good-quality cupcake liners to make removing the cheesecakes super easy. If you’re planning to serve without liners for a more polished look, you can also use silicone baking cups—they release easily and maintain the cupcake shape.
Don’t Open the Oven Door Too Soon:
Resist the urge to peek before the 14-minute mark. Sudden drafts of cool air can cause your mini cheesecakes to collapse or crack.
Make Ahead and Freeze:
These are ideal make-ahead treats. Bake a batch (or two) and freeze them for future events. This saves time and reduces stress when you’re prepping for parties or gatherings.
Add Variety with Toppings:
Turn these into a build-your-own dessert by offering a topping bar—think crushed Oreos, mini chocolate chips, caramel drizzle, fruit compote, or even flavored whipped creams.
With these pro tips in your back pocket, you’ll be baking like a cheesecake champion in no time.
Frequently Asked Questions (FAQs)
Can I make these without an electric mixer?
Yes, absolutely. You can mix the batter by hand using a whisk and some arm strength, but make sure your cream cheese is very soft. This will make it much easier to blend into a smooth batter.
Can I use store-brand cream cheese?
You can, though premium cream cheese brands tend to have a creamier, less watery texture, which can make a difference in the final result.
Can I make these ahead of time?
Yes! These mini cheesecakes are perfect for making in advance. You can store them in the fridge for up to 5 days or freeze them for up to 2 months.
What’s the best way to crush the Oreos for the filling?
Chop them by hand with a sharp knife to get a mix of small crumbs and larger cookie chunks. This adds both flavor and texture to the cheesecakes.
Can I use a different type of cookie for the crust?
Sure! While Oreos are the star here, you could try chocolate graham crackers or even chocolate chip cookies for a fun twist.
How can I tell when they’re done baking?
The centers should be just set and slightly jiggly when you shake the pan. They will firm up as they cool and chill.
Can I use flavored Oreos?
Definitely! Try mint, peanut butter, or even birthday cake flavored Oreos to change things up. Just make sure the filling complements the added flavors.
Why did my cheesecakes sink in the middle?
That’s usually from overmixing the batter or opening the oven door too early. Follow the mixing and baking guidelines and you’ll avoid this issue.
Can I make these gluten-free?
Yes, just use gluten-free sandwich cookies in place of Oreos and double-check your vanilla extract and cream cheese for gluten-free labels.
Do I need to use a water bath?
Nope! These mini cheesecakes are small enough that they bake evenly without one. That’s part of what makes this recipe so easy and stress-free.
Conclusion & Call to Action
If you’ve been searching for a dessert that’s easy to make, guaranteed to impress, and always hits the spot, these Mini Oreo Cheesecake Cupcakes are it. They come together with minimal prep, require no fancy equipment, and are practically foolproof. With their creamy filling, crunchy cookie crust, and just the right level of sweetness, they’re the kind of dessert that disappears fast—so you might want to make a double batch just to be safe.
One of the best parts of this recipe is how adaptable it is. You can keep things classic with just a sprinkle of Oreo crumbs, or dress them up with whipped cream, chocolate drizzle, or a fruit topping. You can freeze them, store them, make them days ahead, and always rely on them to taste amazing. Whether you’re serving them at a birthday party, holiday event, potluck, or just treating yourself on a Tuesday night, they fit right in.
I’d love to know how these turned out for you! If you give this recipe a try, snap a photo and tag me on Instagram or share your experience in the comments. I’m always excited to see your creations and hear your favorite variations.
So go ahead—get those cream cheese blocks softening and preheat that oven. Your new favorite dessert is just a few simple steps away. Happy baking!
Print
Mini Oreo Cheesecake Cupcakes That’s Easy and Delicious
- Total Time: ~3 hours (including chilling)
- Yield: 16 mini cheesecakes 1x
- Diet: Vegetarian
Description
These Mini Oreo Cheesecake Cupcakes are creamy, rich, and packed with cookies-and-cream flavor, all on top of a whole Oreo crust. Perfect for parties, holidays, or an easy sweet treat that everyone will love.
Ingredients
-
16 whole Oreo cookies (1 per cupcake liner)
-
16 oz cream cheese, softened (2 blocks)
-
½ cup granulated sugar
-
2 large eggs
-
1 tsp vanilla extract
-
¾ cup Oreo cookie crumbs (reserve some for topping)
-
Optional: whipped cream and more crushed Oreos for topping
Instructions
-
Preheat oven to 350°F (175°C). Line 16 muffin cups with paper liners and place 1 Oreo cookie at the bottom of each.
-
In a large mixing bowl, beat softened cream cheese with sugar until smooth.
-
Add eggs and vanilla. Mix until just combined.
-
Fold in Oreo crumbs gently using a spatula.
-
Spoon cheesecake filling evenly into muffin cups, about 2 tablespoons each.
-
Sprinkle reserved Oreo crumbs on top.
-
Bake for 14–16 minutes, or until centers are just set.
-
Cool for 30 minutes, then refrigerate for at least 2 hours before serving.
-
Optional: Top with whipped cream and extra crushed Oreos.
Notes
-
Do not overmix the batter to avoid cracking.
-
Make ahead and store in the fridge or freezer.
-
For a lighter version, use reduced-fat cream cheese.
- Prep Time: 15 minutes
- Cook Time: 16 minutes
- Category: Dessert
- Method: Baking
- Cuisine: American