
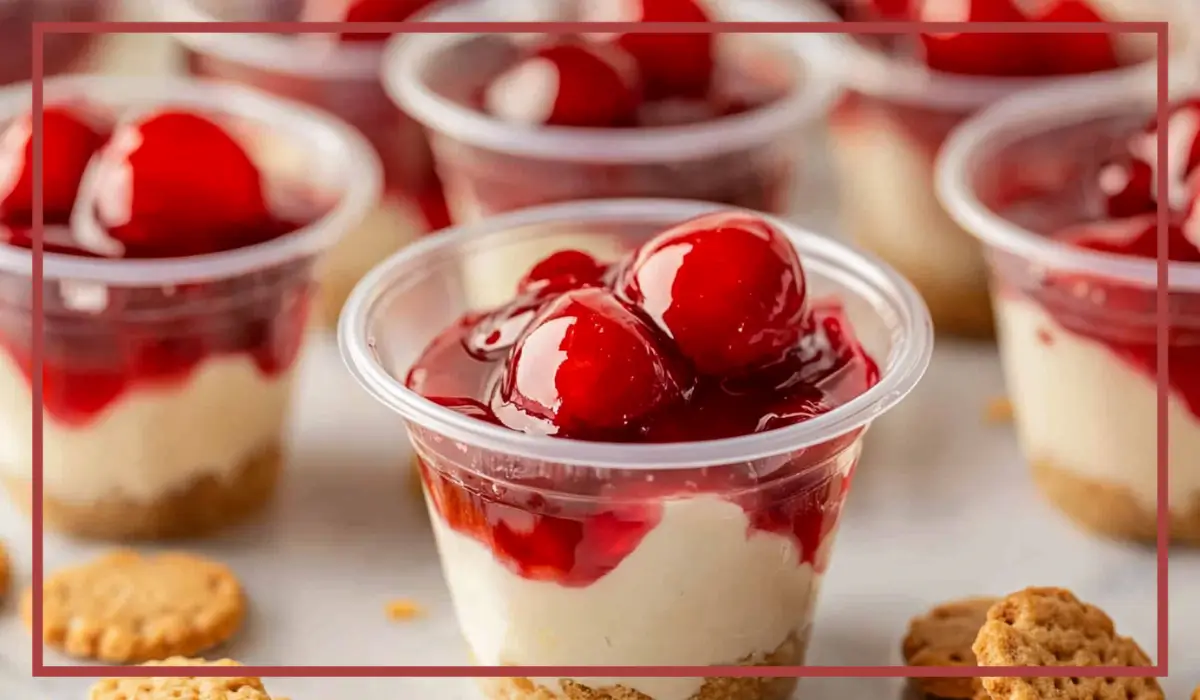
There’s something magical about the combination of creamy cheesecake filling, a hint of vanilla, and a fruity, glossy topping. These No-Bake Mini Cheesecake Cups are one of those recipes that check every box—they’re quick, easy, adorable, and downright delicious. Whether you’re planning a party, a cozy family dinner, or just need something sweet after a long day, this dessert will be your new go-to. It feels elegant enough for entertaining but is simple enough that you can throw it together in under an hour.
The first time I made these No-bake cheesecake cups was for a potluck at my neighbor’s house. I wanted to bring something that looked impressive but wouldn’t require me to turn on the oven—because let’s be honest, no one wants to bake in the middle of summer. I had cream cheese in the fridge, some leftover whipping cream, and a box of vanilla wafers in the pantry. With a quick mix and some fruit pie filling on top, I had dessert ready in no time. I served them in mini mason jars, and they were gone before dinner was even finished.
What I love most about this recipe is how customizable it is. You can switch up the toppings depending on the season—think cherry or blueberry pie filling in summer, or even spiced apple in the fall. The vanilla wafers make a perfectly soft yet slightly crisp base after chilling, and the cheesecake filling is ultra-smooth and fluffy without being too rich.
These No-Bake Mini Cheesecake Cups are also incredibly kid-friendly, both in flavor and portion size. Plus, there’s no slicing involved, no cracked cheesecake tops to worry about, and absolutely zero oven time. It’s really one of those “set it and forget it” kind of recipes that you can make ahead, pop in the fridge, and pull out when you need them.
If you’re a fan of classic cheesecake flavors but want a lighter, more effortless version, keep reading. This recipe is about to become your new favorite sweet treat.
Why You’ll Love This No-Bake Mini Cheesecake CupsRecipe
There are so many reasons to fall in love with these no-bake mini cheesecake cups, especially if you appreciate a good dessert that’s both low-effort and high-impact.
1. They’re Truly No-Bake
No oven, no water bath, and no worrying about cracks or overbaking. These mini cheesecakes skip the traditional baking step and still deliver that same rich, creamy texture you expect from a classic cheesecake. Just mix, chill, and serve.
2. They’re Incredibly Easy to Make
If you can stir and fold, you can make these. The ingredients are all familiar and easy to find. There’s no fancy technique required—just a hand mixer or stand mixer, a couple of bowls, and a spoon or piping bag. It’s practically foolproof.
3. Perfect for Parties and Gifting
Served in small plastic cups or mini mason jars, these desserts are ideal for gatherings. Everyone gets their own individual portion, which makes serving a breeze. They also make charming homemade gifts for holidays or special occasions.
4. Totally Customizable
While the base remains the same, the toppings can vary as much as you’d like. From cherry pie filling to blueberry, strawberry, or even lemon curd, there’s a topping for every season and preference. You could even do a drizzle of caramel or chocolate for something extra decadent.
5. The Texture is Dreamy
The cheesecake filling is light and airy thanks to the whipped cream folded in, yet still rich and satisfying. It’s smooth, sweet, and melts in your mouth, making it the perfect pairing with the fruit topping and soft cookie crust.
6. Great for Kids and Adults Alike
Because they’re so mild and sweet, these cheesecake cups are a huge hit with kids. Adults will appreciate the elegant presentation and creamy taste, too. It’s truly a dessert that pleases every age group.
All in all, these no-bake cheesecake cups are the kind of dessert you’ll keep coming back to. They’re quick, versatile, and guaranteed to impress.
Health Benefits of these No-bake cheesecake cups
While no one’s pretending that cheesecake is a health food, there are a few redeeming qualities in this particular dessert that make it a smarter choice than many others.
1. Smaller Portions for Built-In Moderation
Because these cheesecakes are served in individual cups, it’s easier to control portions compared to slicing a full-sized cake. Each cup provides just enough richness without going overboard, making them a more mindful way to indulge.
2. Protein-Rich Ingredients
Cream cheese and heavy whipping cream both provide a good amount of fat and protein, which means this dessert is more satiating than typical high-sugar, low-fat treats. That little bit of protein can help slow sugar absorption and keep you fuller, longer.
3. No Added Artificial Colors or Preservatives
When you make cheesecake cups at home, you get to control what goes in. Using simple, whole ingredients means you skip all the artificial stuff that often sneaks into store-bought desserts. You can even use organic cream cheese and pie filling if preferred.
4. Customizable Toppings for Added Nutrition
Adding a fruit topping isn’t just for flavor—it’s also a great way to get some antioxidants, fiber, and vitamins. Blueberries, cherries, and strawberries all offer different health perks, from anti-inflammatory benefits to heart health support.
5. Gluten-Free Adaptation Is Easy
Although vanilla wafers are traditionally made with wheat, it’s easy to substitute gluten-free cookies if you need to. That means you can make this dessert suitable for a wider range of dietary needs without sacrificing taste or texture.
So, while this recipe is certainly a treat, it doesn’t have to be a guilty one. With the right tweaks and portion control, it’s a dessert you can feel good about enjoying.
Preparation Time, Servings, and Nutritional Information
Knowing how long a recipe takes and what you’re getting nutritionally helps you plan better, especially for events or weeknight treats.
Total Preparation Time
- Prep Time: 20 minutes
- Chill Time: 1–2 hours (minimum)
- Total Time: About 2 hours (with chilling)
Servings
- This No-Bake Mini Cheesecake Cups recipe makes 16 individual cheesecake cups, each with one vanilla wafer base.
Nutritional Information (Per Serving)
- Calories: 210
- Protein: 2g
- Carbohydrates: 19g
- Fat: 15g
- Sugar: 14g
- Fiber: <1g
- Sodium: 100mg
Note: Nutritional values may vary depending on the brand of ingredients used and the type of fruit filling chosen.
Ingredients List
Let’s break down everything you’ll need to bring these mini cheesecakes to life. All the ingredients are basic, but each one plays an essential role.
For the Cheesecake Base:
- 16 oz cream cheese, softened
This is the heart of your cheesecake. Make sure it’s at room temperature so it mixes smoothly and doesn’t leave any lumps. - 1 cup powdered sugar
Powdered sugar dissolves easily into the cream cheese mixture, giving you that smooth, sweet flavor without any grittiness. - 1 tsp vanilla extract
Vanilla gives the base its warm, comforting flavor. Use pure vanilla extract for the best taste.
The Whipped Cream:
- 1 cup heavy whipping cream
This gets whipped and folded into the cream cheese mixture, creating a fluffy, light texture that’s irresistible. - ½ tsp cornstarch
Cornstarch helps stabilize the whipped cream, so it holds its shape and doesn’t deflate over time.
The Assembly:
- 16 vanilla wafer cookies (or more, as needed)
These go at the bottom of each cup and create a soft, cake-like crust once chilled. - 1 can prepared fruit pie filling (cherry, blueberry, etc.)
Choose your favorite flavor here. The glossy fruit topping adds color, sweetness, and a touch of tartness.
Optional tools: piping bags for neat filling, small cups or mason jars for serving, and a hand mixer or stand mixer.
Step-By-Step Cooking Instructions
Follow these instructions for a flawless, No-Bake Mini Cheesecake Cups experience. Each step includes helpful tips to make sure you get it right the first time.
1: Prepare the Cheesecake Base
- Place the softened cream cheese in a large mixing bowl. Using a hand mixer or stand mixer, beat it on medium speed for 1–2 minutes until completely smooth.
- Add the powdered sugar and vanilla extract. Beat again on medium-high speed until fully incorporated and fluffy, scraping down the sides as needed.
- Taste the mixture. If you want it a little sweeter, you can add a tablespoon or two more powdered sugar.
2: Whip the Cream
- In a separate bowl, pour in the cold heavy whipping cream. Start whipping on low speed for about 1 minute to prevent splattering.
- Add the cornstarch gradually, then increase the speed to high. Continue whipping until stiff peaks form. This should take 3–5 minutes.
- You’ll know it’s ready when the whipped cream holds its shape and doesn’t slump over when the beaters are lifted.
3: Fold Whipped Cream into Cheesecake Base
- Using a rubber spatula, gently fold the whipped cream into the cream cheese mixture in batches.
- Fold slowly and carefully to keep the mixture airy and fluffy. Don’t overmix, or you’ll lose that light texture.
4: Assemble the Cups
- In each small cup or mason jar, place one vanilla wafer at the bottom. It will soften during chilling and become cake-like.
- Spoon or pipe the cheesecake filling into each cup, filling to about 1 inch from the top.
- Tap the cups gently on the counter to level out the filling and remove any air bubbles.
5: Add the Fruit Topping
- Spoon a generous amount of fruit pie filling on top of each cup.
- Make sure each cup has a nice balance of fruit and syrup for both taste and presentation.
6: Chill and Set
- Cover the cups loosely with plastic wrap or lids if using jars.
- Chill in the refrigerator for at least 1 hour. For best results, let them set for 2–4 hours or even overnight.
7: Serve and Enjoy
- When ready to serve, garnish with a fresh mint leaf or a small dollop of whipped cream for an extra touch.
- Serve cold and enjoy the creamy, fruity goodness in every bite.

How to Serve these No-Bake Mini Cheesecake Cups
Now that your no-bake mini cheesecake cups are perfectly chilled and set, let’s talk about the best ways to serve them so they look as amazing as they taste. Presentation can take a dessert from “yum” to “WOW,” especially when you’re entertaining or serving these at a special gathering.
1. Individual Servings for Convenience and Elegance
One of the best things about this dessert is that it’s already portioned out. Serving individual cups means no slicing, no mess, and no worrying about presentation falling apart. Use clear plastic cups, glass ramekins, or mini mason jars to give each serving a polished, bakery-style look.
If you’re planning for a party, you can even find cute decorative cups or parfait containers at most party supply stores. Layering the cheesecake mixture and fruit filling in a clear cup also shows off the dessert’s beautiful contrast between the creamy base and vibrant fruit topping.
2. Add a Finishing Touch
A tiny garnish can go a long way. Right before serving, add a little swirl of whipped cream on top, a fresh berry, or even a sprig of mint for a pop of color and freshness. If you want something a little extra, dust a light sprinkle of powdered sugar on top or use a drizzle of chocolate or caramel sauce.
3. Serve Cold
These cheesecake cups taste best when served cold. Make sure they’ve had time to chill for at least an hour before serving—two to four hours is even better. If you’re serving outdoors or at an event where refrigeration isn’t readily available, store them in a cooler with ice packs until it’s time to enjoy them.
4. Dessert Table Favorite
These are also fantastic on a dessert table alongside cookies, brownies, and fruit platters. Because they look so neat and well-portioned, they bring balance and elegance to any spread.
5. Dress It Up for Special Occasions
You can easily adapt the presentation to match the theme of any occasion. Add heart-shaped sprinkles for Valentine’s Day, edible gold dust for a birthday bash, or colored sugar crystals for a baby shower. These little tweaks help the dessert feel festive and thoughtful without any extra baking.
No matter how you choose to serve them, these mini cheesecake cups are a total showstopper.
Pairing Suggestions for these No-Bake Mini Cheesecake Cups
While these no-bake mini cheesecake cups are amazing on their own, pairing them with the right sides, drinks, or other desserts can really elevate the experience—whether you’re serving them at a dinner party, holiday gathering, or weekend treat for the family.
1. Pair with Light and Fresh Beverages
Since the cheesecake cups are rich and creamy, it’s a great idea to balance them with something light to drink.
- Sparkling water with lemon or berries adds a bubbly, refreshing contrast.
- Iced herbal teas like hibiscus or mint tea make a cooling, caffeine-free pairing.
- For adults, a sparkling apple juice or halal non-alcoholic rosé adds a festive touch without overpowering the dessert.
If you’re serving these after dinner, a warm drink also pairs well:
- A light chai or vanilla rooibos tea complements the vanilla notes in the cheesecake without adding bitterness.
- A cup of decaf coffee or café au lait can create that cozy coffee shop feel at home.
2. Pair with Fresh Fruit or Fruit Salads
Fresh berries, especially strawberries and blueberries, work beautifully alongside these cheesecake cups. They help cleanse the palate and add a juicy, tart balance to the creamy texture of the cheesecake.
You could serve:
- A bowl of mixed berries with a little honey and lemon zest.
- A fruit skewer platter with melon, grapes, and kiwi for a vibrant side.
- A citrus salad with orange, grapefruit, and mint to add a touch of sophistication.
3. Pair with Other Light Desserts
If you’re putting together a dessert buffet or just want to offer variety:
- Serve alongside lemon bars, mini fruit tarts, or coconut macaroons for a delicate, elegant spread.
- Offer shortbread cookies or sugar cookies that echo the vanilla wafer base of the cheesecakes.
Pairing is about more than just taste—it’s about balance, contrast, and creating a whole experience. When done right, these mini cheesecake cups become part of a dessert moment that people will remember long after the last bite.
Storage, Freezing & Reheating Instructions
One of the most convenient features of these mini no-bake cheesecake cups is how well they store and travel. Whether you’re making them ahead for a party or planning to enjoy leftovers later, here’s how to keep them tasting fresh and delicious.
1. Storing in the Refrigerator
After assembling your cheesecake cups, cover each one tightly with plastic wrap or place a lid on the container if you’re using mason jars. Then refrigerate them for at least 1 hour to allow the mixture to fully set.
- Fridge Shelf Life: These cheesecake cups will stay fresh in the fridge for up to 3–4 days.
- Tip: Keep them away from strong-smelling foods (like onions or garlic) to prevent them from absorbing other flavors.
If you’ve added whipped cream or fresh fruit on top, they are best enjoyed within 1–2 days for optimal texture and appearance.
2. Freezing for Later Use
You can absolutely freeze these mini cheesecakes, but there are a couple of things to keep in mind for best results.
- Assemble the cheesecake filling and cookie base as directed, but wait to add the fruit topping until after thawing. Fruit toppings can change texture after being frozen and thawed.
- Place the assembled cups (without topping) on a tray and freeze until solid—this prevents them from getting crushed or dented.
- Once frozen, wrap each cup tightly in plastic wrap, then place in a freezer-safe container or resealable freezer bag.
- Freezer Shelf Life: Store for up to 2 months.
- Thawing Instructions: Transfer the desired number of cups to the fridge and let them thaw overnight. Then add the fruit topping before serving.
3. Can You Reheat Them?
No need! These cheesecakes are meant to be served cold. However, if they’ve been frozen, allow them to come to fridge temperature for the best texture. Avoid microwaving them, as this will ruin the structure and texture of the cheesecake.
With the right storage methods, these little treats can be made ahead, frozen for future cravings, or safely tucked away for later. Perfect for planners, procrastinators, and everyone in between.
Common Mistakes to Avoid
While this recipe is simple and beginner-friendly, a few common mistakes can make the difference between “pretty good” and “absolutely amazing.” Here’s how to dodge the most frequent pitfalls.
1. Not Softening the Cream Cheese Properly
If your cream cheese is too cold, it won’t mix smoothly and you’ll end up with a lumpy base. To avoid this, let it sit at room temperature for at least 30 minutes before you start. Properly softened cream cheese creates a silky, lump-free filling.
2. Overwhipping the Cream
Whipping cream takes just a few minutes, but it’s easy to go from soft peaks to butter if you’re not careful. Whip just until stiff peaks form, and stop there. Overwhipped cream becomes grainy and separates, which can ruin the texture of your cheesecake filling.
3. Skipping the Folding Step
Don’t just dump the whipped cream into the cream cheese mixture and stir—it’s important to gently fold it in using a spatula. This keeps the mixture light and fluffy instead of dense. Folding means using a soft, scooping motion that combines without deflating.
4. Not Letting Them Chill Long Enough
Patience is key with no-bake desserts. If you don’t chill the cups for at least 1 hour, the filling might be too soft and won’t hold its shape. For the best results, chill for 2–4 hours or even overnight. This gives the flavors time to develop and the texture to firm up perfectly.
5. Using a Watery Fruit Topping
If your fruit pie filling is too thin or watery, it can leak into the cheesecake layer and make the dessert look messy. Choose a thick, glossy pie filling or drain off a little excess syrup before topping.
Avoiding these common missteps will guarantee that your cheesecake cups turn out picture-perfect every time.
Pro Tips
Whether it’s your first time making no-bake cheesecake or you’ve done it before, these pro tips will help you take your mini cheesecake cups from great to unforgettable. A few smart tweaks can enhance flavor, boost texture, and make your prep even easier.
1. Use High-Quality Cream Cheese
Not all cream cheeses are created equal. For the best texture and flavor, go with a full-fat, high-quality cream cheese. Generic brands can sometimes be watery or grainy, which affects the smoothness of the filling. Avoid the whipped or spreadable types in tubs—use the brick kind for reliable results.
2. Stabilize Your Whipped Cream for Long-Lasting Structure
Adding a bit of cornstarch to your whipped cream is a game-changer. It stabilizes the cream so it won’t deflate, especially if you’re making these a day ahead. Some bakers use powdered sugar or unflavored gelatin for stabilization, but cornstarch does the job just fine and keeps the recipe simple.
3. Use a Piping Bag for a Clean Finish
While spooning the filling into the cups works, using a piping bag gives your cheesecake cups a cleaner, more professional look. Plus, it’s faster and less messy. Don’t have a piping bag? A zip-top bag with the corner snipped off works just as well.
4. Let Them Chill Overnight for Best Flavor
While these cheesecake cups can be served after just an hour in the fridge, they really shine after chilling overnight. The flavors meld together more, the cookie base softens to the perfect texture, and the filling becomes extra creamy and rich.
5. Double the Recipe for a Crowd
These little cups are always a hit at parties, so consider doubling the recipe if you’re expecting guests. They store beautifully, and the leftovers (if there are any) are just as good the next day.
6. Keep Toppings Separate for Make-Ahead Convenience
If you’re prepping these several days in advance, assemble the cream cheese filling and cookie base first, and store the fruit topping separately. Add the topping the day you plan to serve to maintain the best texture and presentation.
7. Experiment with Different Base Options
Not a fan of vanilla wafers? Try crushed graham crackers, chocolate cookies, or even sponge cake circles at the bottom. The cookie base can completely change the flavor profile of your dessert.
Master these tips, and you’ll be making mini cheesecake cups like a pro every single time.
Frequently Asked Questions (FAQs)
To help you feel even more confident making these No-bake cheesecake cups, here are answers to some of the most common questions people have about this recipe.
1. Can I use low-fat cream cheese instead of full-fat?
You can, but the texture and taste will be slightly different. Full-fat cream cheese gives you the richest, creamiest filling. Low-fat versions may be more watery and not set as firmly, so if you go that route, you may want to reduce the whipped cream slightly to compensate.
2. How long do these need to chill before serving?
At a minimum, they should chill for 1 hour. However, for the best results, 2–4 hours is ideal. If you can chill them overnight, even better—the flavors will deepen and the texture will become perfectly set.
3. Can I make these ahead of time?
Absolutely. In fact, they’re even better when made ahead. You can assemble them 1–2 days in advance and store them in the fridge. Just be sure to cover them tightly, and if using fresh fruit on top, add it closer to serving time for the best appearance.
4. Can I freeze the No-Bake Mini Cheesecake Cups?
Yes! Freeze them without the fruit topping for best results. Wrap each cup tightly in plastic wrap and store in a freezer-safe container. Thaw in the refrigerator overnight, then top with fruit and serve.
5. Do I need to use a mixer?
A mixer is highly recommended for achieving a smooth, lump-free filling and properly whipped cream. A hand mixer works great, but if you don’t have one, you can use a whisk and a strong arm—it’ll just take longer and more effort.
6. What other toppings can I use?
Besides canned pie filling, you can use fresh fruit, lemon curd, caramel sauce, crushed cookies, or even a spoonful of Nutella. The toppings are a great way to customize the flavor to suit your event or preferences.
7. Can I make these No-Bake Mini Cheesecake Cups gluten-free?
Yes! Just use gluten-free vanilla wafers or cookies for the base. The rest of the ingredients are naturally gluten-free, so with that one swap, you’ve got a perfect gluten-free dessert.
8. Are these No-bake cheesecake cups suitable for kids?
Definitely. Kids love the fruity topping and the sweet, creamy filling. Plus, the portion size is perfect for little hands, and the mild flavor is appealing to even picky eaters.
9. Can I make this in a large dish instead of individual cups?
Yes, you can. Just layer the cookie base, cheesecake filling, and topping in a 9×9-inch baking dish or similar container. Chill, then scoop or slice to serve. It’s less portable but just as delicious.
10. What if I don’t have vanilla wafers?
No problem. You can substitute with graham crackers, crushed digestive biscuits, ladyfingers, or even chocolate chip cookies for a fun twist.
These FAQs should have you covered, but if you ever run into any snags, know that this recipe is forgiving and flexible. Don’t be afraid to get creative.
Conclusion & Call to Action
There you have it—the full scoop on how to make the dreamiest, easiest no-bake mini cheesecake cups. Whether you’re a beginner in the kitchen or an experienced baker looking for a quick win, this recipe is one you’ll come back to again and again.
From the silky-smooth cheesecake filling to the crisp yet tender cookie base and that vibrant fruit topping, every bite is a little celebration. And because they’re already portioned, they’re perfect for parties, potlucks, after-dinner treats, or even a sneaky late-night snack.
What’s even better is how forgiving this recipe is. You can swap ingredients based on what you have in your pantry, adjust the sweetness to your liking, and play around with toppings until you find your favorite combo. And once you master the base recipe, the possibilities really are endless.
So, what are you waiting for? Head to your kitchen, grab that cream cheese, and whip up a batch of these mini cheesecake cups. I promise they’ll be the easiest dessert you’ve made all week—and quite possibly the most satisfying.
If you try this recipe, I’d love to hear how it turned out! Did you use cherry, blueberry, or a different topping? Did your kids help you assemble the cups? Share your baking wins and tweaks in the comments, and don’t forget to snap a photo of your creation. Tag me on social media so I can celebrate your cheesecake success with you.
This dessert is too good not to share. So go ahead—spread the cheesecake love.
Print
No-Bake Mini Cheesecake Cups with Fruit Topping
- Total Time: 2 hours (including chilling)
- Yield: 16 cups 1x
- Diet: Vegetarian
Description
Creamy, fluffy, and fruity, these no-bake cheesecake cups are a quick and elegant dessert served in individual portions—perfect for any occasion.
Ingredients
-
16 vanilla wafer cookies (or more as needed)
-
16 oz cream cheese, softened
-
1 cup powdered sugar
-
1 tsp vanilla extract
-
1 cup heavy whipping cream
-
½ tsp cornstarch
-
1 can prepared fruit pie filling (cherry, blueberry, etc.)
Instructions
-
Beat softened cream cheese until smooth.
-
Add powdered sugar and vanilla; beat until combined.
-
Whip heavy cream with cornstarch until stiff peaks form.
-
Gently fold whipped cream into the cream cheese mixture.
-
Place one wafer in each cup.
-
Fill cups with cheesecake mixture.
-
Top with fruit pie filling.
-
Chill for at least 1 hour. Serve cold.
Notes
-
Use a piping bag for neater filling.
-
Let chill overnight for best results.
-
Customize toppings with caramel, chocolate, or fresh fruit.
-
Use gluten-free wafers for a GF version.
- Prep Time: 20 minutes
- Cook Time: 0 minutes
- Category: Dessert
- Method: No-Bake
- Cuisine: American