
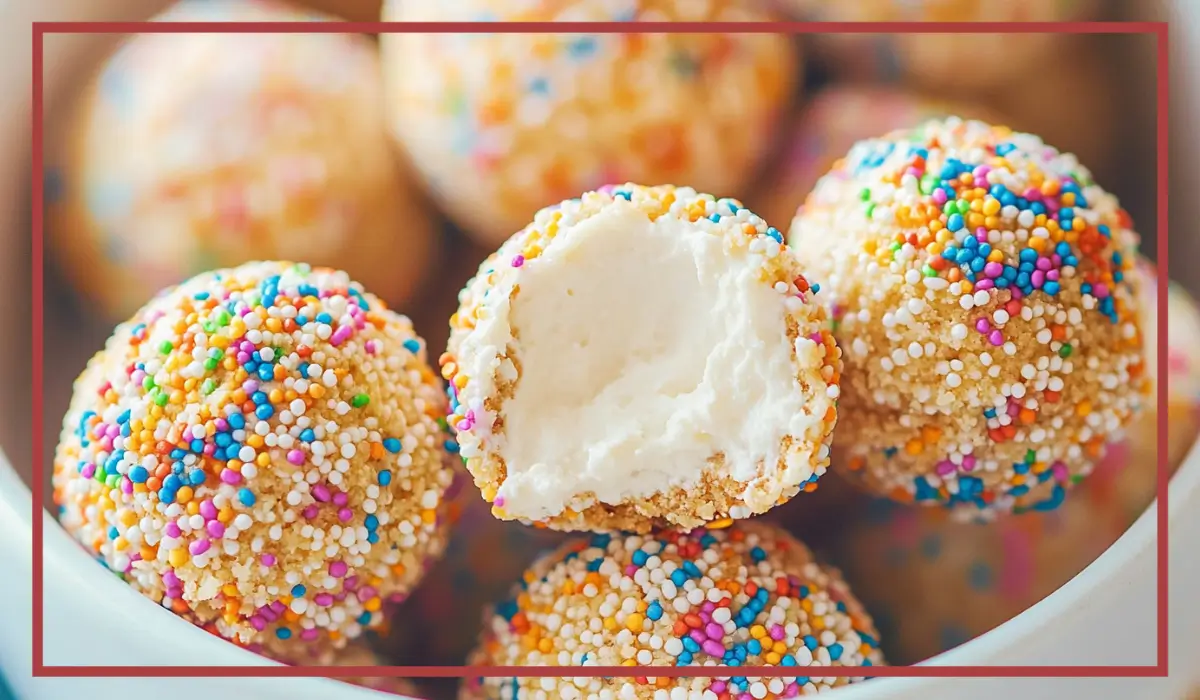
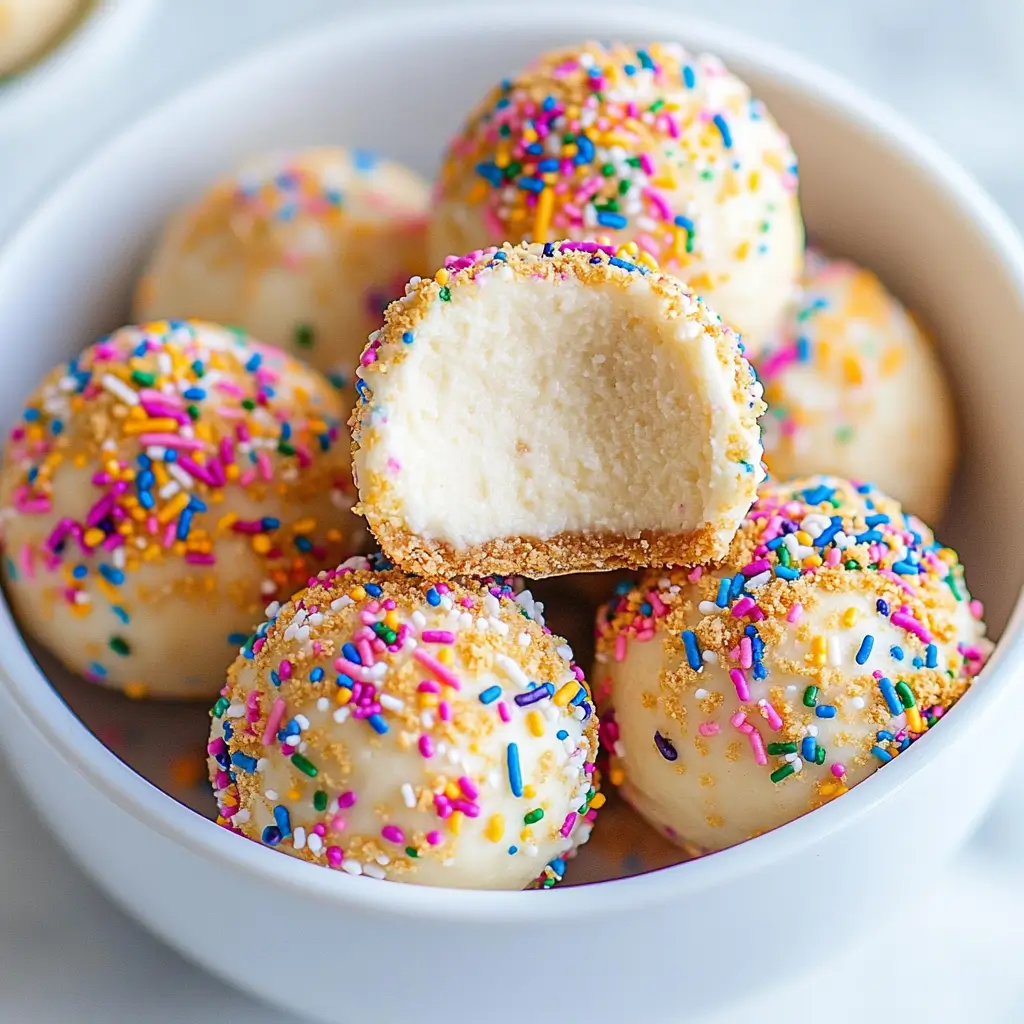
There’s something deeply comforting about the rich, smooth texture of cheesecake. But let’s be real—traditional cheesecake can be a bit of a project. You need a water bath, a springform pan, and nerves of steel to avoid that dreaded surface crack. That’s where these no-bake cheesecake balls come in. They deliver everything we love about cheesecake—creamy texture, sweet and tangy flavor, and just the right touch of vanilla—in a completely hassle-free format.
No oven. No complicated equipment. No fuss. Just mix, chill, roll, and enjoy. Whether you’re hosting a party, looking for a quick treat to satisfy a sweet craving, or just want something special for your family without spending hours in the kitchen, these cheesecake balls are the answer.
I discovered this recipe when I was looking for a make-ahead dessert for a summer picnic. It was too hot to turn on the oven, and I didn’t want to show up with just another tray of cookies. That’s when I experimented with a no-bake cheesecake filling and thought—why not turn this into bite-sized treats? I coated some with graham cracker crumbs and others with sprinkles for a fun, colorful twist, and they disappeared within minutes. Everyone asked for the recipe.
Since then, they’ve become my go-to for just about any occasion. They’re rich but not too heavy, sweet but not cloying, and the texture is just so satisfying—creamy in the center with a bit of crunch on the outside. Plus, they’re incredibly easy to make and endlessly customizable.
These cheesecake balls also hold up beautifully when refrigerated, making them the perfect dessert to prepare in advance. They’re also a hit with both kids and adults alike. With a few simple ingredients and about 20 minutes of hands-on time, you’ll have a batch of elegant, irresistible treats that look like they came straight from a bakery display case.
So if you’re looking for a dessert that’s easy, no-bake, crowd-pleasing, and absolutely delicious, keep reading. These no-bake cheesecake balls might just become your new favorite thing.
Why You’ll Love This no-bake cheesecake balls Recipe
There are a million reasons to fall in love with these no-bake cheesecake balls, but let’s start with the basics: they’re easy, delicious, and incredibly versatile. Whether you’re a beginner baker or a seasoned home cook, this is one dessert you can absolutely master—and have fun making, too.
First, there’s the simplicity. You don’t need any fancy tools or baking skills to pull this off. If you have a hand mixer, a mixing bowl, and a refrigerator, you’re good to go. The steps are so straightforward that even kids can help out, making it a perfect activity for family baking sessions.
Second, let’s talk about the flavor. These little bites are the perfect balance of tangy cream cheese and sweet vanilla, with a buttery undertone from the graham cracker crumbs. Every bite melts in your mouth, and the crumb coating adds just the right amount of texture to keep things interesting.
They’re also beautifully customizable. Want to add mini chocolate chips to the mix? Go for it. Want a fruity twist? Fold in some chopped strawberries or a spoonful of raspberry jam. You can even swap the coating—use crushed cookies, chopped nuts, or even cocoa powder for a different flavor profile.
Not only are they versatile in flavor, but they also fit a variety of occasions. These cheesecake balls work just as well on a holiday dessert tray as they do at a casual potluck or birthday party. You can dress them up with fancy toppings or keep them simple and classic—it’s entirely up to you.
Another reason to love this recipe is that it’s make-ahead friendly. In fact, these taste even better after a few hours in the fridge. You can make them a day or two ahead of time, which means less stress when it’s time to serve. And because they’re individually portioned, they’re easy to grab, serve, and enjoy—no slicing or utensils needed.
And finally, they’re a crowd-pleaser. Every time I’ve brought these somewhere, I’ve had someone ask me for the recipe. They appeal to kids and adults, and they’re especially great for people who want a treat without committing to a full slice of cake or pie.
If you love cheesecake but don’t love the time and effort it usually takes to make one, this recipe is for you. It delivers all the flavor and satisfaction of classic cheesecake in a compact, no-bake, low-effort format. What’s not to love?
Health Benefits of these no-bake cheesecake balls
While we won’t pretend that cheesecake balls are health food, they do offer a few surprisingly beneficial points—especially when compared to store-bought desserts filled with preservatives and artificial flavorings. When you make them at home, you’re in control of what goes in, and that alone can make a big difference.
Let’s start with the base ingredient: cream cheese. Cream cheese is rich in fat, yes, but it also contains a good amount of calcium, which is essential for bone health. It also offers small amounts of vitamin A, which supports vision and immune health. If you opt for full-fat cream cheese, you’re also getting conjugated linoleic acid (CLA), a compound found in dairy fat that has been linked to several potential health benefits in moderation.
Butter, when used in small quantities as it is here, adds flavor and helps with the creamy texture. While it does contain saturated fat, it also contains fat-soluble vitamins like A, D, and E. Moderation is key, and in this recipe, you only need a small amount to get big flavor.
Graham crackers, while not a nutritional powerhouse, can offer a source of quick energy thanks to their carbohydrate content. Using whole grain graham crackers can add a touch more fiber to the mix, which is a bonus for digestion.
One way to boost the nutritional profile of this dessert is by customizing it. You can add chopped nuts for healthy fats and extra protein. You could also roll the cheesecake balls in finely chopped dried fruits or seeds for added nutrients and fiber.
Since this dessert is served in small portions, it’s also easier to practice moderation. Each ball delivers the flavor satisfaction of a rich cheesecake slice but in a portion-controlled format. That makes it easier to enjoy something sweet without going overboard.
In addition, making desserts like this at home allows you to avoid artificial sweeteners, preservatives, and other unwanted additives often found in pre-packaged sweets. When you prepare your own treats, you get to choose the quality of your ingredients and avoid hidden sugars or additives.
If you’re following a halal diet, the ingredients in this recipe are fully compliant. There are no alcohol-based extracts, no gelatin, and no non-halal animal fats—just simple, familiar ingredients you can feel comfortable using in your kitchen.
So while these cheesecake balls are certainly indulgent, they’re also made from real, whole ingredients, and their customizable nature allows you to add little boosts of nutrition if you choose.
Preparation Time, Servings, and Nutritional Information
These cheesecake balls come together quickly and easily, making them ideal for busy weeknights, last-minute gatherings, or even meal prepping your sweets for the week.
Preparation Time:
Active time: 20 minutes
Chilling time: 1–2 hours
Total time: About 2 hours and 20 minutes (including chilling)
Servings:
This recipe makes approximately 12 to 14 cheesecake balls, depending on how large you roll them. If you use a standard 2-tablespoon cookie scoop, you’ll get about 12 generous portions.
Nutritional Information (per cheesecake ball):
Calories: 130
Protein: 1.5g
Fat: 10g
Carbohydrates: 9g
Sugar: 7g
Fiber: 0.2g
Calcium: 4% DV
Please note that these values are approximate and will vary based on the specific brands of ingredients used and any optional add-ins or coatings. If you make modifications—such as using low-fat cream cheese or adding nuts—the nutrition content will shift accordingly.
Despite being a treat, these cheesecake balls can fit into a balanced diet when enjoyed in moderation. They offer a satisfying richness that makes it easier to stop at just one or two, which isn’t always the case with desserts that leave you chasing flavor.
Up next, let’s take a detailed look at what you’ll need to bring these sweet bites to life.
Ingredients List of these no-bake cheesecake balls
Here’s everything you’ll need to make these no-bake cheesecake balls. All ingredients are easy to find and require no special preparation, making this one of the most accessible desserts you can whip up.
For the Cheesecake Mixture:
- 8 oz (225g) cream cheese, softened (full-fat recommended): The heart of this recipe. It provides the classic cheesecake texture and tangy flavor. Let it sit at room temperature for easier mixing.
- 2 tablespoons salted butter, softened: Adds richness and helps create that smooth, creamy texture. Salted butter balances the sweetness and enhances the other flavors.
- ½ cup powdered sugar: This dissolves easily into the cream cheese and adds just the right amount of sweetness.
- 1 teaspoon vanilla extract: Use pure vanilla for the best flavor. It adds warmth and depth to the cheesecake base.
- ¾ cup graham cracker crumbs (plus more for coating): This gives the mixture a bit of structure and that signature cheesecake taste.
For the Coating:
- ½ cup crushed graham crackers: Roll the finished cheesecake balls in these to give them a classic finish.
- Sprinkles (optional): Adds a fun, colorful twist, especially great for kids’ parties or festive occasions.
Optional Add-ins and Variations:
- Mini chocolate chips: Fold into the cheesecake mixture for a chocolatey bite.
- Finely chopped nuts: Walnuts, pecans, or almonds add crunch and a nutty depth.
- Dried fruit bits: Chopped dried cranberries or raisins offer a sweet, chewy contrast.
- Citrus zest: Lemon or orange zest adds brightness and cuts through the richness.
All of these ingredients are pantry staples in most households, which means you can likely make this dessert without an extra trip to the store. And if you do need to grab a few things, they’re all affordable and easy to find in any supermarket.
Step-By-Step Cooking Instructions
Making no-bake cheesecake balls is as simple as mix, chill, roll, and coat. But just because the process is easy doesn’t mean we should rush through it. Taking a few extra moments at each stage helps guarantee the creamiest texture, the smoothest finish, and the most flavorful results. In this section, I’ll guide you step-by-step, with extra tips and tricks to make sure your cheesecake balls come out perfect every time.
Step 1: Soften the Cream Cheese and Butter
Before anything else, make sure your cream cheese and butter are properly softened. This step is crucial for creating a smooth and creamy mixture without any lumps.
How to do it:
- Remove the cream cheese and butter from the fridge about 30–45 minutes before you begin.
- Place them on the counter, still wrapped, and let them sit at room temperature.
- They should be soft enough that your finger can gently press into them, but not melted or greasy.
Why this matters:
If you try to mix cold cream cheese or butter, your mixture will end up lumpy and uneven. Softening ensures everything blends smoothly without over-mixing.
Step 2: Beat the Cream Cheese and Butter Together
Once both the cream cheese and butter are softened, it’s time to whip them together.
Instructions:
- Place the cream cheese and butter into a large mixing bowl.
- Use an electric hand mixer on medium speed and beat until smooth and creamy—about 1–2 minutes.
- Scrape down the sides of the bowl halfway through to ensure everything incorporates evenly.
Tips:
- If you don’t have a hand mixer, a sturdy whisk or spatula will work, though it will take a bit more effort.
- Don’t over-mix—stop once the mixture is smooth and lump-free.
Step 3: Add the Powdered Sugar and Vanilla
Now it’s time to sweeten things up and bring in that warm vanilla flavor.
Instructions:
- Add ½ cup powdered sugar and 1 teaspoon vanilla extract to the cream cheese mixture.
- Mix on low speed to start—this prevents the sugar from puffing everywhere.
- Once the sugar is mostly incorporated, increase to medium speed and beat for another 30–45 seconds until smooth.
Tips:
- Powdered sugar blends easily, but always start on low speed.
- Taste your mixture—if you like it sweeter, you can add an extra tablespoon of sugar.
Step 4: Fold in the Graham Cracker Crumbs
Now we bring in the graham crackers, which help add structure and that classic cheesecake flavor.
Instructions:
- Add ¾ cup graham cracker crumbs to the mixture.
- Use a spatula or wooden spoon to fold the crumbs in gently, mixing until fully combined.
- The texture should be thick and slightly doughy—soft but able to hold its shape.
Tips:
- If your mixture feels too loose to roll, don’t panic—you’ll be chilling it next, which will firm it right up.
- For an extra burst of flavor, consider adding a pinch of cinnamon or a touch of citrus zest at this stage.
Step 5: Chill the Mixture
Now comes one of the most important steps: chilling. This allows the mixture to firm up, making it easy to roll into balls.
Instructions:
- Cover the bowl tightly with plastic wrap or a reusable cover.
- Refrigerate for at least 1 hour, preferably 2, until the mixture is firm to the touch.
Tips:
- Don’t skip this step! Trying to roll warm or soft cheesecake mixture will lead to a sticky mess.
- If you’re in a hurry, you can place the bowl in the freezer for about 30 minutes, but keep a close eye to avoid freezing it solid.
Step 6: Form the Balls
Now for the fun part—shaping your cheesecake mixture into bite-sized balls.
Instructions:
- Once the mixture is chilled, remove it from the fridge.
- Grease your hands lightly with a bit of butter or neutral oil to prevent sticking.
- Use a 2-tablespoon cookie scoop or a spoon to portion out the dough.
- Roll each portion gently between your palms to form a smooth ball.
- Place each ball on a parchment-lined tray or plate.
Tips:
- If the mixture still feels too soft to roll, stir in another tablespoon or two of graham cracker crumbs and chill for another 15–30 minutes.
- Try to keep the balls uniform in size for even chilling and a more polished presentation.
Step 7: Coat the Cheesecake Balls
This is where you add texture and visual appeal. Choose crushed graham crackers for that classic look, or go wild with sprinkles for a pop of color.
Instructions:
- Place ½ cup of crushed graham crackers in a shallow bowl.
- Roll each cheesecake ball in the crumbs until evenly coated.
- For variety, you can also roll some in sprinkles, mini chocolate chips, or crushed cookies.
Tips:
- If the coating isn’t sticking well, let the balls sit at room temperature for a minute before rolling.
- You can also lightly mist them with a bit of water to help the crumbs adhere better.
Step 8: Chill or Serve
Your cheesecake balls are now ready! You can enjoy them immediately or let them chill a little longer for a firmer bite.
Instructions:
- If serving right away, transfer the balls to a platter and enjoy.
- Otherwise, refrigerate them in a single layer, covered, until ready to serve.
Tips:
- These are best served cold or slightly chilled.
- If making ahead, store them in an airtight container with layers separated by parchment paper.
Now that you’ve mastered the recipe, let’s look at all the delicious ways to serve them.
How to Serve these no-bake cheesecake balls
These no-bake cheesecake balls are one of the most versatile desserts you can make. They’re just as perfect for casual gatherings as they are for more formal celebrations. Their small size and elegant presentation make them ideal for plating, gifting, or serving buffet-style.
Here are some fun and practical serving ideas:
Serve them on a decorative dessert platter with a variety of toppings—some coated in graham cracker crumbs, others in sprinkles, mini chocolate chips, or chopped nuts. The variety will not only look beautiful but also let guests choose their favorite.
Place each cheesecake ball into a mini cupcake liner. This makes for a polished presentation and keeps fingers clean at parties or potlucks.
Stack them on a tiered dessert stand for a stunning display at showers, birthdays, or Eid celebrations.
Create a “build-your-own” dessert station by offering plain cheesecake balls alongside different coatings like cocoa powder, crushed Oreos, cinnamon sugar, or even finely shredded coconut.
Serve alongside fresh fruit like strawberries, blueberries, or raspberries. The tangy berries contrast beautifully with the rich cheesecake filling.
Add a small drizzle of halal-friendly chocolate or strawberry syrup on the serving plate for a plated dessert look.
You can even include these cheesecake balls as part of a larger dessert board, surrounded by cookies, fruit, and chocolate bark for an impressive and Instagram-worthy spread.
No matter how you serve them, these bite-sized treats will always steal the show.
Pairing Suggestions
What you serve alongside your cheesecake balls can elevate them from simple treats to full-on dessert experiences. Whether you’re planning a dessert bar, a dinner party, or a quiet night in, here are some excellent pairings to consider.
Beverage Pairings
Hot beverages pair particularly well with cheesecake balls. Try one of these:
- A warm mug of coffee or cappuccino balances the sweetness and complements the creamy filling.
- Hot chocolate, especially with a touch of cinnamon or vanilla, makes for a cozy pairing on chilly evenings.
- Herbal teas like chamomile, mint, or rooibos offer a gentle contrast to the richness of the dessert.
- For a refreshing non-caffeinated option, serve with iced hibiscus tea or citrusy sparkling water.
Dessert Bar Additions
If you’re planning a dessert table or holiday buffet, cheesecake balls pair well with:
- Chocolate-dipped strawberries
- Fruit skewers
- Mini brownies
- Halal marshmallow treats
- Homemade truffles or date balls
Savory Pairings
Believe it or not, a few light savory snacks can help balance out the sweetness and keep your guests coming back for more. Consider offering:
- Cheese and crackers
- Mixed roasted nuts
- Savory puff pastry bites
- Mini turkey or veggie sliders
These pairings not only create variety but also keep your dessert course feeling interesting and well-rounded. Whether you’re planning a party or just treating yourself, these combinations turn a simple dessert into something special.
Storage, Freezing & Reheating Instructions
Once you’ve gone through the fun of making these delicious no-bake cheesecake balls, the next question becomes: how do you store them so they stay fresh, creamy, and delightful? Luckily, this recipe is very storage-friendly. In fact, it’s one of the reasons I love making these ahead of time for parties or gatherings. Whether you’re preparing them days in advance or planning to freeze a batch for future dessert emergencies, these tips will help you get the best results every time.
Storing in the Refrigerator
If you’re planning to serve your cheesecake balls within a few days, the refrigerator is the way to go. The chilled environment keeps them firm, flavorful, and safe to eat without compromising the texture.
How to store in the fridge:
- Place the finished cheesecake balls in a single layer in an airtight container.
- If stacking them, separate each layer with parchment paper to prevent sticking or damage to the coating.
- Refrigerate for up to 5 days.
Tips:
- Be sure the container is tightly sealed to prevent the cheesecake balls from absorbing odors from other foods in your fridge.
- If you notice any condensation inside the container, place a paper towel under the lid to absorb moisture and keep the coating crisp.
- For best texture, remove them from the fridge about 5–10 minutes before serving so they soften just slightly.
Freezing for Long-Term Storage
One of the best things about these no-bake cheesecake balls is how beautifully they freeze. This means you can make a double batch and keep some stashed away for when that sweet craving hits.
How to freeze cheesecake balls:
- Place the cheesecake balls on a parchment-lined baking sheet in a single layer.
- Freeze for about 1–2 hours, or until they are completely solid.
- Once frozen, transfer them to a freezer-safe bag or airtight container.
- Label the container with the date and freeze for up to 3 months.
Tips for freezing:
- Avoid adding coatings like sprinkles or crushed graham crackers until after thawing, as they can lose texture in the freezer.
- If you prefer to coat them before freezing, make sure they are frozen solid before transferring to the container to minimize damage to the exterior.
Thawing and Reheating
Because these are no-bake treats, there’s no need to “reheat” them in the traditional sense. However, you’ll still want to know how to bring them back to their ideal texture and flavor after freezing.
How to thaw frozen cheesecake balls:
- Remove the desired number of cheesecake balls from the freezer.
- Place them on a plate or tray and thaw in the refrigerator for 3–4 hours or overnight.
- Once thawed, roll in fresh graham cracker crumbs or sprinkles if desired to restore texture.
Quick thaw option:
- If you’re short on time, you can let them sit at room temperature for about 30–40 minutes. Just keep an eye on them to ensure they don’t become too soft.
What not to do:
- Don’t try to microwave them to speed up the thawing. The cream cheese can separate and the texture will suffer.
- Avoid leaving them out at room temperature for long periods. Once they’ve been served, refrigerate any leftovers promptly.
These storage and freezing methods make this dessert incredibly convenient. You can prepare them in advance for special events, stockpile them for sweet-tooth emergencies, or simply enjoy a few at a time throughout the week without losing quality.
Up next, let’s explore what to avoid so your cheesecake balls always come out perfect.
Common Mistakes to Avoid
Even though this recipe is straightforward and beginner-friendly, a few common mistakes can sneak in and affect your results. To help you steer clear of any missteps, here’s a list of things to watch out for and how to avoid them.
Mistake 1: Using Cold Cream Cheese
This is the number one issue that leads to lumpy, uneven cheesecake mixture. Cold cream cheese doesn’t blend well, and it can create tiny curdled pieces throughout your mixture.
How to avoid it:
Always soften your cream cheese before mixing. Let it sit at room temperature for about 30–45 minutes. If you’re in a rush, you can microwave it for 10 seconds (no more) to soften it slightly.
Mistake 2: Skipping the Chill Time
Trying to roll the cheesecake mixture before it’s fully chilled will lead to frustration. The mixture will be sticky, too soft, and difficult to shape.
How to avoid it:
Be patient and chill the mixture for at least 1–2 hours. If you’re really in a hurry, pop it in the freezer for 30 minutes instead.
Mistake 3: Overmixing the Filling
While mixing is essential to get a smooth base, overdoing it can make the mixture too soft and difficult to shape. It can also incorporate too much air, which impacts the final texture.
How to avoid it:
Mix just until everything is smooth and combined. Once the graham cracker crumbs are added, switch to folding with a spatula rather than using the mixer.
Mistake 4: Not Adjusting for Texture
Depending on your brand of cream cheese or humidity levels, your mixture may be slightly too wet or too dry.
How to avoid it:
If the mixture feels too soft to roll even after chilling, stir in more graham cracker crumbs, 1 tablespoon at a time. If it’s too stiff or dry, add a splash of milk or an extra teaspoon of softened butter to smooth it out.
Mistake 5: Storing Without Proper Separation
If you just toss all the cheesecake balls into a container, they’ll stick together, and the coatings may get ruined.
How to avoid it:
Store them in a single layer, or separate layers with parchment paper. Use an airtight container to preserve freshness and flavor.
Avoiding these common pitfalls will help ensure your no-bake cheesecake balls come out beautifully every single time—smooth, rich, flavorful, and picture-perfect.
Next, let’s take your skills even further with some advanced pro tips to make your dessert stand out.
Pro Tips
Want to take your cheesecake balls to the next level? These pro tips go beyond the basics and help you achieve bakery-quality results with minimal extra effort. Whether you’re making these for the first time or looking to refine your technique, here’s how to elevate your dessert game.
Tip 1: Use a Cookie Scoop for Uniformity
Using a cookie scoop (especially one that holds about 2 tablespoons) makes it easy to portion the cheesecake balls evenly. Not only does this ensure they look consistent, but they’ll also chill and serve more uniformly.
Why it matters: Uniformity makes your presentation more polished, especially if you’re serving these at a party or gifting them.
Tip 2: Let the Mixture Rest Before Rolling
Even after chilling, the mixture may still be a little sticky. Let it sit at room temperature for 5–10 minutes before rolling. This softens the mixture just enough to make it easier to handle while still being firm.
Why it helps: This prevents cracking and gives you smoother, more polished balls.
Tip 3: Double-Coat for Extra Crunch
If you want a bolder flavor and crunchier exterior, consider rolling the cheesecake balls in crushed graham crackers twice. The first coat will adhere slightly as the balls soften, and the second will stick even better.
Bonus: You can even toast your graham cracker crumbs for a deeper, nutty flavor.
Tip 4: Add a Flavor Twist to the Base
This recipe is delicious on its own, but adding one small element can take it from simple to signature. A teaspoon of lemon or orange zest, a dash of cinnamon, or a bit of almond extract can change the flavor in exciting ways.
Flavor add-ins to try:
- Lemon zest + blueberry jam swirl
- Cinnamon + mini chocolate chips
- Almond extract + crushed pistachios
Tip 5: Serve on Chilled Plates
If you’re serving these on a dessert tray, place your serving plate in the fridge for 20–30 minutes beforehand. This helps keep the cheesecake balls cool longer and prevents them from softening too quickly on warm surfaces.
Pro move: Use marble or glass trays—they retain chill longer and look elegant too.
With these small but impactful tweaks, you’ll elevate a simple dessert into a memorable treat that guests will rave about.
Now, let’s answer some of the most common questions people have when making this recipe.
Frequently Asked Questions (FAQs)
No matter how straightforward a recipe may be, it’s totally normal to have questions—especially if you’re making it for the first time or adapting it to suit your preferences. Below, I’ve gathered some of the most frequently asked questions about these no-bake cheesecake balls, along with helpful answers that will guide you to sweet success every time.
Can I use low-fat or non-fat cream cheese?
Yes, you can, but with a few caveats. While low-fat cream cheese will still yield a creamy result, it may not be quite as rich or firm as the full-fat version. Non-fat cream cheese is not recommended, as it can make the mixture watery and affect both the taste and texture.
Recommendation: For best results, stick with full-fat cream cheese. If you want to cut back slightly on fat, use a mix of full-fat and low-fat.
What if I don’t have graham crackers?
No problem. While graham crackers provide that classic cheesecake flavor, you can easily substitute other dry cookies or biscuits. Try crushed digestive biscuits, vanilla wafers, shortbread, or even crushed cereal like cornflakes or Rice Krispies for a different texture.
Tip: Make sure whatever substitute you use is dry and finely crushed to keep the texture consistent.
Can I make these no-bake cheesecake balls in advance?
Absolutely! These cheesecake balls are perfect for making ahead. In fact, chilling them overnight helps the flavor develop and improves the texture.
Storage advice: Just be sure to store them in an airtight container in the fridge. If you’re making them more than 24 hours ahead, wait to roll them in the final coating until closer to serving time so they don’t lose their crunch.
How long do they last in the fridge?
They’ll stay fresh in the refrigerator for up to five days. After that, the texture might begin to change slightly, and they may absorb other odors from the fridge if not properly sealed.
Best practice: Use parchment paper between layers and store in a well-sealed container to maintain their flavor and texture.
Can I freeze them after they’ve been coated?
Yes, but with a few precautions. While you can freeze coated cheesecake balls, some coatings like sprinkles may lose their color or texture when frozen. Graham cracker crumbs tend to hold up better.
Tip: If you’re planning to freeze them, consider leaving off the coating until you’re ready to serve. You can quickly roll them in fresh crumbs after thawing.
How long do they take to thaw?
If you’ve frozen your cheesecake balls, they’ll take about 3–4 hours to thaw in the refrigerator or around 30–40 minutes at room temperature.
Note: Thawing them slowly in the fridge is the best method to preserve their creamy texture and structure.
Can I add mix-ins like chocolate chips or fruit?
Definitely! Mini chocolate chips, finely chopped nuts, citrus zest, or small pieces of dried fruit can all be mixed into the cheesecake base for added flavor and texture.
Add-ins to try:
- Mini white chocolate chips and dried cranberries for a holiday twist
- Lemon zest and poppy seeds for a zesty version
- Crushed Oreos or chocolate wafers for a cookies-and-cream vibe
Are these safe to eat without baking?
Yes, completely. Since there are no raw eggs or raw flour in the recipe, these cheesecake balls are totally safe to eat without baking. All the ingredients are ready-to-eat.
Bonus: This makes them an excellent choice for kids to help prepare or for quick desserts during hot weather when you don’t want to turn on the oven.
Can I use a stand mixer instead of a hand mixer?
Yes, a stand mixer works perfectly well. Use the paddle attachment for best results and be sure to scrape down the bowl occasionally to ensure everything mixes evenly.
Reminder: Don’t overmix—once the mixture is smooth, stop the mixer to avoid making it too soft.
Are these halal-friendly?
Yes, this recipe is 100% halal-friendly. There’s no alcohol, gelatin, or animal-derived products that would conflict with halal dietary guidelines. Just be sure to double-check that the cream cheese and butter brands you use don’t include any hidden non-halal ingredients.
Note: If you’re using flavored extracts, make sure they are alcohol-free or halal-certified.
By addressing these common questions, you can confidently go into this recipe knowing what to expect and how to handle any small tweaks or adjustments you might want to make.
Now that you’ve got answers to the top questions, let’s wrap things up with a final word of encouragement and a call to action to bring this recipe to life in your kitchen.
Conclusion & Call to Action
There’s something incredibly satisfying about making a dessert that’s not only easy and stress-free but also totally delicious and universally loved. These no-bake cheesecake balls check all the boxes—they’re creamy, dreamy, indulgent, and require zero baking or complicated steps.
They’re the kind of treat that feels special enough for a celebration but simple enough to whip up on a random Tuesday afternoon. With just a few basic ingredients and a bit of chill time, you end up with something that looks and tastes like it came straight from a bakery display. Whether you’re making them for family, friends, or a crowd, these bite-sized treats are always a hit.
One of my favorite things about this recipe is how forgiving it is. Don’t have graham crackers? Swap them out. Want to make them more festive? Add sprinkles or mix in some chocolate chips. You can keep things classic or make them your own—there’s no wrong way to enjoy them. Plus, they’re perfect for making ahead, storing in the fridge, or freezing for later. That’s dessert flexibility at its finest.
I hope this guide gave you not only a step-by-step walkthrough of how to make no-bake cheesecake balls, but also the confidence to dive in and try it for yourself. They’re a great starting point if you’re new to homemade desserts, and if you’re a seasoned baker, they’re a fun and simple addition to your go-to recipes.
Now it’s your turn. Head into your kitchen, gather your ingredients, and give this recipe a try. When you do, I’d love to hear how it turns out. Did you add any fun mix-ins? Try a new coating? Share your delicious results and tag your photos so others can be inspired too.
Dessert doesn’t have to be complicated to be amazing—and these cheesecake balls are proof of that. I can’t wait for you to fall in love with them just like I have.
Happy no-baking!
Print
No-Bake Cheesecake Balls: Easy and Creamy Dessert Bites
- Total Time: 2 hours (including chill time)
- Yield: 12–14 cheesecake balls 1x
- Diet: Halal
Description
These no-bake cheesecake balls are creamy, sweet, and coated in graham cracker crumbs or sprinkles. Perfect for parties, holidays, or anytime you want a quick, crowd-pleasing treat with no oven required!
Ingredients
-
8 oz cream cheese, softened
-
2 tbsp salted butter, softened
-
½ cup powdered sugar
-
1 tsp vanilla extract
-
¾ cup graham cracker crumbs (plus more for coating)
-
½ cup crushed graham crackers (for coating)
-
Sprinkles (optional)
Instructions
-
In a large bowl, beat softened cream cheese and butter until smooth.
-
Add powdered sugar and vanilla, then mix again until creamy.
-
Fold in graham cracker crumbs until fully combined.
-
Chill the mixture for 1–2 hours until firm.
-
Use a cookie scoop to portion and roll into balls.
-
Roll each ball in crushed graham crackers or sprinkles.
-
Serve immediately or chill until ready to enjoy.
Notes
-
If the mixture feels too soft after chilling, add extra graham crumbs.
-
You can freeze the cheesecake balls for up to 3 months.
-
For variety, mix in mini chocolate chips, dried fruit, or citrus zest.
-
Store in an airtight container in the fridge for up to 5 days.
- Prep Time: 20 minutes
- Cook Time: 0 minutes
- Category: Dessert
- Method: No-Bake
- Cuisine: American