
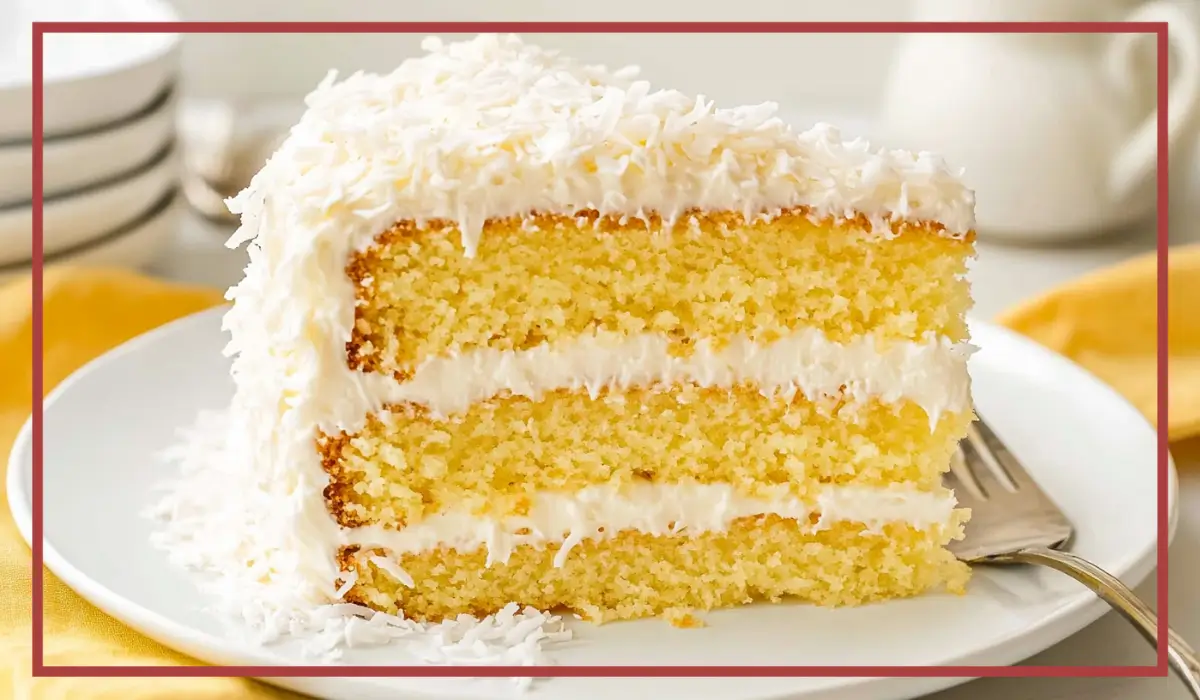
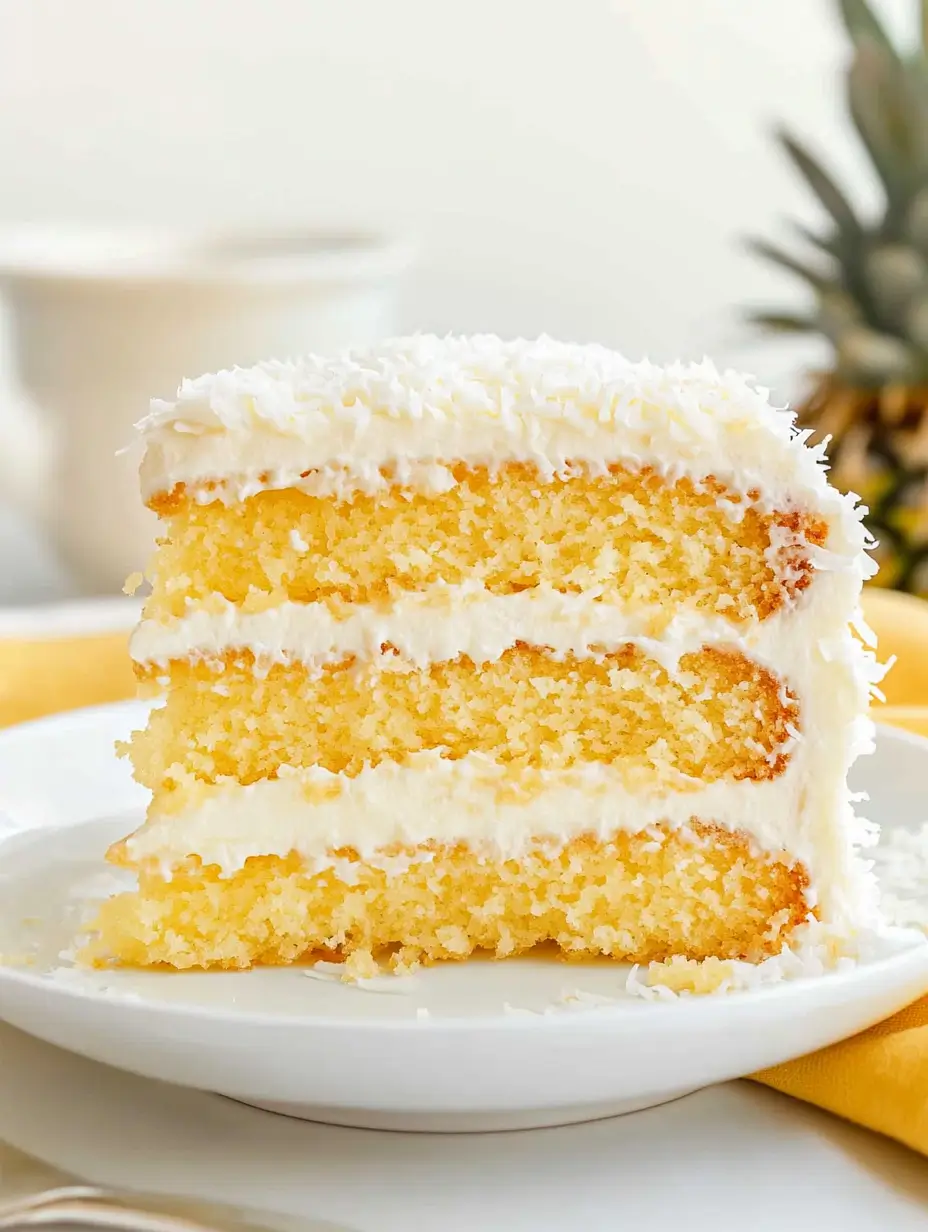
If you’re a fan of tropical flavors and love a cake that’s rich, moist, and utterly irresistible, then you’re in for a treat. This Pineapple Coconut Layer Cake is the perfect dessert to transport you to a sunny paradise, even if you’re stuck at home on a rainy day. Imagine layers of soft, buttery cake infused with vanilla and coconut extracts, generously slathered with a sweet-tart pineapple filling, and topped off with creamy, dreamy cream cheese frosting. And if that’s not enough, there’s a gentle dusting of sweetened coconut flakes to seal the deal.
I first made this cake for a family gathering, and to say it was a hit would be an understatement. Everyone raved about the combination of flavors. The refreshing burst of pineapple paired with the creamy, coconut-kissed frosting made each bite unforgettable. This cake has since become a family favorite, especially for birthdays and celebrations when we want something a little more special than the usual chocolate or vanilla cake.
But here’s the best part: despite how fancy it looks and tastes, this cake is surprisingly easy to make. Whether you’re a seasoned baker or someone who’s still figuring out their way around the kitchen, this recipe will guide you through each step with ease. Ready to bake the most delicious tropical cake of your life? Let’s get started.
Why You’ll Love This Recipe
There are so many reasons why this Pineapple Coconut Layer Cake will quickly become your go-to dessert for special occasions or just a regular Tuesday pick-me-up. Let’s break down why this recipe is such a winner:
First and foremost, it’s packed with flavor. The cake itself is buttery and moist, thanks to the combination of unsalted butter, vegetable oil, and sour cream. Plus, the addition of vanilla and coconut extracts enhances the tropical theme. The pineapple filling adds a delightful tanginess that perfectly balances the sweetness of the cake and frosting.
Second, it has an amazing texture. The cake layers are light yet rich, with a crumb that practically melts in your mouth. The creamy frosting and juicy pineapple filling make each slice a beautiful contrast of textures that keeps you going back for another bite.
Third, it’s incredibly versatile. You can make this cake as a show-stopping layer cake, cupcakes, or even a sheet cake if you prefer something a bit simpler. And if you love making things your own, there are plenty of ways to customize it, which I’ll cover later on.
Lastly, it’s a crowd-pleaser. Whether you’re serving it at a holiday gathering, birthday party, or just because you feel like having cake, everyone will be asking for the recipe.
The combination of pineapple and coconut is a match made in heaven, and this cake proves it. It’s sweet but not overly so, creamy without being heavy, and indulgent without feeling like too much. Plus, it’s gorgeous to look at, with those beautiful coconut flakes adding both flavor and decoration.
Health Benefits
Now, let’s be clear: this cake is a dessert, so it’s meant to be enjoyed as a treat. But that doesn’t mean there aren’t a few redeeming qualities to this delightful confection. Let’s break down some of the key ingredients and their benefits:
Pineapple: The star of our filling, pineapple is rich in vitamin C, which is essential for immune function and skin health. It’s also high in antioxidants and contains bromelain, an enzyme that may aid digestion and reduce inflammation.
Coconut: The coconut extract and flakes add more than just flavor. Coconut is known to provide healthy fats and some essential minerals, such as manganese, which is important for bone health and metabolism.
Eggs: Packed with high-quality protein, vitamins, and minerals, eggs are a staple in baking for their ability to bind ingredients, provide structure, and add richness. They’re also a good source of choline, essential for brain health.
Sour Cream: It adds moisture and richness to the cake, but also provides a bit of calcium and probiotics, depending on the brand you use.
While this cake may not be a “health food” by traditional standards, it certainly has some ingredients that offer nutritional benefits. The key is to enjoy it in moderation and savor every bite. And let’s be honest: part of healthy living is about balance and enjoying life’s little pleasures, right?
Preparation Time, Servings, and Nutritional Information
Preparation Time: About 1 hour
Cooking Time: 27-32 minutes
Cooling Time: 1 hour (for the cake layers) + Additional time for filling and frosting assembly
Total Time: Approximately 3 hours (including cooling and assembling)
Servings: 12-16 slices (depending on how generously you slice it)
Nutritional Information (Per Slice):
Calories: 620
Carbohydrates: 78g
Protein: 6g
Fat: 32g
Saturated Fat: 18g
Cholesterol: 155mg
Sodium: 330mg
Sugars: 58g
Fiber: 1g
Keep in mind that these nutritional facts are estimates based on 16 servings. If you slice the cake larger or smaller, the nutritional information will vary.
Ingredients List
For the Cake:
- 1 cup unsalted butter, room temperature (adds moisture and rich flavor)
- 1/3 cup vegetable oil (keeps the cake moist and tender)
- 2 1/2 cups granulated sugar (provides sweetness and structure)
- 6 large eggs, room temperature (adds richness and structure)
- 2 egg yolks (for extra moisture and a richer flavor)
- 3 cups sifted cake flour (creates a finer, more tender crumb)
- 1 tsp baking powder (helps the cake rise)
- 1/2 tsp salt (enhances flavor)
- 1 cup sour cream, room temperature (adds moisture and a slight tang)
- 1 tbsp vanilla extract (for flavor depth)
- 1 tsp coconut extract (for tropical aroma and taste)
For the Pineapple Filling:
- 2 tbsp unsalted butter (for richness)
- 2 tbsp cornstarch (for thickening)
- 1/2 cup granulated sugar (adds sweetness)
- 2 cups crushed pineapple with juice (the star of the filling)
- 1 tsp fresh lemon juice (adds brightness)
- 1 tsp vanilla extract (rounds out the flavor)
For the Frosting:
- 1/2 cup unsalted butter, room temperature (for creaminess)
- 4 oz cream cheese, room temperature (adds richness and tang)
- 2 cups confectioner’s sugar (sweetness and structure)
- 1 tsp heavy whipping cream (for a smooth, spreadable consistency)
- 1 tsp vanilla extract (for flavor depth)
- 1/8 tsp coconut extract (for that extra coconut punch)
- 1 cup sweetened coconut flakes (for decoration and extra flavor)
Each ingredient in this cake plays an important role in bringing the entire masterpiece together. From the richness of butter and cream cheese to the sweet-tart contrast of pineapple filling, everything works in perfect harmony.
Up next, I’ll walk you through the step-by-step process of bringing this delicious Pineapple Coconut Layer Cake to life. And don’t worry—I’ll be sharing plenty of helpful tips along the way to make sure your cake turns out perfectly. Let’s get baking!
Step-By-Step Cooking Instructions
Ready to dive in and make the most incredible Pineapple Coconut Layer Cake you’ve ever tasted? Let’s break it down, step by step, so you can bake with confidence.
Step 1: Prepare Your Cake Pans and Preheat Oven
- Preheat your oven to 325°F (163°C).
- Grease and flour three 9-inch round cake pans. To ensure easy removal, you can also line the bottoms with parchment paper.
Step 2: Make the Cake Batter
- In a large mixing bowl, beat the butter and vegetable oil together until smooth and creamy. This combination of butter and oil ensures a moist, tender cake.
- Gradually add the granulated sugar while continuing to beat the mixture. Keep beating for about 3-4 minutes, until the mixture is light and fluffy. This step is crucial for incorporating air into the batter, giving your cake a light, soft texture.
Step 3: Add the Eggs and Yolks
- Add the eggs and yolks one at a time, beating well after each addition. Make sure each egg is fully incorporated before adding the next.
- This gradual process helps the batter emulsify properly, leading to a smoother, more even cake.
Step 4: Combine the Dry Ingredients
- In a separate bowl, whisk together the cake flour, baking powder, and salt.
- Gradually add the dry ingredients to the butter mixture, mixing slowly until just combined. Avoid over-mixing at this stage, as it can result in a dense cake.
Step 5: Add Sour Cream and Extracts
- Gently fold in the sour cream, vanilla extract, and coconut extract. The sour cream not only adds richness and moisture but also gives the cake a subtle tang that balances the sweetness beautifully.
- Mix until the ingredients are just incorporated and the batter is smooth.
Step 6: Divide and Bake
- Divide the batter evenly among the three prepared cake pans. Use a spatula to smooth the tops.
- Bake in the preheated oven for 27-32 minutes, or until a toothpick inserted into the center of each cake layer comes out clean.
- Let the cakes cool in their pans for about 10 minutes before transferring them to wire racks to cool completely. Make sure they’re fully cooled before you even think about frosting or assembling.
Step 7: Prepare the Pineapple Filling
- In a medium saucepan, melt the butter over medium heat.
- Add the cornstarch, granulated sugar, crushed pineapple with juice, fresh lemon juice, and vanilla extract.
- Stir the mixture constantly while cooking. It will take about 8-10 minutes to thicken. You’re looking for a consistency that’s thick enough to spread, but not so thick that it becomes gelatinous.
- Once it reaches the desired thickness, remove from heat and let it cool completely before using. You can speed up the cooling process by placing the saucepan in the refrigerator.
Step 8: Make the Cream Cheese Frosting
- In a large mixing bowl, beat the butter and cream cheese together until smooth and creamy. This step is essential to avoid lumps in your frosting.
- Gradually add the confectioner’s sugar while beating on low speed. Once all the sugar is incorporated, increase the speed and beat until fluffy and light.
- Add the heavy whipping cream, vanilla extract, and coconut extract, then beat again until everything is smooth and well-combined.
- The frosting should be thick but spreadable. If it feels too thick, you can add a tiny bit more heavy cream. If it’s too runny, pop it in the fridge for 10 minutes to firm up.
Step 9: Assemble the Cake
- Once your cake layers are completely cooled, it’s time to assemble the masterpiece. Place one cake layer on your serving plate or a cake stand.
- Spread a generous layer of the pineapple filling over the top. Make sure to leave about a half-inch border around the edge so the filling doesn’t seep out when you add the next layer.
- Place the second cake layer on top of the filling and repeat the process. Add the final cake layer on top.
Step 10: Apply the Frosting
- Using an offset spatula or a butter knife, spread a thin layer of cream cheese frosting (known as a crumb coat) over the entire cake. This initial layer will lock in any loose crumbs, giving you a smooth surface to work with.
- Chill the cake for about 20 minutes to set the crumb coat.
- Once the crumb coat is firm, spread the remaining frosting evenly over the top and sides of the cake. Take your time and make it as smooth as you like.
Step 11: Decorate with Coconut Flakes
- Gently press the sweetened coconut flakes onto the sides and top of the cake. This not only adds flavor but also creates a beautiful, snowy-white appearance.
Step 12: Chill and Serve
- For best results, refrigerate the cake for at least 1 hour before serving. This helps everything firm up, making slicing and serving much easier.
- When ready to serve, use a sharp knife to cut clean, beautiful slices.
And just like that, your Pineapple Coconut Layer Cake is ready to be devoured! Now, let’s talk about how to make the most of serving this gorgeous cake.
How to Serve
This Pineapple Coconut Layer Cake is a showstopper all on its own, but there are several ways you can enhance the experience even more:
- Serve it slightly chilled or at room temperature. Both work well, but the frosting will be creamier at room temperature.
- Pair each slice with a dollop of whipped cream or a scoop of vanilla ice cream if you’re feeling indulgent.
- Garnish with fresh pineapple slices or toasted coconut flakes for added texture and visual appeal.
- For an elegant touch, drizzle a bit of pineapple syrup or caramel sauce over the slice before serving.
This cake pairs beautifully with a hot cup of coffee or a refreshing glass of cold milk. And if you’re serving this at a party, watch it disappear quickly—it’s that good.
Pairing Suggestions
Wondering what to serve alongside this decadent cake? Here are a few ideas that complement the tropical flavors perfectly:
- Fresh Fruit Salad: A mix of tropical fruits like mango, kiwi, and banana pairs wonderfully with the cake.
- Coconut Milk Coffee: Adding coconut milk to your coffee can enhance the cake’s coconut flavor.
- Pineapple Mocktail: A refreshing drink made with pineapple juice, coconut water, and a touch of lime is a perfect complement.
- Mint Tea: A light, herbal tea can help cleanse the palate between bites of the rich, creamy cake.
Now that you’ve baked and served your cake, let’s talk about how to store and reheat any leftovers—if there are any left!
Storage, Freezing & Reheating Instructions
One of the best things about this Pineapple Coconut Layer Cake is that it keeps well, so you can enjoy leftovers for days. Here’s how to store, freeze, and reheat your cake to maintain its flavor and freshness.
Storing the Cake:
- If you plan to eat the cake within a couple of days, you can store it in the refrigerator.
- Place the cake in an airtight container or cover it loosely with plastic wrap to prevent it from drying out.
- The cake will stay fresh for up to 4 days in the refrigerator.
Freezing the Cake:
If you want to make this cake ahead of time or save some for later, freezing it is a fantastic option.
- Freezing the Whole Cake: After assembling and frosting, place the cake in the refrigerator for about 1 hour to firm up the frosting. Once it’s slightly firm, wrap the entire cake tightly in plastic wrap, followed by a layer of aluminum foil. Store it in the freezer for up to 3 months.
- Freezing Individual Slices: If you prefer to freeze individual servings, slice the cake and wrap each slice in plastic wrap. Then, place all wrapped slices in a freezer-safe zip-top bag or airtight container.
- Label and Date: Always label your cake with the date you made it to keep track of freshness.
Thawing and Reheating:
- To thaw the whole cake, transfer it to the refrigerator and let it defrost overnight.
- For individual slices, you can either thaw them in the refrigerator or leave them at room temperature for about 30 minutes.
- This cake is best served chilled or at room temperature, so reheating is not necessary. However, if you prefer your cake slightly warm, you can microwave a slice for 10-15 seconds on low power.
The cake will taste just as delicious as the day you made it, especially if you stored it properly. And let’s be honest—knowing you have a slice of this tropical delight waiting for you in the freezer is pure joy.
Common Mistakes to Avoid
Even though this recipe is straightforward, there are a few common pitfalls you should watch out for to ensure your cake turns out perfectly every single time.
- Over-Mixing the Batter:
Mixing the cake batter too much after adding the flour can result in a dense, tough cake. Once you add the dry ingredients, mix until just combined. A few small lumps are fine. - Not Cooling the Cake Layers Completely:
As tempting as it may be to dive right into assembling the cake, patience is key. If the cake layers are even slightly warm, the frosting will melt and become runny. Make sure the layers are completely cool before adding the filling and frosting. -
Skipping the Crumb Coat:
A crumb coat is an initial thin layer of frosting that seals in any loose crumbs. Skipping this step can result in crumbs mixing into your final layer of frosting, making the cake look messy. - Using Cold Ingredients:
It’s essential to use room temperature ingredients, especially the eggs, butter, and sour cream. Cold ingredients don’t mix as well, which can lead to a lumpy batter or uneven baking. - Forgetting to Drain the Pineapple:
While you do use the juice from the crushed pineapple for the filling, it’s important not to add too much liquid. If the filling is too watery, it won’t thicken properly and could make your cake layers soggy. -
Over-Baking the Cake:
Keep an eye on your cakes during baking. Over-baking will dry out the cake layers. Check for doneness by inserting a toothpick into the center—if it comes out clean or with just a few crumbs, your cake is ready.
Being mindful of these potential mistakes will make a huge difference in your final result. And even if something doesn’t go quite as planned, remember: it’s cake. It’s going to taste delicious regardless.
Pro Tips
To make sure your Pineapple Coconut Layer Cake turns out as amazing as possible, here are some pro tips to elevate your baking game:
- Use Cake Flour Instead of All-Purpose Flour:
Cake flour gives this cake its soft, delicate crumb. If you don’t have cake flour on hand, you can make your own by measuring out 1 cup of all-purpose flour, removing 2 tablespoons of it, and replacing those with 2 tablespoons of cornstarch. Sift the mixture well before using. - Toast the Coconut Flakes:
For a richer flavor and slight crunch, you can toast the coconut flakes before pressing them onto the cake. Just spread them on a baking sheet and bake at 350°F (175°C) for about 5-7 minutes, stirring occasionally until golden brown. - Chill the Frosting Before Applying:
If your frosting feels too soft, pop it in the fridge for about 10-15 minutes before spreading it on the cake. This will help it firm up, making it easier to achieve a smooth finish. - Make It Ahead:
This cake is actually better the next day! The flavors have more time to meld together, and the cake stays wonderfully moist. You can even make the cake layers and pineapple filling a day or two ahead and frost the cake just before serving. - Use a Serrated Knife for Slicing:
When serving, use a sharp serrated knife to cut clean slices. This prevents the layers from squishing down and keeps your presentation beautiful.
These simple but effective tips will have you baking like a pro in no time. And now, let’s address some of the most frequently asked questions about this delicious cake.
Frequently Asked Questions (FAQs)
Q1: Can I make this cake gluten-free?
Yes! You can substitute the cake flour with a high-quality gluten-free baking flour blend. Make sure it contains xanthan gum or a similar binding agent to achieve the proper texture.
Q2: Can I use fresh pineapple instead of canned?
Absolutely! Just make sure to finely crush the pineapple and drain any excess liquid to avoid a runny filling.
Q3: How can I make this cake less sweet?
If you prefer a less sweet cake, reduce the amount of sugar in the pineapple filling by 1/4 cup and use a bit less confectioner’s sugar in the frosting.
Q4: Can I use store-bought frosting?
Yes, but homemade frosting will provide a much richer, creamier flavor. If using store-bought, choose a high-quality cream cheese or buttercream frosting.
Q5: Can I turn this recipe into cupcakes?
Definitely! This recipe will make approximately 24 cupcakes. Simply divide the batter evenly into lined muffin tins and bake at 350°F (175°C) for 18-22 minutes.
Q6: How should I store leftovers?
Store leftovers in an airtight container in the refrigerator for up to 4 days. For longer storage, follow the freezing instructions provided above.
Q7: What if I don’t have coconut extract?
If you don’t have coconut extract, you can skip it, but the cake will have a milder coconut flavor. If possible, try adding a bit of toasted coconut to enhance the flavor.
Q8: Can I make this cake in a sheet pan?
Yes! Bake the batter in a 9×13-inch baking pan at 325°F (163°C) for about 40-45 minutes.
Q9: Can I make the cake layers ahead of time?
Yes, you can bake the cake layers, wrap them tightly in plastic wrap, and store them at room temperature for up to 24 hours or freeze them for up to 3 months.
Q10: Can I double the pineapple filling for extra layers?
Definitely! If you love the filling, feel free to double the recipe and use more between the layers.
Conclusion & Call to Action
You’ve just baked the most luscious Pineapple Coconut Layer Cake, and I bet your kitchen smells absolutely heavenly. This cake is everything you could ever want from a dessert: rich, moist, sweet, tangy, creamy, and just the right amount of tropical. Whether you’re making it for a birthday, a holiday, or just because you deserve something special, this cake will not disappoint.
I remember the first time I made this cake; it was an instant hit. From the delightfully buttery, coconut-infused cake layers to the refreshing pineapple filling and the rich cream cheese frosting, every component works together in perfect harmony. It’s a cake that feels like a warm, sunny day on a tropical beach. And the best part? You made it from scratch, with love, and it tastes way better than anything you could buy from a bakery.
Baking can be a little intimidating at times, but I hope this detailed guide has made the process feel approachable and fun. You’ve learned everything from avoiding common mistakes to customizing the recipe to suit your taste. And let’s not forget those helpful storage tips to make sure you can enjoy every last slice.
Now that your masterpiece is complete, it’s time to share it with the world. Cut yourself a generous slice, pour yourself a hot cup of coffee or a refreshing mocktail, and savor every bite. And if you’re feeling extra generous, share a slice with friends or family—they’ll be singing your praises for weeks.
I’d love to hear how your Pineapple Coconut Layer Cake turned out. Did you stick with the classic version, or did you make it your own with some fun variations? Did you try the toasted coconut flakes for extra flavor? Whatever you did, I’m sure it was amazing.
Please leave a comment below and share your baking experience. If you took photos of your cake (and trust me, you’ll want to), feel free to tag me on social media. I can’t wait to see your beautiful creations!
And if you’re already planning your next baking adventure, I’ve got tons of delicious recipes waiting for you. Keep baking, keep experimenting, and most importantly, keep enjoying every moment in the kitchen.
Happy Baking!
Print
Pineapple Coconut Layer Cake Recipe – Moist & Tropical Delight
- Total Time: 3 hours (including cooling and assembling)
- Yield: 12-16 slices 1x
- Diet: Vegetarian
Description
This Pineapple Coconut Layer Cake is a rich, tropical dessert featuring buttery coconut-infused cake layers, tangy pineapple filling, and creamy cream cheese frosting topped with sweetened coconut flakes. Perfect for birthdays, holidays, or any special occasion!
Ingredients
For the Cake:
-
1 cup unsalted butter, room temperature
-
1/3 cup vegetable oil
-
2 1/2 cups granulated sugar
-
6 large eggs, room temperature
-
2 egg yolks
-
3 cups sifted cake flour
-
1 tsp baking powder
-
1/2 tsp salt
-
1 cup sour cream, room temperature
-
1 tbsp vanilla extract
-
1 tsp coconut extract
For the Pineapple Filling:
-
2 tbsp unsalted butter
-
2 tbsp cornstarch
-
1/2 cup granulated sugar
-
2 cups crushed pineapple with juice
-
1 tsp fresh lemon juice
-
1 tsp vanilla extract
For the Frosting:
-
1/2 cup unsalted butter, room temperature
-
4 oz cream cheese, room temperature
-
2 cups confectioner’s sugar
-
1 tsp heavy whipping cream
-
1 tsp vanilla extract
-
1/8 tsp coconut extract
-
1 cup sweetened coconut flakes (for decoration)
Instructions
-
Preheat oven to 325°F (163°C) and prepare three 9-inch round cake pans with grease and flour.
-
Beat butter and oil until smooth. Gradually add sugar, beating until fluffy.
-
Add eggs and yolks one at a time, mixing well after each addition.
-
Combine flour, baking powder, and salt. Gradually add to the batter.
-
Fold in sour cream, vanilla extract, and coconut extract.
-
Divide batter into pans and bake for 27-32 minutes. Cool completely.
-
For filling, cook all ingredients over medium heat for 8-10 minutes until thick. Let cool.
-
For frosting, beat butter and cream cheese until smooth. Add confectioner’s sugar, heavy cream, vanilla, and coconut extract. Beat until fluffy.
-
Assemble cake with pineapple filling between layers. Frost cake and decorate with coconut flakes.
-
Chill for 1 hour before serving.
Notes
-
Toast coconut flakes for extra flavor.
-
For gluten-free, use gluten-free baking flour.
-
Store leftovers in the refrigerator for up to 4 days.
- Prep Time: 1 hour
- Cook Time: 32 minutes
- Category: Dessert
- Method: Baking
- Cuisine: American