
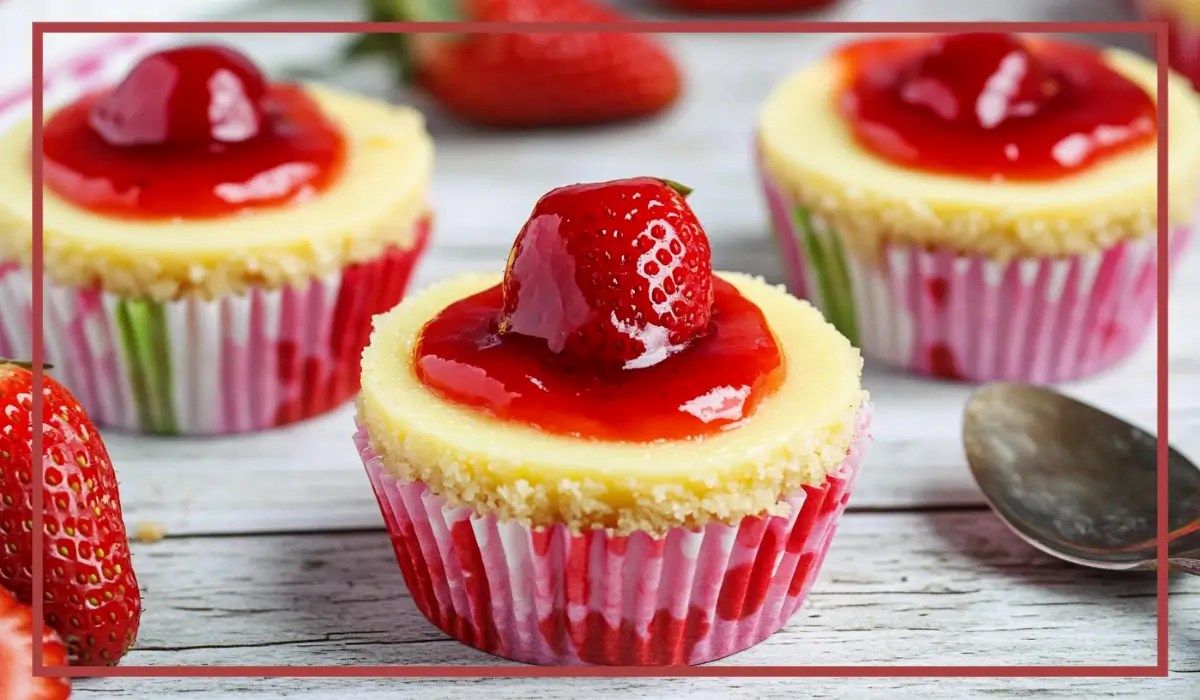
If you’ve ever craved cheesecake but felt intimidated by the idea of making a full-sized one, let me introduce you to your new best friend: Mini Cheesecakes. These delightful little desserts are creamy, rich, and completely customizable. Best of all, they’re portion-controlled, making them perfect for sharing, serving at parties, or just indulging in a sweet treat whenever you need a pick-me-up.
I remember the first time I made these mini cheesecakes for a family gathering. I wanted something special that wouldn’t keep me chained to the kitchen all day. These mini cheesecakes turned out to be a total hit. Everyone loved the smooth, creamy filling sitting atop that buttery, slightly crunchy graham cracker crust. And the best part? They were so easy to make, I almost couldn’t believe it.
What makes these mini cheesecakes so fantastic is that they’re both simple to prepare and versatile. You can top them with just about anything: fresh berries, caramel drizzle, chocolate ganache, or even a dollop of whipped cream. Whatever you choose, these mini cheesecakes are sure to impress.
Whether you’re a seasoned baker or a complete beginner, this recipe is foolproof. With straightforward steps and simple ingredients, you’ll have decadent mini cheesecakes ready in no time. Plus, they’re baked in a cupcake pan, which makes them convenient to serve and store. Ready to dive into cheesecake bliss? Let’s do this.
Why You’ll Love This Recipe
There are so many reasons why this mini cheesecake recipe is a total game-changer, especially if you love creamy desserts but hate the hassle of complicated recipes.
1. Easy to Make: You don’t need any fancy springform pans or water baths like you would for a traditional cheesecake. Just grab a cupcake pan, line it with paper liners, and you’re good to go.
2. Perfectly Portioned: These mini cheesecakes are individually sized, which means no more messy slicing or fighting over who gets the biggest piece. Each person gets their own adorable, personal-sized treat.
3. Versatile and Customizable: You can dress these cheesecakes up or down depending on the occasion. From simple berry toppings to elaborate caramel swirls or even crushed cookies, the options are practically endless. This makes them perfect for everything from birthday parties to casual get-togethers.
4. Creamy and Delicious: The texture of these cheesecakes is everything you want it to be—smooth, creamy, and just sweet enough. The vanilla extract adds a comforting warmth that ties all the flavors together beautifully.
5. Make-Ahead Friendly: Because these cheesecakes need to be chilled before serving, you can make them in advance. They also store and freeze well, making them the perfect dessert for planning ahead.
Whether you’re making them for a special occasion or just because you’re craving something sweet, these mini cheesecakes will not disappoint.
Health Benefits
While mini cheesecakes are definitely a treat, making them at home gives you the power to control the ingredients and even boost their nutritional value if you choose to. Let’s break down some of the potential benefits:
1. Controlled Portions: Because these cheesecakes are baked in cupcake liners, you get a precise portion size every time. This can help with mindful eating and prevent overindulgence.
2. Quality Ingredients: Making cheesecake at home allows you to use high-quality, fresh ingredients. You can even opt for organic cream cheese and eggs for a healthier approach.
3. Nutrient-Rich Ingredients: Cream cheese is rich in healthy fats, calcium, and vitamin A. While it’s high in calories, it also provides essential nutrients that support bone health and immune function.
4. Reduced Sugar Options: If you want to cut down on sugar, you can replace some of the granulated sugar with alternatives like monk fruit sweetener or erythritol without sacrificing flavor.
5. Customizable for Dietary Needs: You can easily modify this recipe to make it gluten-free by using gluten-free graham crackers. Additionally, you can use reduced-fat cream cheese and sour cream if you prefer a lighter option.
Remember, while these mini cheesecakes are a decadent dessert, making them from scratch allows you to enjoy them with fewer preservatives and more natural ingredients.
Preparation Time, Servings, and Nutritional Information
Preparation Time: 20 minutes
Cooking Time: 17–19 minutes
Cooling Time: 2 hours and 30 minutes (including chilling time)
Total Time: Approximately 3 hours and 10 minutes
Servings: Makes 18 mini cheesecakes
Nutritional Information (Per Serving):
Calories: Approximately 210 kcal
Protein: 3.7 grams
Carbohydrates: 18 grams
Fat: 14 grams
Sugar: 13 grams
Fiber: 0.4 grams
Calcium: 52 mg
Vitamin A: 545 IU
Keep in mind that the nutritional values may vary slightly depending on the specific brands of ingredients you use and the toppings you choose.
Ingredients List
For the Graham Cracker Crust:
- 1.5 cups graham cracker crumbs (165 grams)
- 3 tablespoons granulated sugar
- 1/4 cup unsalted butter, melted
For the Cheesecake Filling:
- 16 ounces cream cheese, room temperature (454 grams)
- 1/2 cup granulated sugar (99 grams)
- 2 large eggs, room temperature
- 1/2 cup sour cream (114 grams)
- 1 teaspoon vanilla extract
The ingredients are straightforward, and you might already have most of them in your pantry or fridge. If not, they’re easy to find at your local grocery store.
Step-By-Step Cooking Instructions
Step 1: Preheat & Prepare
- Preheat your oven to 350°F (177°C).
- Line a cupcake pan with 18 paper liners to prevent sticking and make removing the cheesecakes easier.
Step 2: Make the Graham Cracker Crust
- In a medium bowl, combine the graham cracker crumbs, sugar, and melted butter.
- Mix until the crumbs are evenly coated with the butter, forming a sandy texture.
- Distribute about 1 tablespoon of the crumb mixture into each cupcake liner.
- Press down firmly with the back of a spoon or a small measuring cup to create a compact, even crust.
Step 3: Prepare the Cheesecake Filling
- In a large mixing bowl, beat the softened cream cheese with an electric mixer until smooth and creamy, about 2 minutes.
- Add the sugar and mix until well incorporated and smooth.
- Add the eggs one at a time, mixing on low speed until just combined after each addition.
- Add the sour cream and vanilla extract, then mix until just combined. Avoid overmixing to prevent too much air from getting into the batter.
Step 4: Fill and Bake
- Spoon the cheesecake filling evenly over the prepared crusts, filling each liner almost to the top.
- Gently tap the pan on the counter a few times to release any air bubbles.
- Bake for 17–19 minutes, until the cheesecakes are set with a slight jiggle in the center.
- Turn off the oven, crack the oven door, and let the cheesecakes rest inside for 2–3 minutes before removing them.
Step 5: Cool and Chill
- Remove the cheesecakes from the oven and let them cool at room temperature for about 30 minutes.
- Transfer them to the refrigerator to chill for at least 2 hours before serving.
Step 6: Serve and Enjoy
- Once fully chilled, your mini cheesecakes are ready to serve.
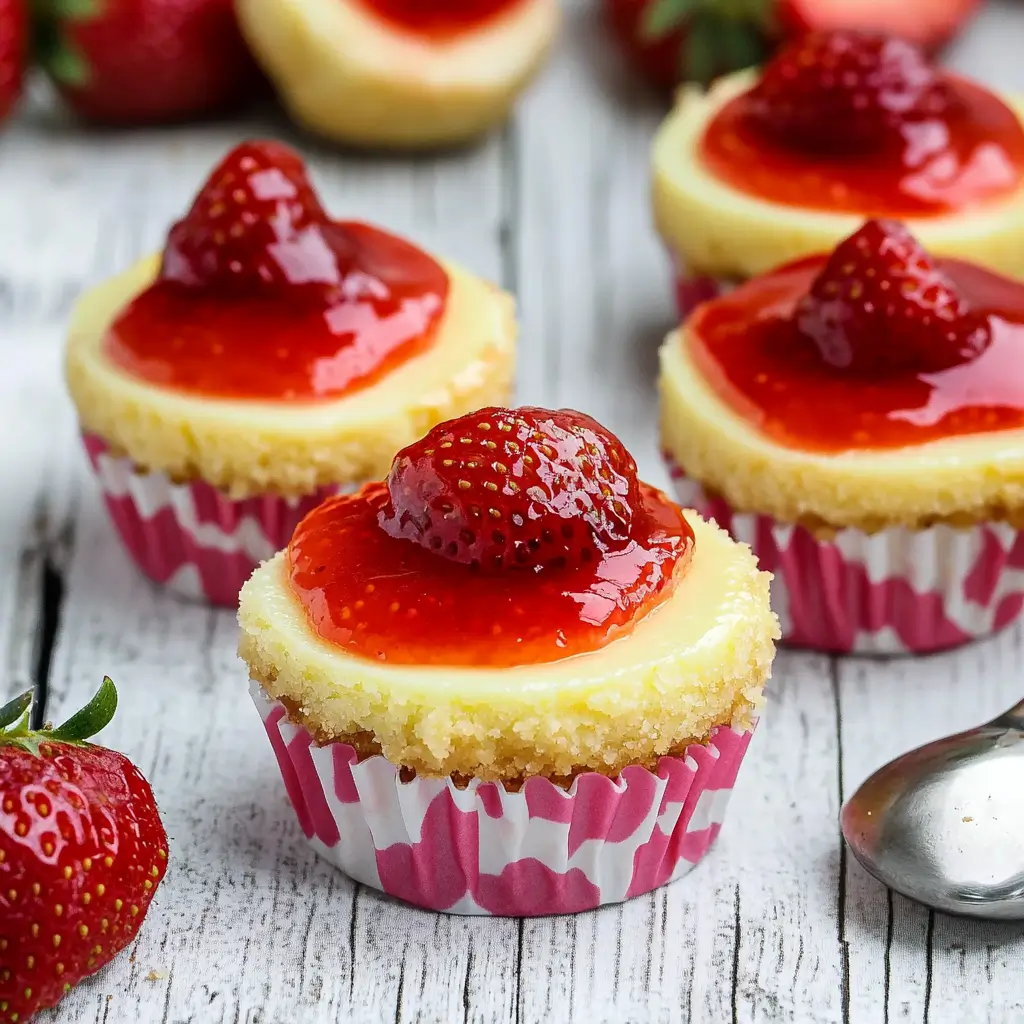
- Carefully remove the paper liners and add your favorite toppings. Some popular options include fresh strawberries, blueberry compote, caramel drizzle, crushed Oreos, or even a dollop of whipped cream.
- Serve immediately or store them as instructed below if you’re saving them for later.
These cheesecakes are wonderfully creamy with a buttery, slightly crunchy crust. The vanilla flavor is subtle yet perfect, making it a versatile base for any topping you desire.
How to Serve
Serving these mini cheesecakes is truly a joy because of how easy they are to personalize. Here are a few delicious ways to serve them:
Classic Style: Serve them plain or with a light dusting of powdered sugar if you prefer something simple. The creamy texture and graham cracker crust are more than enough to impress.
Fruit Toppings: Fresh berries like strawberries, raspberries, or blueberries make excellent toppings. You can also use fruit sauces or preserves for a sweet and tangy contrast.
Chocolate Lovers’ Dream: Drizzle melted chocolate or spread chocolate ganache over the top. Adding some chocolate shavings or chips is also a great idea.
Caramel Delight: A swirl of caramel sauce or a sprinkle of toffee bits brings a delightful sweetness that pairs beautifully with the creamy cheesecake.
Nutty Crunch: Crushed nuts such as pecans, walnuts, or almonds add a wonderful crunch and depth of flavor.
Whipped Cream Finish: A dollop of freshly whipped cream with a hint of vanilla or cocoa powder sprinkled on top provides a classic finish.
No matter how you choose to serve them, these mini cheesecakes are bound to be a hit. Feel free to mix and match toppings to find your perfect combination.
Pairing Suggestions
Pairing these mini cheesecakes with the right beverages or side dishes can elevate the entire experience. Here are some ideas:
Hot Beverages: Coffee and cheesecake are a match made in heaven. Try pairing your mini cheesecakes with a rich espresso, creamy latte, or even a hot chocolate if you’re looking for something sweeter. Herbal teas like chamomile or mint can also be lovely for a lighter touch.
Cold Beverages: If you prefer something cold, iced coffee, iced lattes, or even a chilled glass of milk pairs wonderfully with the richness of the cheesecake. A fruity iced tea can also work well, especially if your cheesecake topping features fresh berries.
Fruit Salad: Serving these mini cheesecakes with a light fruit salad adds freshness and a burst of natural sweetness that complements the creamy filling.
Ice Cream: Want to make dessert extra decadent? Pair these cheesecakes with a small scoop of vanilla or caramel ice cream. The combination of creamy textures is simply irresistible.
Savory Contrast: If you’re serving these cheesecakes as part of a larger spread, consider pairing them with something savory, like a charcuterie board. The salty, rich flavors of cured meats and cheeses can make the sweetness of the cheesecakes shine even brighter.
These pairings can transform your mini cheesecakes into an unforgettable dessert experience, whether served at a casual family dinner or a fancy dinner party.
Storage, Freezing & Reheating Instructions
One of the best things about these mini cheesecakes is how well they store, making them a convenient make-ahead dessert. Here’s how to keep them fresh:
Storing in the Fridge:
- Store leftover cheesecakes in an airtight container in the refrigerator for up to 5 days.
- To maintain freshness, keep any toppings separate until you’re ready to serve them.
Freezing:
- These mini cheesecakes freeze beautifully!
- Place cooled cheesecakes (without toppings) on a baking sheet lined with parchment paper.
- Freeze until solid, usually about 2–3 hours.
- Once frozen, transfer them to a freezer-safe container or resealable plastic bag.
- Store in the freezer for up to 3 months.
Thawing:
- To enjoy frozen mini cheesecakes, simply transfer them to the refrigerator and allow them to thaw overnight.
- Alternatively, if you’re in a hurry, let them sit at room temperature for about 30 minutes before serving.
Reheating:
- These cheesecakes are meant to be enjoyed chilled, so reheating is not necessary. However, if you prefer a softer texture, you can let them sit at room temperature for 10–15 minutes before eating.
Proper storage ensures you can always have a delicious dessert ready for those spontaneous sweet cravings or when unexpected guests drop by.
Common Mistakes to Avoid
Making mini cheesecakes is pretty straightforward, but there are a few common pitfalls to watch out for:
1. Overmixing the Batter:
Overmixing introduces too much air into the batter, which can cause the cheesecakes to rise too quickly and then fall, resulting in cracks. Beat the ingredients until just combined for the best results.
2. Skipping the Room Temperature Ingredients:
Always use room-temperature cream cheese, eggs, and sour cream. Cold ingredients can cause lumps in the batter and prevent a smooth, creamy texture.
3. Not Allowing Enough Cooling Time:
It’s tempting to dig in right away, but cheesecake needs time to set. Make sure to refrigerate the cheesecakes for at least 2 hours before serving.
4. Overbaking:
Mini cheesecakes should be slightly jiggly in the center when you take them out of the oven. Overbaking will result in a dense, dry texture instead of a creamy, luscious one.
5. Adding Toppings Too Early:
If you plan to add fruit or sauces, wait until just before serving. Adding them too soon can cause the cheesecakes to become soggy or lose their structural integrity.
Avoiding these mistakes ensures your mini cheesecakes will have the perfect creamy texture and rich flavor every single time.
Pro Tips
Here are some helpful tips to take your mini cheesecake game to the next level:
1. Use a Measuring Cup for the Crust:
When pressing the graham cracker mixture into the cupcake liners, use the bottom of a small measuring cup to pack the crust firmly and evenly. This creates the perfect foundation for your creamy filling.
2. Tap Out Air Bubbles:
Before baking, gently tap the cupcake pan on the counter a few times to remove any air bubbles trapped in the batter. This step helps achieve a smoother, creamier texture.
3. Chill Completely Before Serving:
Patience is key! Chilling the cheesecakes thoroughly enhances the texture and allows the flavors to meld beautifully.
4. Experiment with Flavors:
Try adding lemon zest, almond extract, or even a swirl of melted chocolate to the filling for an extra-special twist.
5. Make in Advance:
Since these cheesecakes store and freeze well, feel free to make a batch or two ahead of time. They’re perfect for holiday gatherings, birthday parties, or whenever you need an impressive dessert without last-minute stress.
Frequently Asked Questions (FAQs)
Making mini cheesecakes is simple, but it’s natural to have a few questions before diving in. Here are some of the most commonly asked questions to help you along the way:
1. Can I Use Low-Fat Cream Cheese Instead of Regular Cream Cheese?
Yes, you can! However, keep in mind that using low-fat cream cheese will slightly affect the texture and flavor of the cheesecakes. They may not be as rich and creamy as the original version, but they’ll still be delicious.
2. Can I Make This Recipe Gluten-Free?
Absolutely. Simply substitute the graham cracker crumbs with gluten-free graham crackers. Everything else in the recipe is naturally gluten-free.
3. What Can I Use Instead of Sour Cream?
If you don’t have sour cream on hand or prefer not to use it, you can replace it with plain Greek yogurt. The texture and taste will be very similar, and it adds a little extra protein, too.
4. How Do I Prevent My Mini Cheesecakes from Cracking?
To avoid cracks, make sure your ingredients are at room temperature before mixing. Also, avoid overmixing the batter and don’t overbake the cheesecakes. A slight jiggle in the center is fine when you remove them from the oven.
5. Can I Add Flavors to the Cheesecake Batter?
Definitely! You can add flavorings like lemon zest, almond extract, or even cocoa powder to the batter. For a fruity twist, you can also swirl in fruit puree before baking.
6. Can I Freeze the Cheesecakes with Toppings?
It’s best to freeze them without toppings. Add your favorite toppings right before serving to keep them fresh and visually appealing.
7. Can I Make the Cheesecakes Ahead of Time?
Yes, and they actually taste better when made ahead. You can store them in the refrigerator for up to 5 days or in the freezer for up to 3 months.
8. Why Did My Cheesecakes Sink in the Middle?
Sinking usually happens when too much air is incorporated into the batter from overmixing, or if they are taken out of the oven too quickly. Allowing them to cool gradually in the oven for a few minutes helps prevent sinking.
9. Can I Make These Cheesecakes Without an Electric Mixer?
Yes, you can use a hand whisk, but it will require more effort. Make sure the cream cheese is fully softened before mixing to make the process easier.
10. How Should I Store Leftover Mini Cheesecakes?
Store leftover mini cheesecakes in an airtight container in the refrigerator for up to 5 days. If you want to keep them longer, freeze them following the instructions provided above.
These answers should help you feel confident and prepared to tackle this delicious recipe. If you have any other questions, feel free to ask!
Conclusion & Call to Action
And there you have it—perfectly creamy, irresistibly delicious Mini Cheesecakes that are sure to become a favorite in your dessert collection. They’re easy to make, beautiful to serve, and endlessly versatile when it comes to flavors and toppings. Whether you’re making them for a birthday party, a holiday gathering, or just because you need a sweet treat, this recipe is a winner every single time.
What makes these mini cheesecakes so special is how foolproof they are. With a simple graham cracker crust and a rich, creamy filling, you’ve got a dessert that looks and tastes like it took hours to make. And the best part? They store and freeze beautifully, so you can always have a batch on hand for whenever the craving strikes.
I can’t wait to see how your mini cheesecakes turn out! Try the recipe, have fun with the toppings, and most importantly, enjoy every delicious bite. If you give this recipe a go, be sure to share your results. Leave a comment below, or tag me on social media with your beautiful creations. Happy baking!
Print
Easy Mini Cheesecakes Recipe – Delicious & Creamy Treat
- Total Time: 3 hours 10 minutes (including cooling)
- Yield: 18 mini cheesecakes 1x
- Diet: Vegetarian
Description
These creamy Mini Cheesecakes are rich, smooth, and perfectly portioned. Made with a buttery graham cracker crust and a luscious cream cheese filling, they’re perfect for any occasion and super easy to make. Top them with fruits, caramel, chocolate, or your favorite sauce for an irresistible treat.
Ingredients
Graham Cracker Crust:
-
1.5 cups graham cracker crumbs (165 grams)
-
3 tablespoons granulated sugar
-
1/4 cup unsalted butter, melted
Cheesecake Filling:
-
16 ounces cream cheese, room temperature (454 grams)
-
1/2 cup granulated sugar (99 grams)
-
2 large eggs, room temperature
-
1/2 cup sour cream (114 grams)
-
1 teaspoon vanilla extract
Instructions
-
Preheat & Prepare: Preheat oven to 350°F (177°C). Line a cupcake pan with 18 paper liners.
-
Make Crust: Combine graham cracker crumbs, sugar, and melted butter. Press about 1 tablespoon of mixture into each liner.
-
Prepare Filling: Beat cream cheese until smooth. Add sugar and mix well. Add eggs one at a time, mixing until just combined. Add sour cream and vanilla; mix until smooth.
-
Fill & Bake: Pour filling over the crusts. Tap the pan to remove air bubbles. Bake for 17–19 minutes, until centers are slightly jiggly.
-
Cool & Chill: Let cool at room temperature for 30 minutes, then refrigerate for at least 2 hours before serving.
-
Serve & Enjoy: Top with fresh fruit, chocolate, caramel, or your favorite toppings.
Notes
-
For gluten-free cheesecakes, use gluten-free graham crackers.
-
For a lighter option, use reduced-fat cream cheese and sour cream.
-
Store in an airtight container in the fridge for up to 5 days, or freeze for up to 3 months.
- Prep Time: 20 minutes
- Cook Time: 19 minutes
- Category: Dessert
- Method: Baking
- Cuisine: American