
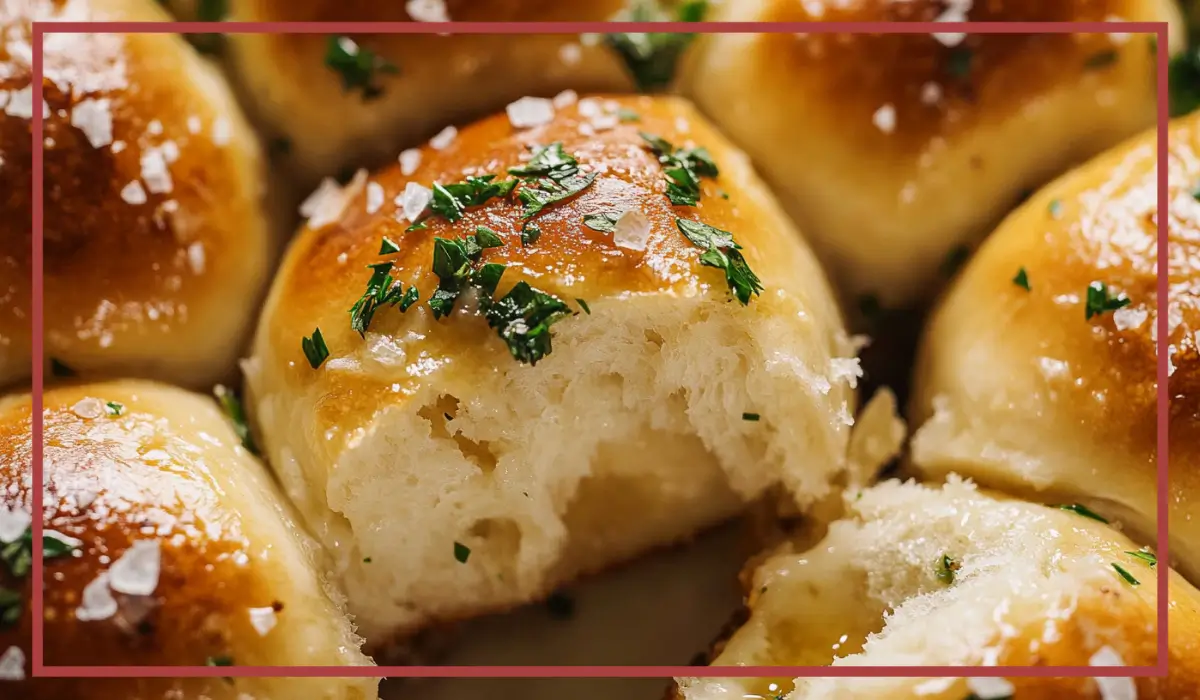
There’s something truly magical about warm, buttery, melt-in-your-mouth Soft garlic rolls fresh out of the oven. The golden-brown crust, the soft and pillowy interior, and that perfect balance of garlicky goodness make these rolls absolutely irresistible. Whether you’re serving them alongside a hearty pasta dish, dunking them into a steaming bowl of soup, or enjoying them straight from the pan, these homemade garlic rolls are the perfect addition to any meal.
What makes this recipe so special is the combination of simple ingredients and a foolproof method that guarantees perfect results every time. The dough is soft and easy to work with, the garlic butter infuses the rolls with rich flavor, and the final bake results in perfectly fluffy rolls with a golden, buttery crust. Plus, they make your entire kitchen smell absolutely divine!
I still remember the first time I made homemade garlic rolls. I was craving something warm and comforting, but store-bought options just didn’t have the same freshness and flavor. After a bit of experimenting, I landed on this recipe, and it has been a favorite in my kitchen ever since. Now, whenever I make these, my family gathers around the oven, eagerly waiting for that first bite. And let me tell you, once you try these rolls, there’s no going back to store-bought!
If you’ve ever thought making bread at home was too complicated, I promise you—this recipe is easy, fun, and absolutely worth it. Even if you’re a beginner, you’ll be amazed at how simple it is to make bakery-quality garlic rolls right in your own kitchen. So, let’s dive into why you’re going to love this recipe and how to make the best homemade garlic rolls ever!
Why You’ll Love This Soft garlic rolls Recipe
There are so many reasons to fall in love with these homemade garlic rolls. They check all the boxes for the perfect side dish, snack, or even a base for creative recipes. Here’s why you need to try them:
1. Easy to Make, Even for Beginners
This recipe is straightforward and doesn’t require any advanced baking skills. With just a few simple ingredients and some patience while the dough rises, you’ll have perfect garlic rolls without any stress.
2. Soft, Fluffy, and Buttery
The texture of these rolls is out of this world. They are light, airy, and melt-in-your-mouth soft, thanks to the perfect balance of yeast, milk, and butter in the dough.
3. Packed with Garlicky Goodness
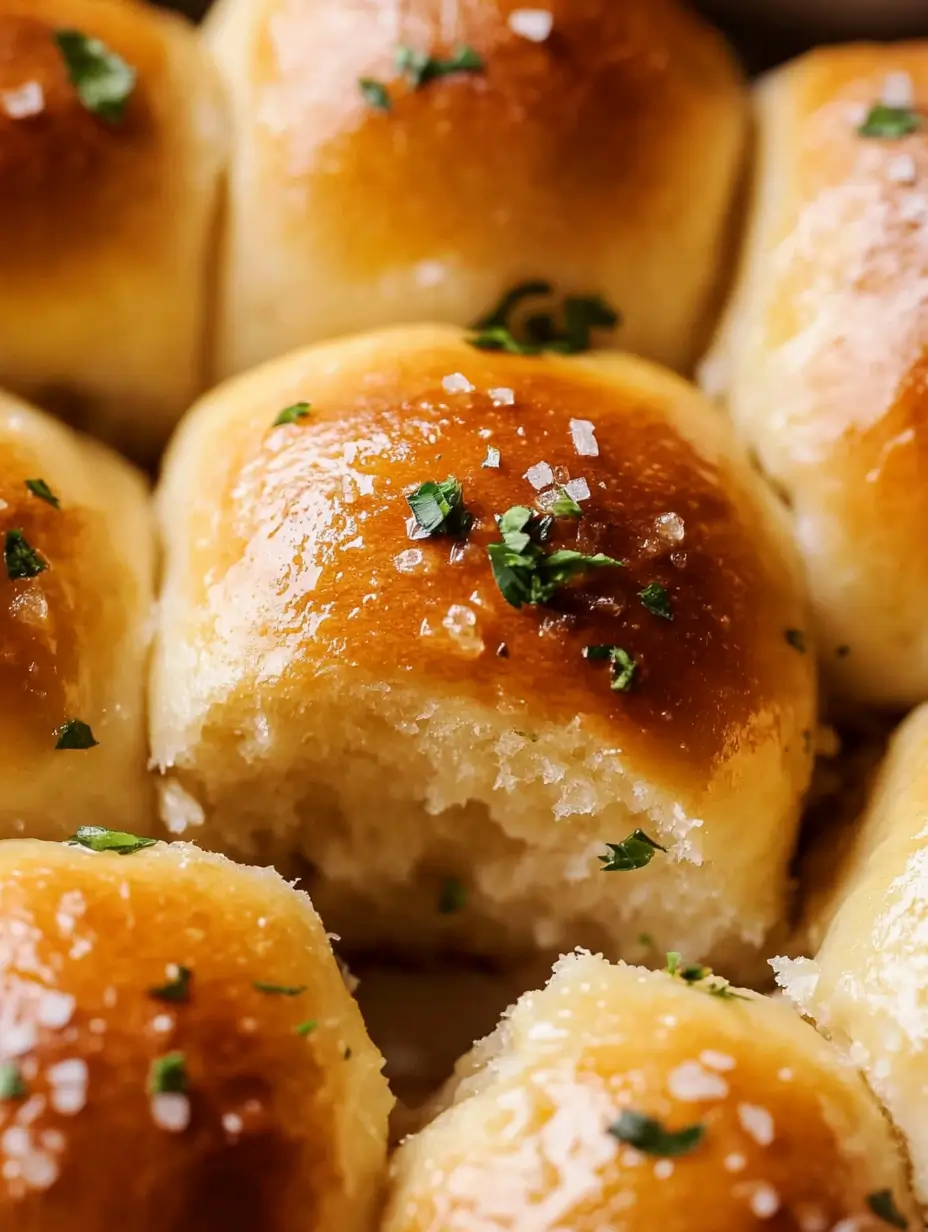
The garlic butter brushed over the warm rolls adds an irresistible aroma and flavor. The combination of fresh garlic, melted butter, and parsley creates the ultimate savory finish.
4. Pairs Perfectly with Any Meal
Whether you’re serving these rolls with pasta, soup, roasted chicken, or a fresh salad, they complement any dish beautifully. They’re also great for making garlic roll sliders!
5. Perfect for Meal Prep and Freezing
You can easily make a big batch and freeze some for later. Simply reheat them in the oven, and they’ll taste just as fresh as the day they were baked.
If you’re looking for a fail-proof recipe that delivers soft, golden, and flavorful garlic rolls every single time, this is the one!
Health Benefits of Homemade Garlic Rolls
While garlic rolls are definitely a comfort food, making them from scratch at home has several health benefits compared to store-bought or restaurant versions.
1. No Preservatives or Additives
When you make these rolls at home, you’re in control of the ingredients. Unlike many store-bought bread products that contain preservatives and artificial flavorings, this homemade version is free from unnecessary additives.
2. The Goodness of Garlic
Garlic is not just delicious—it’s packed with health benefits. It has natural antibacterial and antifungal properties, supports heart health, and can help boost the immune system.
3. Rich in Essential Nutrients
These rolls contain wholesome ingredients like milk, eggs, and butter, which provide essential vitamins and minerals. Milk adds calcium and protein, while eggs contribute to healthy fats and additional protein.
4. Less Sodium and Unwanted Oils
Many packaged breads contain high amounts of sodium and unhealthy oils. By making your own, you can control the amount of salt and use high-quality butter for a richer, healthier taste.
5. Supports Digestion and Gut Health
Homemade bread is often easier to digest than highly processed alternatives. Plus, garlic itself is known to support gut health and aid in digestion.
With all these benefits, there’s no reason not to enjoy a warm, buttery garlic roll fresh from your own kitchen!
Preparation Time, Servings, and Nutritional Information
- Prep Time: 15 minutes
- Rise Time: 1 hour 30 minutes
- Bake Time: 15-18 minutes
- Total Time: Approximately 2 hours
- Servings: 12 garlic rolls
Nutritional Information (Per Roll)
- Calories: 180
- Protein: 5g
- Carbohydrates: 24g
- Fat: 7g
- Fiber: 1g
- Sugar: 2g
Now that you know why these rolls are so special, let’s talk about what you’ll need to make them.
Ingredients List Of these Soft garlic rolls
The Dough:
- ¾ cup warm milk (about 110°F)
- 2 tablespoons granulated sugar
- 2 ¼ teaspoons (1 packet) active dry yeast
- 3 tablespoons unsalted butter, melted
- 1 large egg
- 3 cups all-purpose flour
- 1 teaspoon salt
The Garlic Butter:
- 4 tablespoons unsalted butter, melted
- 2 cloves garlic, minced
- 1 teaspoon dried parsley (or fresh)
- ¼ teaspoon salt
Topping:
- Grated Parmesan cheese (optional)
- Extra fresh parsley for garnish
Each ingredient plays an essential role in achieving the perfect texture and flavor. The yeast helps the dough rise, the butter adds richness, and the garlic butter topping infuses the rolls with irresistible flavor. Now, let’s move on to how to make these garlic rolls step by step!
Step-By-Step Cooking Instructions to make this Soft garlic rolls
Step 1: Activate the Yeast
In a small bowl, combine the warm milk, sugar, and yeast. Stir gently and let it sit for 5-10 minutes until foamy. If the yeast doesn’t foam, it may be expired, and you should start over with fresh yeast.
Step 2: Make the Dough
In a large mixing bowl, add the melted butter, egg, and salt. Gradually mix in the flour, one cup at a time, until a soft dough forms. The dough should be slightly sticky but manageable.
Step 3: Knead the Dough
Transfer the dough to a lightly floured surface and knead for about 5-7 minutes until smooth and elastic. If using a stand mixer, knead with a dough hook on medium speed for about 5 minutes.
Step 4: Let It Rise
Place the dough in a greased bowl, cover it with a kitchen towel, and let it rise in a warm place for about 1 hour or until it doubles in size.
Step 5: Shape the Rolls
Punch down the dough to release air bubbles. Divide it into 12 equal portions and roll each into a smooth ball. Arrange them in a greased baking dish, leaving some space between them.
Step 6: Second Rise
Cover the rolls with a towel and let them rise again for about 30 minutes. They should become slightly puffy.
Step 7: Bake the Rolls
Preheat the oven to 375°F (190°C). Bake the rolls for 15-18 minutes or until golden brown.
Step 8: Prepare the Garlic Butter
While the rolls are baking, mix the melted butter, minced garlic, parsley, and salt in a small bowl.
Step 9: Brush and Serve
As soon as the rolls come out of the oven, brush them generously with the garlic butter. Sprinkle with Parmesan cheese and fresh parsley for an extra touch of flavor.
How to Serve
These homemade garlic rolls are incredibly versatile, making them a perfect side dish for various meals. Whether you want to serve them at a family dinner, holiday gathering, or casual weeknight meal, here are some of the best ways to enjoy them:
1. As a Side for Pasta Dishes
Garlic rolls and pasta are a match made in heaven. Serve them alongside creamy fettuccine Alfredo, spaghetti marinara, or a hearty lasagna for an indulgent Italian-style meal. The fluffy texture of the rolls is perfect for soaking up rich sauces.
2. With Soups and Stews
A warm bowl of soup paired with a buttery garlic roll is pure comfort food. These rolls go especially well with creamy tomato soup, classic chicken noodle soup, or a thick lentil stew. They add a delicious contrast of texture and flavor.
3. As a Sandwich or Slider Bun
Slice these rolls in half and use them as mini buns for sliders. Fill them with grilled chicken, turkey, or roasted vegetables for a quick and easy sandwich. They also make fantastic mini pulled beef or BBQ chicken sandwiches.
4. Alongside Roasted Meats and Vegetables
Garlic rolls complement roasted or grilled meats beautifully. Serve them with juicy roast chicken, slow-cooked beef, or a grilled steak dinner. Add some roasted vegetables on the side, and you have a complete meal.
5. As a Snack with Dipping Sauces
Enjoy these rolls as a snack by dipping them into marinara sauce, ranch dressing, or a cheesy garlic dip. They also pair wonderfully with hummus or a roasted red pepper spread.
6. With Breakfast or Brunch
Believe it or not, garlic rolls can be part of a delicious breakfast. Serve them with scrambled eggs, turkey bacon, or an omelet. You can even turn them into a savory breakfast sandwich by adding eggs and cheese.
No matter how you serve these garlic rolls, they will bring warmth, flavor, and comfort to any meal. Now, let’s explore some ideal pairings that elevate the experience even more.
Pairing Suggestions
Pairing these homemade garlic rolls with the right dishes and beverages enhances their flavor and overall enjoyment. Here are some excellent ideas:
Best Dishes to Pair with Garlic Rolls
1. Classic Italian Favorites
- Spaghetti with marinara or meat sauce
- Chicken Parmesan
- Fettuccine Alfredo
- Baked ziti or stuffed shells
2. Hearty Soups & Stews
- Creamy mushroom soup
- Chicken and vegetable soup
- Minestrone or lentil soup
- Butternut squash soup
3. Meat & Poultry Dishes
- Grilled lemon herb chicken
- Slow-cooked pot roast
- Roasted turkey with gravy
- Garlic butter shrimp
4. Salads & Light Meals
- Caesar salad with grilled chicken
- Mediterranean chickpea salad
- Caprese salad with balsamic glaze
- Fresh garden salad with vinaigrette
Best Drinks to Serve with Garlic Rolls
1. Refreshing Non-Alcoholic Beverages
- Freshly squeezed lemonade
- Iced tea with mint and honey
- Sparkling water with lemon or lime
- Mango or passion fruit juice
2. Warm Beverages
- Classic chai or herbal tea
- Freshly brewed coffee
- Hot chocolate for a comforting treat
By pairing these soft, buttery garlic rolls with the right meals and drinks, you’ll create a well-rounded and delicious dining experience. But what if you have leftovers? Don’t worry—let’s go over how to store, freeze, and reheat them properly.
Storage, Freezing & Reheating Instructions
Homemade garlic rolls taste best when they are fresh, but if you have leftovers or want to make a big batch for later, here’s how to store and reheat them while keeping their soft and fluffy texture.
Storing at Room Temperature
- Place leftover rolls in an airtight container or a resealable plastic bag.
- Keep them at room temperature for up to 2 days.
- To refresh them, warm them in the oven at 300°F (150°C) for 5-7 minutes.
Refrigeration Method
- If you need to store them for longer, refrigerate the rolls in an airtight container.
- They will stay fresh for up to 5 days.
- Reheat in the oven at 325°F (160°C) for 10 minutes or until warmed through.
Freezing Instructions
- To freeze unbaked rolls: After shaping them into balls, place them on a baking sheet and freeze until firm. Then, transfer them to a freezer-safe bag. When ready to bake, thaw them in the fridge overnight and allow them to rise before baking.
- To freeze baked rolls: Let them cool completely, then store them in a freezer-safe bag or airtight container. They can be frozen for up to 3 months.
How to Reheat Frozen Rolls
- Oven method: Wrap the rolls in foil and bake at 350°F (175°C) for 10-12 minutes.
- Microwave method: Place a damp paper towel over the rolls and heat for 20-30 seconds to prevent them from drying out.
With these storage and reheating tips, you can always have fresh, delicious garlic rolls ready to enjoy! Now, let’s go over some common mistakes to avoid.
Common Mistakes to Avoid
To ensure your garlic rolls turn out perfectly every time, avoid these common pitfalls:
1. Using Water Instead of Milk
Milk adds richness and makes the rolls extra soft. If you use water, the dough may lack moisture and flavor.
2. Not Activating the Yeast Properly
Make sure your yeast is fresh and that the milk is warm (about 110°F). If the yeast doesn’t foam, your dough won’t rise properly.
3. Over-kneading the Dough
Kneading too much can make the rolls dense. Stop kneading once the dough is smooth and elastic.
4. Skipping the Second Rise
Allowing the dough to rise twice is crucial for fluffy rolls. Skipping this step can result in dense, heavy rolls.
5. Overbaking the Rolls
Bake just until golden brown. Overbaking dries out the rolls and makes them tough.
By keeping these mistakes in mind, you’ll achieve soft, fluffy, and flavorful garlic rolls every time. Let’s move on to some expert tips to make them even better!
Pro Tips for Perfect Garlic Rolls
1. Use Bread Flour for a Chewier Texture
If you prefer a slightly chewier roll, substitute all-purpose flour with bread flour.
2. Brush with Garlic Butter Twice
For the most flavorful rolls, brush them with garlic butter right after baking and again before serving.
3. Add Cheese for Extra Flavor
Sprinkle shredded mozzarella or Parmesan cheese over the rolls before baking for a cheesy twist.
4. Use Fresh Garlic for Maximum Flavor
While garlic powder works, freshly minced garlic gives the best aroma and taste.
5. Let the Dough Rise in a Warm Spot
If your kitchen is cold, place the dough in a slightly warm oven (turned off) to help it rise faster.
Now, let’s answer some frequently asked questions.
Frequently Asked Questions (FAQs)
1. Can I Make These Rolls Without Yeast?
Yeast is essential for the fluffy texture, but you can try a quick bread version using baking powder. However, they won’t be as airy.
2. Can I Use Instant Yeast Instead of Active Dry Yeast?
Yes! Instant yeast doesn’t need to be activated. Just mix it directly with the flour.
3. Can I Use Whole Wheat Flour?
You can substitute half the all-purpose flour with whole wheat flour, but the rolls may be denser.
4. Can I Make the Dough Ahead of Time?
Yes! After the first rise, refrigerate the dough overnight and bake the next day.
Conclusion & Call to Action
These homemade garlic rolls are warm, fluffy, and bursting with garlicky goodness. Whether you serve them with dinner, as a snack, or on their own, they’re guaranteed to impress. Try this recipe today, and let me know how they turn out! Leave a comment, share your experience, and don’t forget to tag me if you post pictures of your delicious rolls!
Print
Soft Garlic Rolls – Easy & Fluffy Homemade Recipe
- Total Time: ~2 hours (including rising time)
- Yield: 12 rolls 1x
- Diet: Vegetarian
Description
These homemade garlic rolls are incredibly soft, buttery, and packed with garlicky goodness. Perfect as a side dish for pasta, soups, or any meal, they are easy to make and absolutely delicious!
Ingredients
- For the Dough:
- ¾ cup warm milk (110°F)
- 2 tbsp sugar
- 2 ¼ tsp (1 packet) active dry yeast
- 3 tbsp unsalted butter, melted
- 1 egg
- 3 cups all-purpose flour
- 1 tsp salt
- For the Garlic Butter:
- 4 tbsp unsalted butter, melted
- 2 cloves garlic, minced
- 1 tsp dried parsley (or fresh)
- ¼ tsp salt
- For Topping:
- Grated Parmesan cheese (optional)
- Extra fresh parsley for garnish
Instructions
- Activate the yeast by mixing warm milk, sugar, and yeast. Let it sit for 5-10 minutes until foamy.
- Add melted butter, egg, flour, and salt to the yeast mixture. Mix until a soft dough forms.
- Knead the dough for 5-7 minutes until smooth. Let it rise for 1 hour or until doubled in size.
- Punch down the dough, divide into 12 pieces, and roll into balls. Place on a greased baking dish.
- Let the rolls rise again for 30 minutes.
- Preheat oven to 375°F (190°C) and bake for 15-18 minutes until golden brown.
- Mix melted butter, garlic, parsley, and salt. Brush over the warm rolls.
- Sprinkle with Parmesan and extra parsley before serving.
Notes
-
- Use fresh garlic for maximum flavor.
- If short on time, use pre-made pizza dough.
- Store leftovers in an airtight container for up to 3 days.
- Prep Time: 15 minutes
- Cook Time: 15-18 minutes
- Category: Bread, Side Dish
- Method: Baking
- Cuisine: American, Italian