

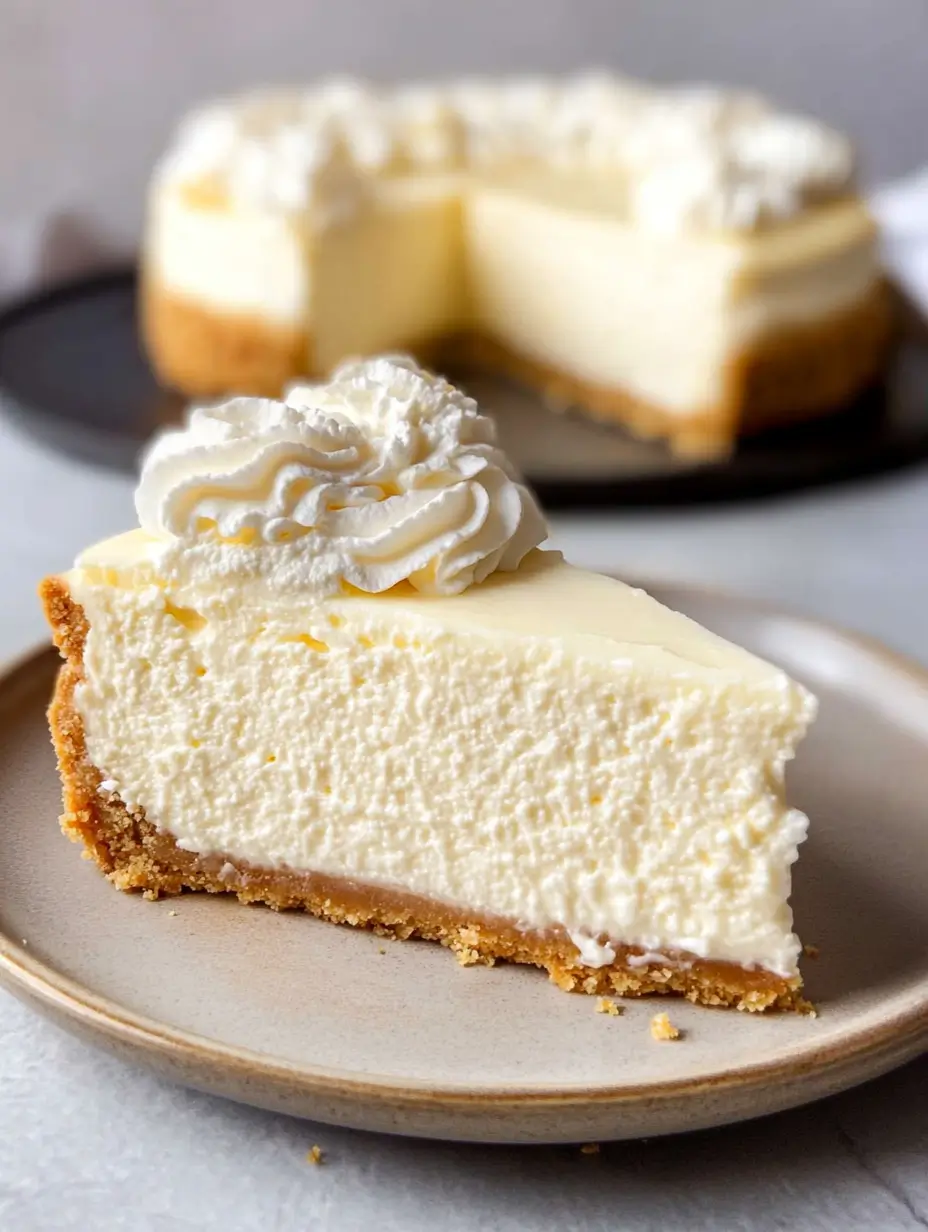
There’s something truly magical about a well-made Classic Cheesecake Recipe. It’s rich, creamy, and indulgent, with a velvety texture that melts in your mouth. Whether served plain, topped with fresh berries, or drizzled with caramel, cheesecake has a way of making any occasion feel special.
I remember the first time I attempted to make a homemade cheesecake. I was convinced it would be complicated—water baths, cracking tops, overbaking disasters. But after a few trials (and a couple of cracked tops along the way), I finally perfected my foolproof method. Now, every time I bake this cheesecake, I know I’m in for a smooth, luscious dessert that rivals any bakery-style version.
What makes this recipe so special? The perfect balance of flavors and textures. The buttery graham cracker crust provides the ideal contrast to the creamy filling, while a gentle water bath ensures a crack-free surface. The result is a New York-style cheesecake that’s incredibly smooth and just the right amount of sweet.
This cheesecake is perfect for birthdays, dinner parties, or even a cozy weekend treat. It’s easy to make ahead of time, and the flavor only gets better as it chills. If you’ve ever been intimidated by homemade cheesecake, don’t worry—I’ll walk you through every step to guarantee success. Once you master this recipe, you’ll never go back to store-bought cheesecake again!
Why You’ll Love This Classic Cheesecake Recipe
There are countless cheesecake recipes out there, but this one stands out for a few key reasons. First and foremost, it’s incredibly creamy. The combination of cream cheese, sour cream, and just the right amount of eggs creates a smooth, silky filling that’s rich without being too heavy.
Another reason to love this recipe is its foolproof method. Many people avoid baking cheesecake because they fear cracks or dry textures, but with my simple tips—like using a water bath and cooling it gradually—you’ll get a flawless cheesecake every time.
The graham cracker crust is another highlight. It’s buttery, slightly sweet, and has a wonderful crunch that balances the soft, creamy filling. If you’re feeling adventurous, you can even swap it out for a chocolate cookie crust or a nut-based crust for a twist on the classic.
Finally, this cheesecake is endlessly customizable. Whether you love it plain, swirled with fruit compote, or topped with chocolate ganache, it’s a dessert that can be tailored to any occasion.
Health Benefits of this Classic Cheesecake Recipe
While cheesecake is undoubtedly an indulgent dessert, it does offer a few surprising health benefits when enjoyed in moderation.
One of the key ingredients in cheesecake is cream cheese, which provides a good source of calcium. Calcium is essential for strong bones and teeth, making this dessert a small but delicious way to support bone health.
Eggs, another main ingredient, are packed with protein and essential nutrients like vitamin B12 and choline, which support brain function. Additionally, sour cream adds probiotics that aid in digestion and gut health.
If you’re looking to make this cheesecake a little healthier, there are a few simple swaps you can try. Using a reduced-fat cream cheese or Greek yogurt instead of sour cream can lower the fat content without sacrificing creaminess. For the crust, opt for a whole-wheat graham cracker base to add a bit more fiber.
Finally, portion control is key. While it’s easy to indulge in multiple slices, enjoying a small serving can satisfy your sweet tooth without overloading on sugar and calories.
Preparation Time, Servings, and Nutritional Information of this Classic Cheesecake Recipe
Time Breakdown
- Prep Time: 15 minutes
- Bake Time: 60-70 minutes
- Cooling & Chilling Time: 5+ hours
- Total Time: About 6-7 hours
Servings of this Classic Cheesecake Recipe:
This recipe makes approximately 10-12 slices.
Nutritional Information (Per Serving, Based on 12 Servings):
- Calories: 420
- Protein: 7g
- Carbohydrates: 35g
- Fat: 28g
- Sugar: 24g
Ingredients List
For the Graham Cracker Crust:
- 2 cups graham cracker crumbs
- ½ cup unsalted butter, melted
- 2 tablespoons sugar
For the Cheesecake Filling:
- 24 ounces (3 blocks) full-fat cream cheese, softened
- 1 cup granulated sugar
- 3 large eggs
- 1 cup sour cream
- 1 teaspoon vanilla extract
- 1 tablespoon lemon juice
For the Optional Toppings:
- Fresh berries (strawberries, blueberries, raspberries)
- Caramel or chocolate drizzle
- Lemon zest or whipped cream
Step-By-Step Cooking Instructions to make this Classic Cheesecake Recipe
1. Preheat the Oven & Prepare the Pan
Start by preheating your oven to 325°F (160°C). Grease a 9-inch springform pan lightly with butter or nonstick spray. To prevent leaks, wrap the bottom of the pan with aluminum foil if using a water bath.
2. Make the Graham Cracker Crust
In a mixing bowl, combine graham cracker crumbs, melted butter, and sugar. Stir until the mixture resembles wet sand. Press the mixture firmly into the bottom of the prepared pan, using the back of a spoon to smooth it evenly. Bake for 10 minutes, then set aside to cool.
3. Prepare the Cheesecake Batter
Using a hand or stand mixer, beat the softened cream cheese and sugar together until smooth and creamy, about 2 minutes. Add the eggs one at a time, mixing on low speed just until combined. Avoid overmixing, as too much air can cause cracks.
Gently fold in the sour cream, vanilla extract, and lemon juice until well incorporated. The batter should be silky and smooth.
4. Assemble & Prepare for Baking
Pour the cheesecake batter over the cooled crust. Smooth the top with a spatula to ensure an even layer.
For the best results, use a water bath. Place the springform pan inside a large roasting pan and fill the roasting pan with hot water halfway up the sides of the springform pan. This helps the cheesecake bake evenly and prevents cracking.
5. Bake the Cheesecake
Transfer to the oven and bake for 60-70 minutes, or until the edges are set and the center is slightly jiggly.
6. Cool Gradually
Turn off the oven and leave the cheesecake inside with the door slightly open for 1 hour. This gradual cooling prevents sudden temperature changes that could cause cracks.
7. Chill the Classic Cheesecake Recipe
Once the cheesecake has cooled to room temperature, transfer it to the fridge and chill for at least 4 hours, preferably overnight.
8. Serve & Enjoy
Run a knife around the edges before releasing the springform pan. Slice, add your favorite toppings, and enjoy!
How to Serve this Classic Cheesecake Recipe
This cheesecake pairs wonderfully with:
- A drizzle of homemade berry sauce for a tangy contrast
- A dusting of powdered sugar for an elegant touch
- A dollop of whipped cream for extra indulgence
Pairing Suggestions
This cheesecake goes perfectly with a warm cup of coffee or a glass of cold milk. For a fancier touch, serve it with iced tea or a refreshing fruit smoothie.
Storage, Freezing & Reheating Instructions
Storage:
Keep cheesecake in an airtight container in the fridge for up to 5 days.
Freezing:
Freeze individual slices by wrapping them in plastic wrap and storing them in a freezer bag for up to 3 months.
Reheating:
Let frozen cheesecake thaw overnight in the fridge before serving.
Common Mistakes to Avoid in this Classic Cheesecake Recipe
Even though cheesecake is a relatively simple dessert, there are a few pitfalls that can lead to common baking mishaps. To ensure your cheesecake turns out perfect every time, avoid these common mistakes:
1. Overmixing the Batter
One of the biggest mistakes is overmixing the cheesecake batter. When you beat the cream cheese, sugar, and eggs too aggressively, you incorporate too much air into the mixture. This can cause the cheesecake to rise too quickly while baking and then collapse as it cools. Instead, mix just until the ingredients are combined and smooth. Always use low speed when adding eggs to prevent over-aeration.
2. Not Using a Water Bath (Bain-Marie)
A water bath helps the cheesecake bake evenly and prevents the dreaded cracks on the surface. The steam from the water ensures a gentle, steady heat, which keeps the filling smooth and creamy. If you skip this step, your cheesecake may bake unevenly and have a dry, crumbly texture. If you’re worried about leaks, wrap your springform pan tightly with aluminum foil before placing it in the water bath.
3. Opening the Oven Door Too Early
We all get tempted to peek inside the oven to check our progress, but sudden temperature changes can cause the cheesecake to sink or crack. Resist the urge to open the oven door during baking! Instead, check doneness by gently shaking the pan—if the center jiggles slightly but the edges are set, it’s ready.
4. Not Allowing Enough Cooling Time
Cheesecake requires a slow cooling process to maintain its structure. If you remove it from the oven and immediately place it in the fridge, condensation can form, leading to a soggy crust. Always let the cheesecake cool in the oven first with the door slightly open, then transfer it to the counter before refrigerating. This step prevents cracks and keeps the texture creamy.
5. Using Cold Ingredients
If your cream cheese and eggs are too cold, they won’t blend properly, leading to a lumpy batter. Always let your ingredients come to room temperature before mixing. This ensures a silky smooth batter with no lumps.
6. Overbaking the Cheesecake
Many people assume a cheesecake should be completely firm when it’s done baking, but that’s a mistake! The center should still be slightly wobbly when you remove it from the oven. It will continue to set as it cools. Overbaking can lead to a dry, dense texture instead of the creamy, velvety consistency we love.
Pro Tips for a Perfect Classic Cheesecake Recipe
Want to take your cheesecake to the next level? Follow these expert tips to ensure flawless results every time:
1. Use High-Quality Ingredients
The key to a delicious cheesecake is using full-fat, high-quality cream cheese. Avoid low-fat alternatives, as they won’t give you the same rich texture. Similarly, opt for real vanilla extract instead of artificial vanilla flavoring for the best taste.
2. Prevent Cracks with a Gentle Cooling Process
Cracks usually happen due to sudden temperature changes. After baking, turn off the oven and leave the cheesecake inside with the door slightly open for an hour. This helps it cool gradually, reducing the risk of cracking.
3. Double-Wrap the Pan to Prevent Leaks
If you’re using a water bath, tightly wrap the bottom of your springform pan with two layers of aluminum foil. This ensures no water seeps into the crust, keeping it crisp and dry.
4. Run a Knife Around the Edge Before Chilling
As the cheesecake cools, it can shrink slightly. Running a thin knife around the edges before chilling helps prevent cracks by allowing it to release naturally from the pan.
5. Chill Overnight for the Best Flavor
Cheesecake tastes even better the next day! Let it chill in the refrigerator for at least 4-6 hours, but ideally overnight. This gives the flavors time to develop, resulting in a richer, creamier cheesecake.
6. Add a Flavor Twist
For a fun variation, swirl in raspberry puree, chocolate ganache, or caramel sauce before baking. You can also mix in citrus zest for a refreshing twist.
7. Slice with a Hot Knife
To get clean, picture-perfect slices, dip your knife in hot water, wipe it dry, and slice. Repeat after each cut for smooth, neat slices.
Frequently Asked Questions (FAQs)
1. Can I use a different type of crust?
Yes! While graham cracker crust is the classic choice, you can use crushed Oreos, digestive biscuits, or even a nut-based crust for a gluten-free option.
2. My cheesecake cracked—what went wrong?
Cracks can happen due to overbaking, sudden temperature changes, or skipping the water bath. To fix minor cracks, spread a thin layer of sour cream or whipped cream on top before serving.
3. Can I make this cheesecake ahead of time?
Absolutely! Cheesecake actually tastes better the next day. You can make it up to 2 days in advance and store it in the refrigerator until ready to serve.
4. Can I freeze cheesecake?
Yes! Wrap individual slices or the whole cheesecake tightly in plastic wrap and aluminum foil, then freeze for up to 3 months. Thaw overnight in the fridge before serving.
5. Can I make this recipe without a water bath?
You can, but your cheesecake might be more prone to cracks and uneven baking. If you don’t want to use a water bath, place a pan of hot water on the lower oven rack to add moisture to the oven.
6. How do I know when my cheesecake is done baking?
The center should still have a slight jiggle when you gently shake the pan. It will continue to set as it cools. Avoid baking until the center is completely firm, as that will lead to a dry texture.
7. Can I use low-fat cream cheese?
While you can use low-fat cream cheese, full-fat cream cheese gives the best creamy texture. Low-fat versions may result in a slightly runnier batter.
8. What toppings go well with cheesecake?
Classic toppings include fresh berries, caramel sauce, chocolate ganache, whipped cream, or a dusting of powdered sugar. You can also add a fruit compote for a tangy contrast.
9. Why did my crust get soggy?
If the crust is soggy, it’s likely because water seeped into the pan during the water bath. To prevent this, double-wrap the pan with aluminum foil or bake the crust a few minutes longer before adding the filling.
10. Can I make this cheesecake gluten-free?
Yes! Simply substitute gluten-free graham crackers or use a nut-based crust made with almonds or pecans.
Conclusion & Call to Action of this Classic Cheesecake Recipe
Now that you have all the tools and tips to make the perfect classic cheesecake, it’s time to get baking! Whether you’re making this for a special occasion or just because you’re craving a rich, creamy dessert, this cheesecake is sure to impress.
I’d love to hear how your cheesecake turns out! If you try this recipe, leave a comment below and let me know your thoughts. Did you add a fun topping or a unique flavor twist? Share your experience and inspire others!
Also, don’t forget to snap a picture and tag me on social media—I love seeing your beautiful cheesecake creations.
Happy baking, and enjoy every bite of this creamy, dreamy cheesecake!
Print
Classic Cheesecake Recipe – Creamy, Smooth & Easy to Make
- Total Time: ~6 hours (including cooling)
- Yield: 10-12 slices 1x
- Diet: Vegetarian
Description
This classic cheesecake is ultra-creamy with a smooth, velvety texture and a rich graham cracker crust. Perfect for special occasions or as an indulgent treat, this easy-to-make cheesecake is foolproof and always a crowd-pleaser!
Ingredients
For the Crust:
- 2 cups graham cracker crumbs
- ½ cup unsalted butter, melted
- 2 tablespoons sugar
For the Filling:
- 24 oz full-fat cream cheese, softened
- 1 cup granulated sugar
- 3 large eggs
- 1 cup sour cream
- 1 teaspoon vanilla extract
- 1 tablespoon lemon juice
Instructions
- Preheat oven to 325°F (160°C). Grease a 9-inch springform pan and wrap the bottom with aluminum foil.
- Mix graham cracker crumbs, melted butter, and sugar until combined. Press firmly into the pan and bake for 10 minutes. Let cool.
- Beat cream cheese and sugar until smooth. Add eggs one at a time, mixing on low speed.
- Stir in sour cream, vanilla extract, and lemon juice until well combined.
- Pour batter over the cooled crust and smooth the top.
- Place the springform pan in a roasting pan and add hot water halfway up the sides.
- Bake for 60-70 minutes until the edges are set and the center is slightly jiggly.
- Turn off the oven and let the cheesecake cool inside with the door slightly open for 1 hour.
- Chill in the refrigerator for at least 4 hours or overnight before serving.
Notes
- Use room temperature ingredients for a smooth batter.
- Don’t overmix the eggs to prevent cracks.
- Let the cheesecake cool gradually to avoid sinking.
- Prep Time: 15 minutes
- Cook Time: 60-70 minutes
- Category: Dessert
- Method: Baking
- Cuisine: American