
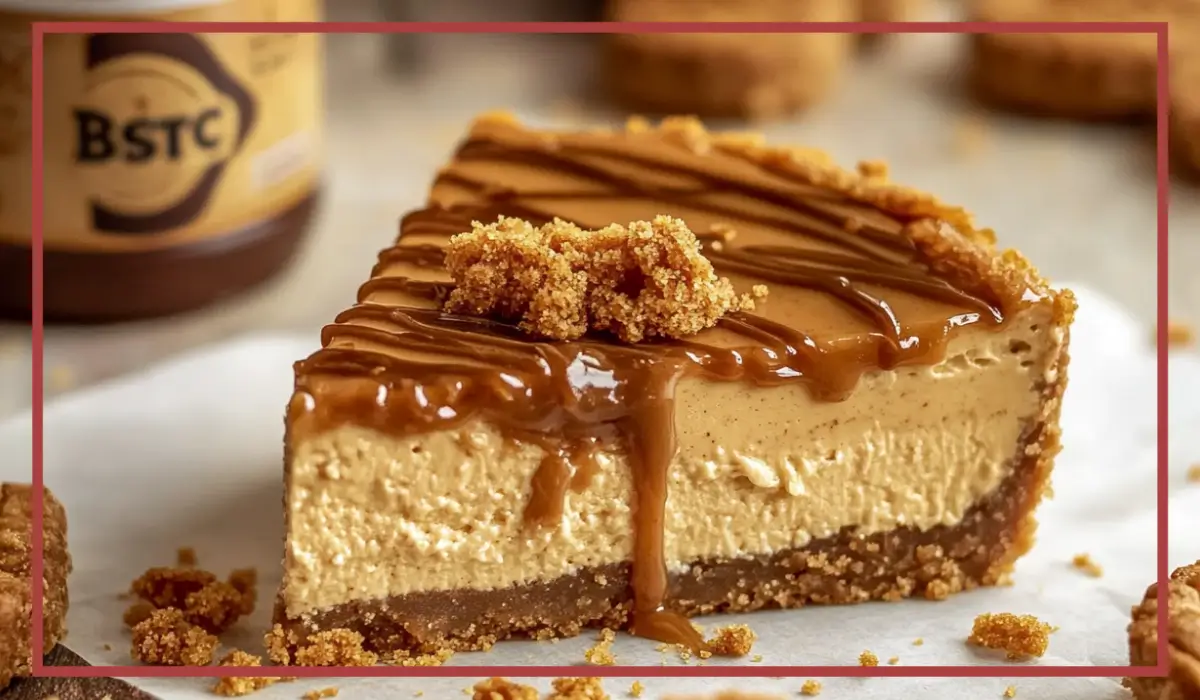
If you’re a fan of Biscoff cookies, then you’re about to fall in love with this No-Bake Biscoff Cheesecake. Imagine the buttery crunch of crushed Biscoff biscuits forming the perfect base, a rich and creamy cheesecake filling infused with Biscoff spread, and a glossy drizzle of melted cookie butter on top. Every bite is pure indulgence, combining the warm spices and caramelized flavors of Biscoff with the smooth, luscious texture of cheesecake.
The best part? No oven required. That means no water baths, no risk of overbaking, and no waiting anxiously for a traditional cheesecake to set. Instead, this dessert comes together effortlessly with a few simple steps, making it perfect for beginner bakers or anyone who wants an easy yet impressive dessert.
I first discovered this cheesecake when looking for a fuss-free alternative to classic baked cheesecakes. I wanted something that didn’t require complicated techniques but still delivered the same luxurious texture and deep flavor. The first time I made it, my family devoured it in one sitting, and I knew I had found a new favorite. Since then, I’ve made it countless times for birthdays, holidays, and casual get-togethers, and it has never disappointed.
This recipe is perfect for any occasion. Whether you need a last-minute dessert for a dinner party or simply want to treat yourself to something special, this cheesecake is a foolproof option. It looks as impressive as a bakery-style cheesecake, but it’s so easy to make that you’ll find yourself coming back to it again and again.
If you love the warm, spiced, caramelized flavor of Biscoff cookies and the creamy richness of cheesecake, then get ready for your new favorite dessert. Let’s dive into why this recipe is a must-try!
Why You’ll Love This Recipe
There are plenty of reasons why this No-Bake Biscoff Cheesecake should be on your must-make list. Let’s talk about what makes it so special.
1. It’s Incredibly Easy to Make
You don’t need to be an experienced baker to make this cheesecake. Since it’s completely no-bake, you won’t have to worry about tricky oven temperatures, water baths, or overbaking. The steps are simple—just mix, assemble, and chill.
2. The Flavor is Out of This World
Biscoff cookies have a unique caramelized, spiced flavor that pairs beautifully with the creamy, tangy cheesecake filling. The cookie butter adds an extra layer of richness, making this dessert taste like something straight from a high-end bakery.
3. It’s a Crowd-Pleaser
This cheesecake is always a hit at gatherings. Whether you’re serving it at a family dinner, a potluck, or a special celebration, everyone will love it. It’s one of those desserts that people will ask you to make again and again.
4. No Special Equipment Required
Unlike traditional cheesecakes that require a water bath and precise baking times, this version only needs a mixing bowl, a spatula, and a springform pan. No fancy baking skills necessary!
5. Perfect for Any Occasion
This cheesecake is elegant enough for celebrations but simple enough for everyday indulgence. Whether you’re making it for a birthday, holiday, or just a weekend treat, it’s always a great choice.
6. Make-Ahead Friendly
Because it needs several hours to chill, this dessert is perfect for making ahead of time. You can prepare it a day in advance, allowing you to focus on other tasks when entertaining guests.
7. Customizable
You can easily switch up the flavors and toppings to make it your own. Add a drizzle of white chocolate, top it with caramel sauce, or even mix some crushed Biscoff cookies into the filling for an extra crunch.
Health Benefits
While this cheesecake is definitely a treat, there are a few aspects that make it a better option compared to some other desserts.
1. No Artificial Additives or Preservatives
Many store-bought cheesecakes contain artificial flavors and preservatives. When you make this cheesecake at home, you control the ingredients, ensuring a fresher and more natural dessert.
2. No Eggs or Gelatin
Since this is a no-bake recipe, it doesn’t rely on eggs or gelatin for structure. That makes it suitable for people with egg allergies and also vegetarian-friendly.
3. Balanced Sweetness
This cheesecake has just the right level of sweetness. The natural caramelized flavor of Biscoff means you don’t need excessive sugar, making it slightly lighter than some other cheesecake recipes.
4. Can Be Made Lighter
If you’re looking for a slightly healthier version, you can make simple swaps like using Greek yogurt instead of some of the cream cheese or opting for a lighter cream cheese variety. You still get the rich texture without as much heaviness.
5. Portion Control
Since this cheesecake is rich and satisfying, a small slice is enough to curb your dessert cravings. That means you can enjoy it without feeling the need to overindulge.
6. Gluten-Free Option Available
Biscoff biscuits do contain gluten, but you can easily swap them for gluten-free speculoos cookies or another gluten-free biscuit alternative to make this recipe completely gluten-free.
While this cheesecake is still an indulgence, making it at home allows you to control the ingredients and enjoy it in a more balanced way.
Preparation Time, Servings, and Nutritional Information
Before diving into the recipe, let’s go over the key details.
- Prep Time: 15 minutes
- Chill Time: 6+ hours (overnight is best)
- Total Time: Approximately 6 hours 15 minutes
- Servings: 8–10 slices
Estimated Nutrition Per Serving (Based on 10 Servings)
- Calories: 420
- Fat: 28g
- Carbohydrates: 38g
- Protein: 5g
- Sugar: 25g
This cheesecake is rich and satisfying, making it perfect for special occasions or when you want to treat yourself.
Ingredients List
For this No-Bake Biscoff Cheesecake, you’ll need just a few basic ingredients.
For the Crust:
- 2 ½ cups Biscoff biscuits (crushed)
- ½ cup unsalted butter, melted
For the Cheesecake Filling:
- 16 oz (450g) cream cheese (softened)
- ½ cup powdered sugar
- ½ cup Biscoff spread (cookie butter)
- 1 tsp vanilla extract
- 1 ¼ cups heavy cream, whipped to soft peaks
For the Topping:
- ¼ cup melted Biscoff spread (for drizzling)
- Extra Biscoff biscuits (for garnish)
You probably already have most of these ingredients in your kitchen, making this recipe easy to whip up anytime you have a craving for something sweet.
Step-By-Step Cooking Instructions
Step 1: Prepare the Crust
Start by crushing the Biscoff biscuits into fine crumbs. You can use a food processor for a quick and even texture, or if you don’t have one, place the biscuits in a sealed ziplock bag and crush them with a rolling pin until they resemble sand. Transfer the crumbs to a bowl and pour in the melted butter. Stir until the mixture is well combined and has the texture of damp sand.
Take a 9-inch springform pan and press the biscuit mixture firmly into the bottom. Use the back of a spoon or the bottom of a glass to compact the crumbs and create an even layer. This helps prevent the crust from falling apart when you slice the cheesecake. Place the pan in the refrigerator while you prepare the filling. This allows the crust to firm up and hold its shape.
Step 2: Make the Cheesecake Filling
In a large mixing bowl, add the softened cream cheese and powdered sugar. Using an electric mixer or a whisk, beat until smooth and creamy. Make sure there are no lumps, as this will help achieve a silky cheesecake texture.
Add the Biscoff spread and vanilla extract to the cream cheese mixture. Continue beating until everything is well incorporated. The cookie butter will add a deep caramelized flavor and a slightly thicker consistency to the filling.
In a separate bowl, whip the heavy cream until it reaches soft peaks. This means the cream should be thickened but still have a slight droop when you lift the whisk. Gently fold the whipped cream into the Biscoff-cream cheese mixture using a spatula. Be careful not to overmix, as you want to maintain the light and airy texture of the whipped cream.
Step 3: Assemble the Cheesecake
Take the prepared crust out of the fridge and pour the cheesecake filling over it. Use a spatula to spread it evenly, making sure to smooth the top. The creamy filling should sit nicely on the firm biscuit base.
Once the filling is in place, cover the pan with plastic wrap or aluminum foil. Place it in the refrigerator and let it set for at least six hours, but preferably overnight. The longer it chills, the better the texture will be. This step allows the cheesecake to firm up without the need for baking.
Step 4: Add the Toppings
Once the cheesecake is fully set, carefully remove it from the springform pan. To do this, run a thin knife around the edges before unclipping the pan.
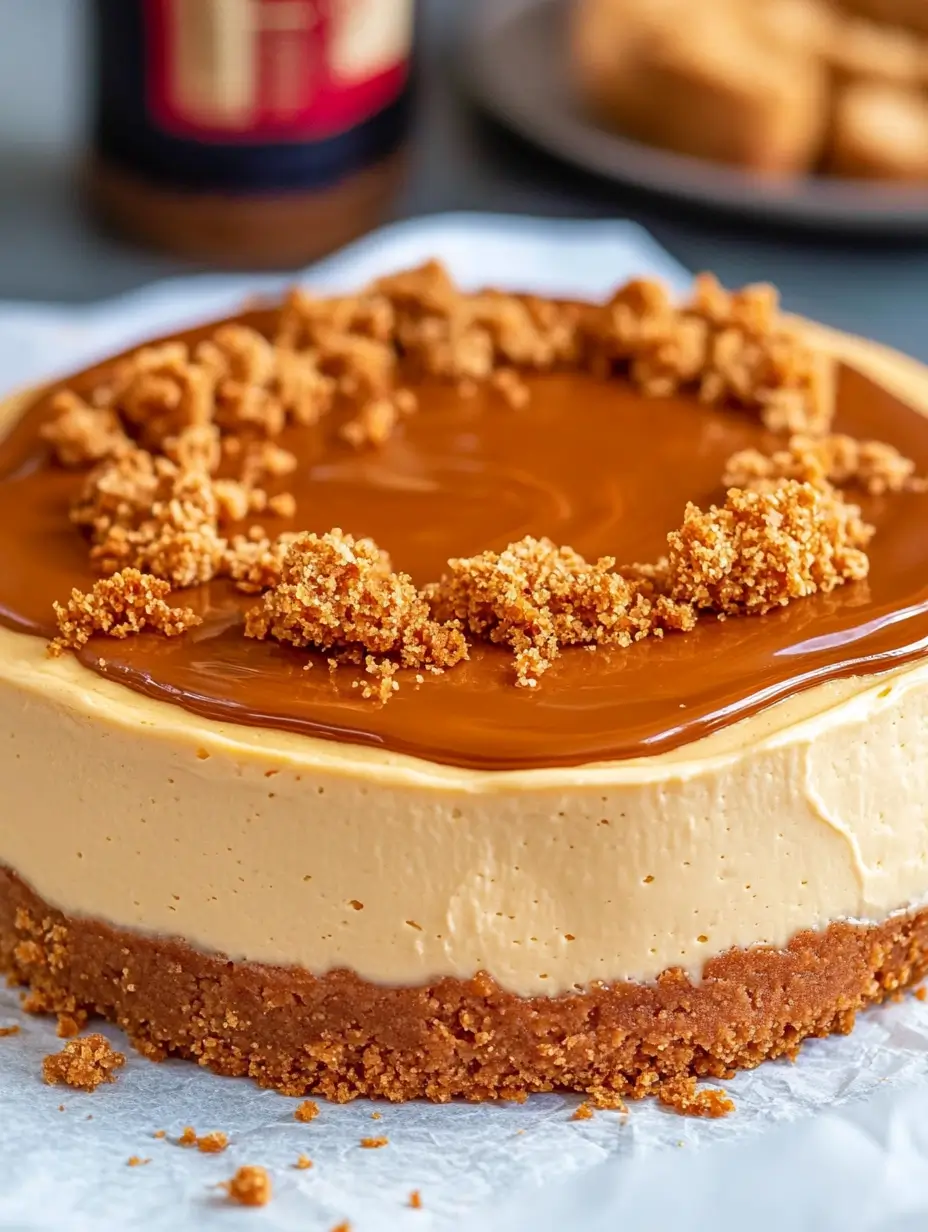
Melt the extra Biscoff spread in the microwave for about 20 seconds or until it reaches a pourable consistency. Drizzle it over the cheesecake in a zigzag pattern or let it cascade down the sides for a beautiful finish.
For extra crunch and presentation, crush some additional Biscoff biscuits and sprinkle them on top. You can also place whole biscuits around the edges as decoration.
Step 5: Slice and Serve
To get clean slices, use a sharp knife and wipe it clean between cuts. Serve each slice chilled and enjoy the rich, creamy, spiced flavor of your homemade no-bake Biscoff cheesecake.
How to Serve this No-Bake Biscoff Cheesecake
This cheesecake is incredibly versatile and can be served in several ways depending on the occasion. For an elegant presentation, serve it on a cake stand with a drizzle of caramel sauce or melted white chocolate for an extra touch of sweetness. If you’re hosting a casual gathering, cut the cheesecake into bite-sized squares and serve it as a no-bake Biscoff cheesecake bar for easy sharing.
For a warm contrast to the cold cheesecake, pair it with a hot beverage. A cup of freshly brewed coffee, spiced chai, or a creamy latte complements the flavors beautifully. If you want to enhance the dessert experience, serve each slice with a scoop of vanilla ice cream or a dollop of whipped cream.
This cheesecake is perfect for birthdays, celebrations, holidays, or simply as a weekend treat. It’s a great addition to dessert tables, and because of its creamy texture, it pairs wonderfully with crisp, crunchy elements like caramelized nuts or a biscuit crumble on top.
Pairing Suggestions of this No-Bake Biscoff Cheesecake
Pairing your cheesecake with the right drink or side can elevate the overall experience. The rich caramelized and spiced flavors of Biscoff are well complemented by warm and slightly bitter beverages. A fresh espresso or a well-brewed Americano balances out the sweetness of the cheesecake, making it an excellent after-dinner dessert. If you prefer something milder, a chai latte or a spiced hot chocolate pairs well with the cookie butter notes.
For a refreshing twist, serve the cheesecake with a cold drink. An iced coffee with a splash of vanilla or caramel syrup complements the flavor perfectly. A simple glass of cold milk also enhances the creamy texture and balances the spices of the Biscoff.
If you’re looking for a fruit pairing, consider serving this cheesecake with fresh berries. Raspberries or strawberries provide a tart contrast to the sweetness, making every bite more balanced. A fruit compote, such as blueberry or raspberry sauce, drizzled over the cheesecake also works beautifully.
Storage, Freezing & Reheating Instructions
How to Store in the Fridge
This cheesecake should always be stored in the refrigerator to maintain its creamy texture. Keep it covered with plastic wrap or in an airtight container to prevent it from absorbing other odors. It stays fresh for up to 4 days in the fridge.
How to Freeze
If you want to make this cheesecake in advance or save leftovers for later, freezing is an excellent option. To freeze the whole cheesecake, wrap it tightly in plastic wrap and then again in aluminum foil. You can also place it in a freezer-safe container to prevent freezer burn.
For individual slices, place the slices on a baking sheet and freeze them for an hour before wrapping them individually in plastic wrap. This method allows you to grab a single slice whenever you want a treat. The cheesecake can be frozen for up to 3 months.
How to Thaw
To thaw the cheesecake, transfer it from the freezer to the refrigerator and let it defrost overnight. This will ensure that it retains its smooth and creamy consistency. Avoid thawing it at room temperature, as this can cause condensation to form, making the cheesecake too soft.
Common Mistakes to Avoid
One of the biggest mistakes people make when preparing a no-bake cheesecake is not chilling it long enough. If you try to slice it before it’s fully set, the filling will be too soft and may collapse. Make sure to refrigerate for at least six hours, but preferably overnight.
Another common mistake is overmixing the whipped cream. When folding it into the cream cheese mixture, be gentle to maintain the airy texture. Overmixing can deflate the whipped cream, making the filling dense instead of light and fluffy.
Using low-fat cream cheese instead of full-fat can also affect the texture. The fat content in full-fat cream cheese helps the cheesecake set properly, so avoid using low-fat versions if you want the best results.
Pro Tips
For the best texture, always use room-temperature cream cheese. Cold cream cheese can result in lumps, making it harder to achieve a smooth and creamy filling.
If you want an extra firm crust, bake the crust at 350°F (175°C) for 10 minutes before cooling and adding the filling. This step is optional since it’s a no-bake recipe, but it gives the crust more structure.
When spreading the cheesecake filling over the crust, use an offset spatula to smooth the top evenly. This helps create a professional-looking cheesecake.
Frequently Asked Questions (FAQs)
1. Can I use another type of cookie for the crust?
Yes! If you don’t have Biscoff cookies, you can use graham crackers or any other spiced biscuit. However, Biscoff cookies add a distinct caramelized flavor that enhances the cheesecake.
2. Can I make this cheesecake ahead of time?
Absolutely! This cheesecake actually tastes better when made a day in advance, as it allows the flavors to develop and the filling to firm up.
3. Can I freeze leftovers?
Yes, you can freeze this cheesecake for up to three months. Just make sure to wrap it properly to prevent freezer burn.
Conclusion & Call to Action
This No-Bake Biscoff Cheesecake is a must-try dessert that is creamy, rich, and bursting with the delicious flavors of cookie butter. Whether you’re making it for a special occasion or just to satisfy a sweet craving, this recipe is easy, foolproof, and always a crowd-pleaser.
Try this recipe and let me know how it turns out! I’d love to hear about your experience. If you make it, share a picture and tag me—I can’t wait to see your delicious creations!
Print
No-Bake Biscoff Cheesecake – Easy & Creamy Cookie Butter Dessert
- Total Time: 6 hours 15 minutes
- Yield: 8–10 slices 1x
- Diet: Vegetarian
Description
This no-bake Biscoff cheesecake is a smooth and creamy dessert made with a spiced Biscoff cookie crust, a rich cheesecake filling infused with cookie butter, and a drizzle of melted Biscoff on top. It’s quick, easy, and requires no oven, making it perfect for any occasion.
Ingredients
- For the Crust:
- 2 ½ cups Biscoff biscuits, crushed
- ½ cup unsalted butter, melted
- For the Cheesecake Filling:
- 16 oz cream cheese, softened
- ½ cup powdered sugar
- ½ cup Biscoff spread (cookie butter)
- 1 tsp vanilla extract
- 1 ¼ cups heavy cream, whipped
- For the Topping:
- ¼ cup melted Biscoff spread
- Extra Biscoff biscuits for garnish
Instructions
- Mix the crushed Biscoff biscuits with melted butter and press into a 9-inch springform pan. Chill while making the filling.
- Beat the cream cheese, powdered sugar, Biscoff spread, and vanilla until smooth.
- Gently fold in the whipped cream until fully combined.
- Pour the cheesecake filling over the crust and smooth the top. Refrigerate for at least 6 hours.
- Drizzle with melted Biscoff spread and garnish with extra biscuits before serving.
Notes
For best results, chill the cheesecake overnight. You can also freeze it for up to three months.
- Prep Time: 15 minutes
- Cook Time: 6+ hours
- Category: Dessert
- Method: No-Bake
- Cuisine: American, European