
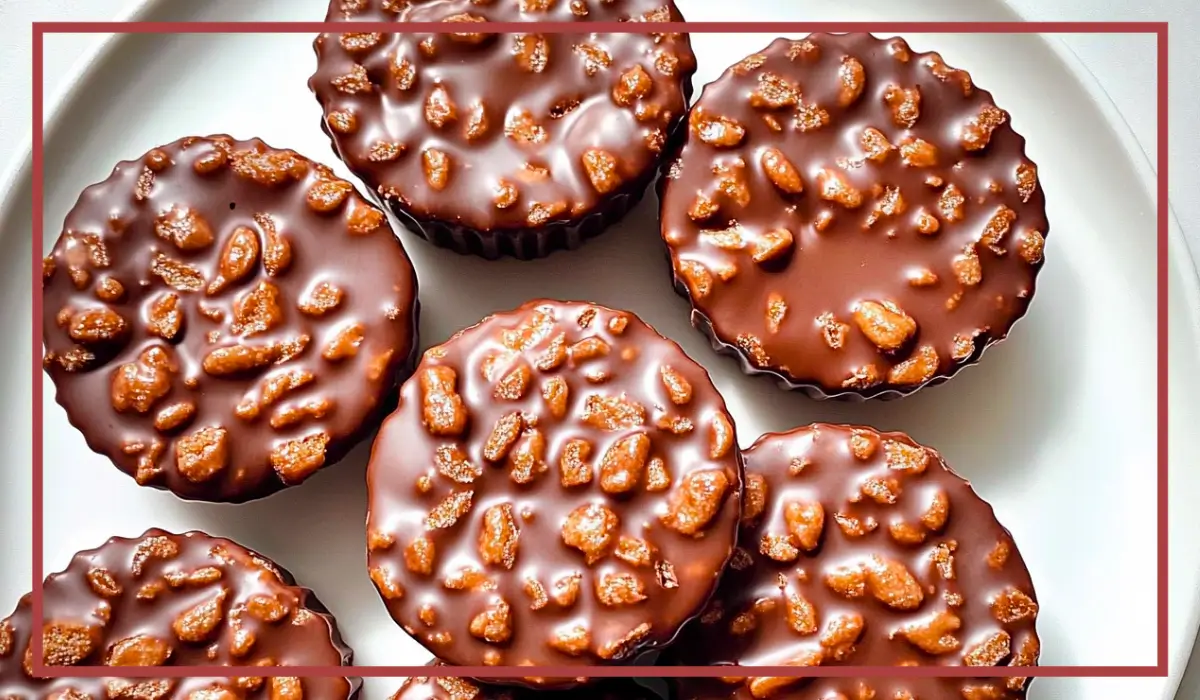
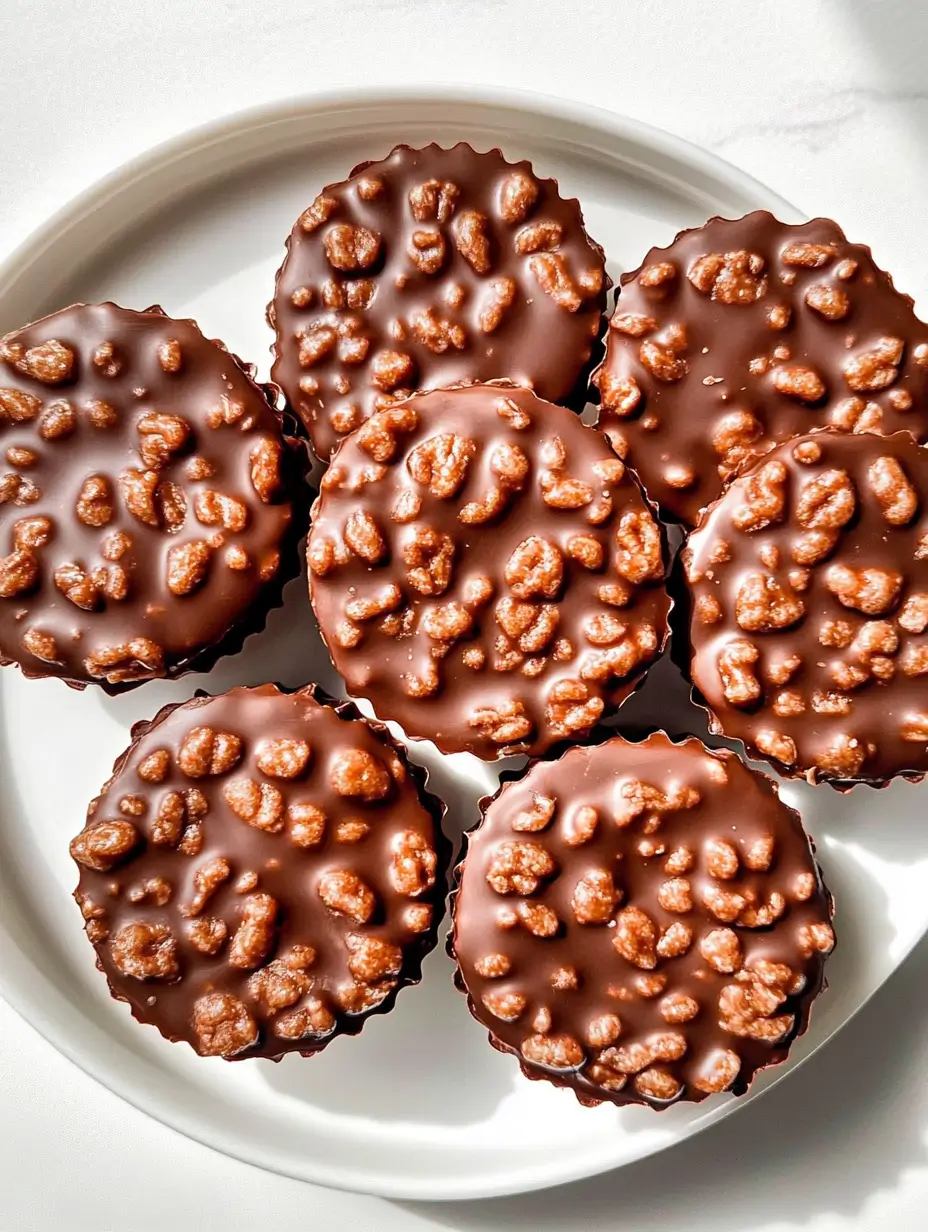
There’s something about the combination of chocolate and peanut butter that never fails to hit the spot. It’s the perfect mix of rich, creamy, nutty, and sweet, all wrapped up in one irresistible bite. But what if you could take that classic duo and make it even better? That’s exactly what happens with these Chocolate Peanut Butter Crunch Cups. Think of them as a homemade version of Reese’s cups—except they have an added crunch that takes them to the next level.
The best part? You only need four simple ingredients to whip up a batch of these delicious treats, and there’s zero baking required. That’s right—no need to turn on the oven or deal with complicated steps. Just a little melting, mixing, and layering, then into the fridge they go. In no time, you’ll have the most satisfying treat that’s perfect for snacking, gifting, or indulging after a long day.
What really makes these peanut butter crunch cups special is the crispy rice cereal. It gives them a light, airy crunch that perfectly balances the smooth chocolate and creamy peanut butter. Every bite is a mix of textures—soft, crunchy, melt-in-your-mouth goodness that’ll have you reaching for just one more.
I first made these on a whim when I was craving something sweet but didn’t want to spend hours in the kitchen. One bite in, and I knew I had stumbled upon something amazing. Now, I make them all the time for family gatherings, holiday parties, or just as a quick treat to have on hand. They’re easy, fun, and seriously addictive. Plus, they’re a great way to get kids involved in the kitchen since there’s no baking required.
So, if you love the classic peanut butter and chocolate combo but want something with an extra layer of crunch, this is the recipe for you. Let’s get into why you’re going to fall in love with these Chocolate Peanut Butter Crunch Cups.
Why You’ll Love This Recipe
There are so many reasons to love these peanut butter crunch cups, but let’s start with the obvious ones.
First, they’re incredibly easy to make. With just four ingredients and a few simple steps, you’ll have a batch of homemade treats ready to enjoy in no time. Even if you’ve never made homemade candy before, this recipe is completely foolproof.
Second, they’re no-bake, which means no need to heat up the oven or wait for anything to cook. Just melt, mix, layer, and chill. It’s that simple.
Another reason you’ll love them is the texture. The creamy peanut butter pairs perfectly with the crispy rice cereal, while the chocolate adds a smooth, rich finish. Each bite is a delightful mix of crunchy and creamy, making these cups even better than store-bought candy.
They’re also completely customizable. Want to use dark chocolate instead of milk chocolate? Go for it. Prefer almond butter or cashew butter? No problem. You can even add extras like sea salt, crushed nuts, or a drizzle of caramel to make them your own.
Lastly, they’re great for meal prepping. You can make a big batch, store them in the fridge, and have a delicious treat ready whenever your sweet tooth kicks in. They also make a perfect homemade gift for holidays, birthdays, or just because.
If you’re looking for a treat that’s simple, satisfying, and guaranteed to be a crowd-pleaser, these Chocolate Peanut Butter Crunch Cups are it.
Health Benefits
While these peanut butter crunch cups might taste like an indulgence, they actually have some surprising health benefits—especially compared to store-bought candy.
Peanut butter is packed with healthy fats, protein, and fiber, making it a great source of energy. It helps keep you full and satisfied, making these cups a perfect snack when you need a quick boost. Plus, peanut butter contains important nutrients like vitamin E, magnesium, and potassium.
Dark chocolate, if you choose to use it, is full of antioxidants that can help fight inflammation and support heart health. It also contains iron and fiber, making it a slightly healthier option than milk chocolate.
Honey or maple syrup, if used as a natural sweetener, provides a touch of natural sugar without the need for processed sweeteners. These options also contain trace minerals and antioxidants that can be beneficial for your overall health.
Finally, crispy rice cereal adds a nice crunch without a ton of extra calories. It keeps the cups light and airy, making them a better alternative to traditional candy bars that are loaded with artificial ingredients.
So while these are definitely a treat, you can feel good about indulging in one (or two) knowing they’re made with real, simple ingredients.
Preparation Time, Servings, and Nutritional Information
These chocolate peanut butter crunch cups come together quickly and require minimal effort. Here’s what you need to know before getting started.
Preparation Time:
- Prep Time: 10 minutes
- Chill Time: 30 minutes
- Total Time: 40 minutes
Servings:
This recipe makes about 12 peanut butter crunch cups, depending on the size of your muffin tin.
Nutritional Information (Per Cup):
- Calories: ~180
- Protein: 4g
- Fat: 12g
- Carbohydrates: 15g
- Sugar: 8g
- Fiber: 2g
Of course, the exact nutrition breakdown will vary based on the type of chocolate and peanut butter you use. If you want a lower-sugar option, opt for dark chocolate and unsweetened peanut butter.
Ingredients List
To make these chocolate peanut butter crunch cups, you’ll need just four simple ingredients.
1 cup peanut butter – You can use creamy or crunchy, depending on your preference. Creamy peanut butter makes for a smooth filling, while crunchy adds even more texture.
2 tablespoons honey or maple syrup – This adds natural sweetness and helps bind the peanut butter mixture together.
1 cup crispy rice cereal – This is the secret ingredient that gives these cups their signature crunch. Make sure to use fresh, crispy cereal for the best texture.
1 ½ cups chocolate chips – You can use milk, dark, or semi-sweet chocolate. Dark chocolate gives a richer, slightly less sweet flavor, while milk chocolate keeps things classic and sweet.
Optional Add-Ins:
- 1/2 teaspoon vanilla extract for extra flavor
- A pinch of sea salt to enhance the sweetness
- Crushed peanuts for a nutty crunch
- A drizzle of melted white chocolate for a decorative touch
Step-By-Step Cooking Instructions
Now that you have all your ingredients, let’s walk through the step-by-step process to make these peanut butter crunch cups.
1: Melt the Chocolate
- In a microwave-safe bowl, add 1 cup of chocolate chips. Microwave in 30-second intervals, stirring between each round, until the chocolate is completely smooth and melted. This usually takes about 1 to 1 ½ minutes total.
- Alternatively, you can melt the chocolate using a double boiler on the stovetop. Simply place a heatproof bowl over a pot of simmering water and stir until melted.
2: Prepare the Peanut Butter Crunch Mixture
- In a separate mixing bowl, combine the peanut butter, honey (or maple syrup), and crispy rice cereal. Stir until well combined and the cereal is evenly coated.
- If you’re using vanilla extract or sea salt, mix it in at this stage.
3: Assemble the Cups
- Line a muffin tin with cupcake liners. This makes it easier to remove the cups once they’re set.
- Add a small spoonful of melted chocolate to the bottom of each liner, spreading it slightly so it covers the base.
- Next, scoop about a tablespoon of the peanut butter crunch mixture and press it gently into the chocolate layer.
- Pour the remaining melted chocolate over each cup to seal the peanut butter layer inside. Use the back of a spoon to smooth it out.
4: Chill and Set
- Place the muffin tin in the fridge for about 30 minutes, or until the chocolate is firm.
- Once set, remove the cups from the tin, peel off the liners, and enjoy.
How to Serve
These Chocolate Peanut Butter Crunch Cups are incredibly versatile and can be served in so many fun and creative ways. Whether you’re enjoying them straight from the fridge, dressing them up for a party, or adding them to a dessert platter, there are plenty of ways to make them even more special.
One of the best ways to serve them is cold from the fridge or freezer. This keeps the chocolate firm and gives the peanut butter filling a nice, satisfying bite. If you prefer a softer texture, simply let them sit at room temperature for a few minutes before enjoying them.
For a dessert platter, arrange them on a serving tray along with some fresh berries, nuts, and other bite-sized treats like chocolate-covered almonds or dried fruit. This is a great way to elevate them for a party or gathering.
If you want to dress them up, drizzle a little melted white chocolate over the tops, sprinkle with flaky sea salt, or dust them with cocoa powder. These small touches make them look extra fancy and add even more layers of flavor.
For a more indulgent treat, try chopping them up and adding them to ice cream, yogurt, or oatmeal. The chocolate and peanut butter mixture pairs beautifully with creamy textures, making them the perfect mix-in for a sweet and crunchy contrast.
Another fun idea is to gift them! These peanut butter crunch cups make an excellent homemade gift for holidays, birthdays, or special occasions. Simply place them in a cute box or wrap them in decorative cellophane bags with a ribbon for a thoughtful and delicious present.
No matter how you serve them, these treats are guaranteed to be a hit. They’re simple yet decadent, and they never fail to impress.
Pairing Suggestions
While these chocolate peanut butter crunch cups are amazing on their own, pairing them with the right beverages or complementary treats can take the experience to another level. Here are a few ideas to make your snacking even more enjoyable.
Drinks That Pair Well
- Coffee or Espresso – The rich, bold flavor of coffee perfectly complements the creamy peanut butter and chocolate. A hot espresso shot with one of these cups on the side is pure bliss.
- Milk (Dairy or Non-Dairy) – A classic choice! Whether it’s regular milk, almond milk, oat milk, or cashew milk, a cold glass enhances the sweetness and balances the richness.
- Hot Chocolate – If you want to go all-in on the chocolate theme, a warm mug of hot cocoa with a peanut butter crunch cup on the side is the ultimate cozy treat.
- Chai Latte – The warm spices in chai tea, like cinnamon and cardamom, pair beautifully with the nuttiness of peanut butter and the deep flavor of chocolate.
- Banana or Peanut Butter Smoothie – A protein-packed smoothie with banana, peanut butter, and a splash of almond milk complements these cups perfectly.
Desserts & Snacks That Go Well
- Fresh Strawberries or Raspberries – The tartness of fresh berries contrasts nicely with the rich chocolate and peanut butter, adding a refreshing touch.
- Popcorn – For a sweet-and-salty mix, serve these peanut butter cups alongside some buttered popcorn or caramel corn.
- Granola or Trail Mix – Break up a few peanut butter crunch cups and mix them into granola or trail mix for a sweet addition.
- Brownies or Blondies – If you love a truly indulgent dessert, chop these cups into small pieces and add them to brownies or blondies before baking.
- Pretzels or Crackers – The salty crunch of pretzels or simple butter crackers pairs wonderfully with the creamy, sweet flavors of these cups.
These pairing ideas make it easy to turn your peanut butter crunch cups into a complete dessert experience. Whether you’re enjoying them with coffee, mixing them into another dish, or serving them as part of a snack board, there are endless ways to make them even more delicious.
Storage, Freezing & Reheating Instructions
One of the best things about these Chocolate Peanut Butter Crunch Cups is that they store incredibly well, making them perfect for meal prep or having a sweet treat on hand whenever you need it.
How to Store in the Fridge
If you plan on eating them within a week, keep them stored in an airtight container in the fridge. This helps maintain their freshness and keeps the chocolate from getting too soft. When stored properly, they stay fresh for up to 10 days.
For best results, layer them with a sheet of parchment paper between each layer to prevent sticking.
How to Freeze for Long-Term Storage
If you want to make a big batch and store them for longer, freezing is the way to go. Simply place the peanut butter crunch cups on a baking sheet lined with parchment paper and freeze for about 30 minutes, or until they’re firm. Then transfer them to a freezer-safe container or zip-top bag.
They can be stored in the freezer for up to 3 months. When you’re ready to enjoy one, simply let it sit at room temperature for about 5 minutes to soften slightly before eating.
How to Reheat or Soften
These cups are meant to be eaten cold or at room temperature, but if you want a softer, melt-in-your-mouth texture, you can microwave them for 5-10 seconds. Be careful not to overheat, as the chocolate can melt too quickly.
Storing and freezing these peanut butter crunch cups properly ensures that you always have a delicious snack ready to go, whether you need a quick dessert or a sweet treat on the run.
Common Mistakes to Avoid
Even though this recipe is incredibly simple, there are a few common mistakes that can affect the final result. Here’s how to avoid them:
1. Using Watery or Oily Peanut Butter
Natural peanut butter can sometimes separate, leading to an oily consistency that doesn’t mix well. If using natural peanut butter, stir it very well before measuring to make sure the oil is fully incorporated.
2. Overheating the Chocolate
Melting chocolate in the microwave requires patience. If you heat it for too long, it can burn or seize up, making it difficult to work with. Always melt in short 30-second intervals, stirring in between, to get a smooth texture.
3. Not Pressing the Peanut Butter Mixture Firmly
If the peanut butter and crispy rice cereal mixture isn’t pressed down firmly, the layers might not hold together well. Use the back of a spoon or your fingers to gently press the mixture into the chocolate base before adding the top layer.
4. Rushing the Chilling Process
It might be tempting to speed up the process by placing them in the freezer instead of the fridge, but doing so can cause the chocolate to crack. Always let them chill slowly in the fridge for the best results.
5. Not Using Cupcake Liners
Skipping liners might seem like a minor detail, but they make it much easier to remove the cups from the tin. If you don’t have liners, lightly grease the muffin tin before adding the chocolate.
Avoiding these mistakes will ensure that your peanut butter crunch cups turn out perfect every time.
Pro Tips for the Best Chocolate Peanut Butter Crunch Cups
If you want to take these Chocolate Peanut Butter Crunch Cups to the next level, here are some expert tips that will guarantee perfect results every time.
1. Use High-Quality Chocolate
Since chocolate is one of the main ingredients in this recipe, it’s important to use high-quality chocolate. Opt for real chocolate chips or a good-quality chocolate bar that melts smoothly. If you’re using a chocolate bar, chop it into small pieces before melting for even consistency.
2. Stir the Peanut Butter Well
If you’re using natural peanut butter, be sure to stir it thoroughly before measuring. Sometimes, the oil separates from the peanut butter, and if you don’t mix it well, your cups might end up too runny or too dry.
3. Add a Pinch of Salt for Flavor Balance
Even if your peanut butter is already salted, adding a tiny pinch of flaky sea salt on top of the finished cups enhances the sweetness and brings out the peanut butter’s natural flavors. The contrast of sweet and salty makes each bite even better.
4. Double the Chocolate for a Thicker Shell
If you want your peanut butter crunch cups to have a thicker chocolate shell, simply add an extra layer of melted chocolate before chilling. This makes them even more satisfying to bite into.
5. Let the Chocolate Cool Slightly Before Assembling
After melting the chocolate, let it sit for 1-2 minutes before spooning it into the muffin liners. If the chocolate is too hot, it might mix with the peanut butter layer instead of forming distinct layers.
6. Press the Peanut Butter Mixture Firmly
To prevent your peanut butter and crispy rice mixture from crumbling when you bite into the cups, gently press it firmly into the first chocolate layer before adding the top chocolate layer.
7. Experiment with Different Nut Butters
While peanut butter is the classic choice, you can easily swap it out for almond butter, cashew butter, or even sunflower seed butter for a nut-free version. Each variation adds a unique twist to the flavor.
8. Make Mini or Jumbo Cups
If you want a bite-sized treat, use a mini muffin tin instead of a standard one. For an extra indulgent dessert, use a jumbo muffin tin to create large peanut butter crunch cups that you can share (or not!).
9. Use Silicone Muffin Liners for Easy Removal
Paper cupcake liners work well, but silicone muffin liners make it even easier to remove the cups without tearing. They also create a smooth, even shape.
10. Store Properly for the Best Texture
For the best texture and flavor, store your peanut butter crunch cups in an airtight container in the fridge. This keeps the chocolate firm and prevents the peanut butter from getting too soft.
By following these pro tips, you’ll get perfectly layered, crunchy, and delicious peanut butter crunch cups every time!
Frequently Asked Questions (FAQs)
1. Can I use milk chocolate instead of dark chocolate?
Absolutely! If you prefer sweeter cups, milk chocolate is a great choice. If you want a richer, slightly more bitter taste, stick with dark chocolate. Semi-sweet chocolate is a good middle ground.
2. Can I make these peanut butter crunch cups vegan?
Yes! To make a vegan version, use dairy-free chocolate chips and maple syrup instead of honey. Most crispy rice cereals are vegan, but double-check the ingredients to make sure.
3. How can I make this recipe gluten-free?
Most crispy rice cereals contain malt extract, which has gluten. Look for a certified gluten-free crispy rice cereal and make sure your chocolate and peanut butter are also gluten-free.
4. Can I add extra flavors or mix-ins?
Of course! Try adding:
- Crushed peanuts or almonds for extra crunch
- A drizzle of caramel or white chocolate on top
- A sprinkle of cinnamon for a warm, cozy flavor
- Coconut flakes for a tropical twist
5. How long do these peanut butter crunch cups last?
They stay fresh in the fridge for up to 10 days and in the freezer for up to 3 months. Just be sure to store them in an airtight container.
6. Can I use a different type of sweetener?
Yes! Instead of honey or maple syrup, you can use agave nectar or a few drops of stevia if you want a low-sugar version.
7. What’s the best way to melt chocolate without a microwave?
If you don’t have a microwave, you can use a double boiler on the stove. Simply place a heatproof bowl over a pot of simmering water and stir the chocolate until it’s melted.
8. Can I make these without crispy rice cereal?
Yes! If you don’t have crispy rice cereal, you can replace it with crushed graham crackers, chopped nuts, or even toasted quinoa for a crunchy texture.
9. My chocolate isn’t melting properly. What should I do?
If your chocolate is seizing up or becoming grainy, try adding a teaspoon of coconut oil or vegetable oil to smooth it out.
10. Can kids help make this recipe?
Yes! This is a kid-friendly recipe since there’s no baking involved. Kids can help stir the peanut butter mixture, scoop it into liners, and drizzle the chocolate on top.
Conclusion & Call to Action
By now, you’re probably already imagining how amazing these Chocolate Peanut Butter Crunch Cups will taste. With their creamy peanut butter filling, crispy texture, and rich chocolate coating, they’re truly the perfect homemade treat. The best part? They’re quick, easy, and totally customizable.
Whether you’re making them for yourself, your family, or as a gift, they’re guaranteed to impress. Plus, since they’re no-bake, you won’t have to spend hours in the kitchen. Just melt, mix, layer, and chill—it’s that simple.
Now it’s your turn! Grab your ingredients, follow the easy steps, and make a batch of these irresistible chocolate peanut butter crunch cups. Once you do, I’d love to hear how they turned out!
Try the recipe and let me know in the comments how they turned out. Did you add any fun twists?
Snap a picture of your peanut butter crunch cups and share it on social media. Tag me so I can see your delicious creations!
Want more easy and delicious no-bake treats? Stay tuned for more recipes that are just as simple and satisfying!
Happy snacking!
Print
Chocolate Peanut Butter Crunch Cups – Easy No-Bake Treat
- Total Time: 40 minutes (includes chilling)
- Yield: 12 cups 1x
- Diet: Gluten Free
Description
These Chocolate Peanut Butter Crunch Cups are a delicious no-bake treat made with just 4 simple ingredients. Creamy peanut butter, crispy rice cereal, and rich chocolate come together for the ultimate sweet and crunchy dessert. Perfect for meal prep, gifting, or satisfying your sweet tooth!
Ingredients
- 1 cup peanut butter (creamy or crunchy)
- 2 tbsp honey or maple syrup
- 1 cup crispy rice cereal
- 1 ½ cups chocolate chips (milk, dark, or semi-sweet)
Instructions
- Melt the Chocolate: Microwave 1 cup of chocolate chips in 30-second intervals, stirring in between, until smooth.
- Prepare the Peanut Butter Mixture: Mix peanut butter, honey (or maple syrup), and crispy rice cereal in a bowl. Stir until well combined.
- Assemble the Cups: Line a muffin tin with cupcake liners. Spoon a layer of melted chocolate into each liner, then add a layer of peanut butter crunch mixture. Top with the remaining melted chocolate.
- Chill & Set: Refrigerate for 30 minutes until firm. Remove from liners and enjoy!
Notes
- Use dark chocolate for a richer flavor.
- Store in an airtight container in the fridge for up to 10 days.
- For a nut-free version, use sunflower seed butter.
- Prep Time: 10 minutes
- Cook Time: 0 minutes
- Category: Dessert, Snack
- Method: No-Bake
- Cuisine: American