
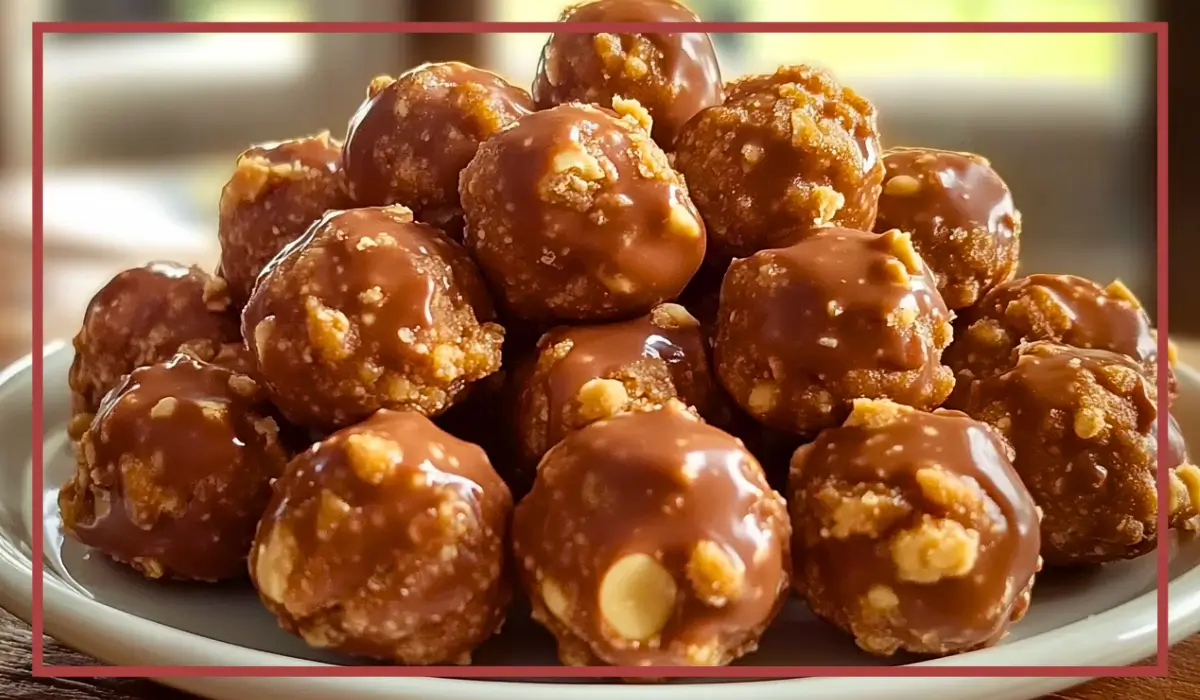
If you’re looking for a simple, sweet, and satisfying treat that requires no baking, these Butterfinger Balls Recipe are exactly what you need. They are a perfect combination of crunchy, creamy, and chocolaty goodness, making them an instant favorite among both kids and adults. Whether you’re preparing for a holiday gathering, a potluck, or just looking for a quick dessert to satisfy your sweet tooth, these bite-sized delights are the answer.
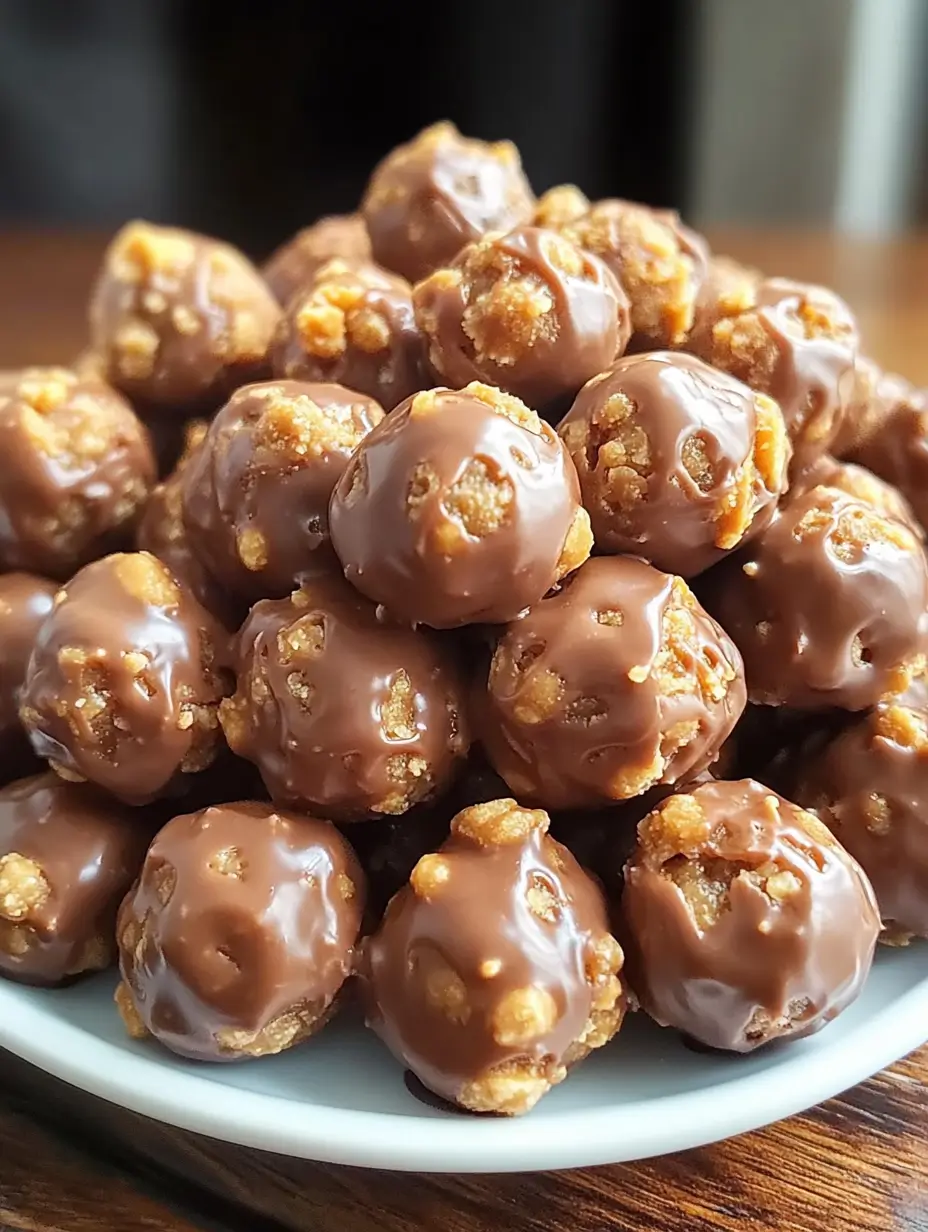
Butterfinger Balls bring together crushed Butterfinger candy bars, creamy peanut butter, and a rich chocolate coating, creating a flavor explosion in every bite. The best part? This recipe is incredibly easy to make and requires only a handful of ingredients that you probably already have in your pantry. Plus, there’s no need to turn on the oven, making them a perfect no-fuss dessert that comes together in under an hour.
I first made these Butterfinger Balls when I was looking for a last-minute dessert for a friend’s party. I had limited time but wanted something that would impress, and these little chocolate-coated peanut butter truffles turned out to be a total hit. I barely had time to put them on the table before they disappeared! From that day on, they became my go-to recipe whenever I needed something quick, delicious, and stress-free.
Another thing I love about this recipe is its versatility. You can easily customize the coating, drizzle them with white chocolate, or even sprinkle them with sea salt for an extra touch of flavor. They also make great homemade gifts during the holidays. Just pack them in a cute tin or a decorative box, and you’ve got an easy, homemade treat that everyone will love.
These Butterfinger Balls are everything you want in a dessert—crunchy, creamy, sweet, and utterly irresistible. If you’re a fan of chocolate and peanut butter, then this recipe is an absolute must-try!
Why You’ll Love This Butterfinger Balls Recipe
There are so many reasons why these Butterfinger Balls will become one of your favorite desserts. Here’s why:
- Quick and Easy – You don’t need any special skills or equipment to make these. They require minimal effort and come together in under an hour.
- No Baking Required – If you love desserts but hate baking, this recipe is for you. Simply mix, roll, dip, and chill—no oven needed!
- Crunchy and Creamy Texture – The combination of crushed Butterfinger bars, smooth peanut butter, and rich chocolate creates the perfect texture with every bite.
- Minimal Ingredients – You only need a handful of pantry staples to whip up this delicious treat.
- Perfect for Any Occasion – Whether it’s a holiday gathering, birthday party, or just a casual dessert craving, these Butterfinger Balls are always a hit.
- Make-Ahead Friendly – You can prepare them in advance and store them in the fridge or freezer for whenever you need a sweet treat.
- Kid-Friendly – Kids love helping roll the balls and dip them in chocolate, making this a fun recipe to make together.
- Customizable – You can experiment with different chocolate coatings, toppings, and mix-ins to make them uniquely yours.
- Great for Gifting – Pack them in decorative tins or boxes, and they make the perfect homemade gift for friends and family.
Once you try these Butterfinger Balls, they’ll quickly become one of your go-to treats. They’re rich, indulgent, and totally irresistible—perfect for any chocolate and peanut butter lover!
Health Benefits
While Butterfinger Balls are undeniably an indulgent treat, they do offer some nutritional benefits when enjoyed in moderation.
- Good Source of Protein – Thanks to the peanut butter, these treats contain a decent amount of protein, which helps keep you full and satisfied.
- Healthy Fats – Peanut butter provides heart-healthy fats that can support brain function and overall well-being.
- Antioxidants from Dark Chocolate – If you use dark chocolate instead of milk chocolate, you’ll get a good dose of antioxidants, which can help fight free radicals in the body.
- Energy-Boosting Ingredients – These truffles contain a mix of protein, healthy fats, and carbohydrates, making them a great energy-boosting snack.
- Portion-Controlled Treat – Since these are bite-sized, you can satisfy your sweet tooth without overindulging.
While Butterfinger Balls should still be enjoyed as an occasional treat, they’re a fun and delicious way to indulge in something sweet without too much guilt.
Preparation Time, Servings, and Nutritional Information
- Prep Time: 15 minutes
- Chill Time: 30 minutes
- Total Time: 45 minutes
- Servings: About 24 Butterfinger Balls
- Calories per serving: ~150 calories
- Macronutrients per serving:
- Protein: 3g
- Carbohydrates: 15g
- Fat: 9g
Ingredients List of this Butterfinger Balls Recipe
To make these delicious Butterfinger Balls, you’ll need:
- 1 ½ cups crushed Butterfinger bars (about 5 full-sized bars)
- 1 cup creamy peanut butter
- 4 tablespoons butter (softened)
- 1 teaspoon vanilla extract
- 1 ½ cups powdered sugar
- 2 cups chocolate chips (milk or semi-sweet)
- 1 tablespoon coconut oil or vegetable shortening (to help smooth out the melted chocolate)
Step-By-Step Cooking Instructions
1: Crush the Butterfinger Bars
- Place the Butterfinger bars in a ziplock bag and use a rolling pin to crush them into small pieces. You want a mix of fine crumbs and some slightly larger chunks for texture.
- Alternatively, pulse them in a food processor for a finer consistency.
2: Mix the Filling
- In a large mixing bowl, combine creamy peanut butter, softened butter, vanilla extract, and powdered sugar. Stir until fully combined and smooth.
- Fold in the crushed Butterfinger pieces and mix until everything is evenly distributed.
3: Roll Into Balls
- Use a small cookie scoop or a spoon to portion out the mixture and roll into balls about 1 inch in diameter.
- Place the balls on a parchment-lined baking sheet and freeze them for at least 30 minutes. This helps them firm up, making them easier to dip in chocolate.
4: Melt the Chocolate
- In a microwave-safe bowl, combine the chocolate chips and coconut oil.
- Microwave in 30-second intervals, stirring in between, until the chocolate is smooth and completely melted.
5: Dip the Balls in Chocolate
- Using a fork or a toothpick, dip each Butterfinger ball into the melted chocolate, coating it evenly.
- Let the excess chocolate drip off before placing it back on the parchment paper.
6: Chill and Set
- Place the coated balls back in the fridge for at least 30 minutes to allow the chocolate to set completely.
How to Serve this Butterfinger Balls Recipe
Once your Butterfinger Balls have chilled and the chocolate has fully set, it’s time to enjoy them! These little treats are perfectly poppable, making them an excellent addition to dessert platters, party spreads, or even just a sweet snack for yourself. Here are some of the best ways to serve them:
For Special Occasions
- Holiday Dessert Platters – Arrange them on a festive platter along with cookies, brownies, and other bite-sized treats for a show-stopping holiday dessert display.
- Birthday Parties – Kids and adults alike love these sweet treats! Place them in mini cupcake liners for a neat and decorative look.
- Gift Boxes – Pack these Butterfinger Balls in decorative tins or small treat bags for an easy homemade gift during the holidays or for special occasions like Valentine’s Day.
Simple and Classic Ways to Serve
- On Their Own – They are perfect just as they are! Serve them cold for the best texture.
- With a Drizzle – If you want to add an extra layer of flavor, drizzle some melted white chocolate or caramel on top before the chocolate coating sets.
- Rolled in Toppings – For extra texture, roll the freshly dipped balls in crushed Butterfinger pieces, shredded coconut, or chopped nuts before they harden.
Pairing with Other Desserts
- Ice Cream Topping – Crumble a few Butterfinger Balls over a scoop of vanilla or chocolate ice cream for an indulgent sundae.
- Cake or Cupcake Garnish – Use them as a topping for cakes or cupcakes. Just press one on top of a frosted cupcake for an extra fun touch.
- Chocolate Fondue – Serve them alongside fresh fruit and marshmallows for a decadent chocolate fondue experience.
However you choose to serve them, these Butterfinger Balls are always a hit. Their bite-sized shape and irresistible combination of textures make them perfect for any occasion.
Pairing Suggestions
These Butterfinger Balls are delicious on their own, but they pair exceptionally well with various drinks, desserts, and even snacks. Here are some pairing ideas to take your dessert experience to the next level:
Beverage Pairings
- Milk – A cold glass of milk balances out the sweetness and richness of the peanut butter and chocolate.
- Coffee or Espresso – The bold flavors of coffee complement the chocolatey, peanut buttery goodness perfectly.
- Hot Chocolate – Double the chocolate? Yes, please! Pairing these truffles with a warm cup of hot cocoa is the ultimate winter treat.
- Milkshakes – Blend up a peanut butter or chocolate milkshake and serve these truffles on the side for a fun, indulgent pairing.
Dessert Pairings
- Cheesecake – Crumble a few Butterfinger Balls over a classic vanilla cheesecake for an extra crunch.
- Brownies – Serve alongside a warm, fudgy brownie for an even richer dessert experience.
- Cookies – These truffles make a great complement to chocolate chip cookies, peanut butter cookies, or even snickerdoodles.
Savory Pairings
While these Butterfinger Balls are undeniably sweet, they also work well when balanced with something salty:
- Salted Pretzels – The combination of sweet and salty is always a winner! Serve them with a side of pretzels for a crunchy contrast.
- Popcorn – Mix them with popcorn for a fun movie night snack that has both sweet and savory flavors.
Whether you enjoy them with a glass of milk, a cup of coffee, or a scoop of ice cream, these Butterfinger Balls are guaranteed to satisfy.
Storage, Freezing & Reheating Instructions to make this Butterfinger Balls Recipe
How to Store Butterfinger Balls
To keep your Butterfinger Balls fresh and delicious, proper storage is key. Here’s the best way to store them:
- Refrigerator: Store them in an airtight container in the fridge for up to one week. Keeping them cold helps maintain the chocolate’s firmness and prevents them from becoming too soft.
- Room Temperature: If your kitchen isn’t too warm, you can store them at room temperature in an airtight container for 1-2 days. However, they may start to soften over time.
To Freeze Butterfinger Balls
If you want to make a large batch ahead of time, freezing is a great option.
- Step 1: Place the Butterfinger Balls in a single layer on a baking sheet lined with parchment paper.
- Step 2: Freeze them for about 1 hour until they are firm.
- Step 3: Transfer them to a freezer-safe bag or container and store them for up to 3 months.
To Thaw and Serve
- Refrigerator Method: Transfer the Butterfinger Balls to the fridge and let them thaw overnight for the best texture.
- Quick Thawing: If you’re in a hurry, leave them at room temperature for 10-15 minutes before serving.
These Butterfinger Balls are great for meal prepping ahead of parties or simply keeping on hand for whenever a sweet craving hits.
Common Mistakes to Avoid in this Butterfinger Balls Recipe
Even though this recipe is simple, a few common mistakes can affect the final results. Here’s what to watch out for:
- Not Chilling the Filling Before Dipping
- If you skip the chilling step, the peanut butter filling will be too soft, making it difficult to coat in chocolate.
- Using Natural Peanut Butter
- While natural peanut butter is great for other recipes, it can make the filling too soft and oily. Stick to regular creamy peanut butter for the best texture.
- Overheating the Chocolate
- Chocolate can burn easily if overheated. Always melt it in 30-second intervals, stirring in between, until smooth.
- Skipping the Coconut Oil or Shortening
- Adding a little coconut oil or shortening helps make the melted chocolate silky smooth, ensuring a perfect coating.
- Dipping While the Chocolate is Too Hot
- Let the melted chocolate cool slightly before dipping to prevent the peanut butter filling from softening too much.
By avoiding these common mistakes, you’ll end up with perfectly smooth, evenly coated Butterfinger Balls every time.
Pro Tips of this Butterfinger Balls Recipe
For the best Butterfinger Balls, keep these expert tips in mind:
- Use a Cookie Scoop: This helps you get evenly sized balls, making them look more uniform.
- Work in Batches: If you’re making a large batch, keep half the peanut butter mixture in the fridge while you work to prevent it from getting too soft.
- Double the Recipe: These disappear fast, so consider making a double batch!
- Sprinkle Extra Butterfinger on Top: Before the chocolate sets, sprinkle a little extra crushed Butterfinger for extra crunch and visual appeal.
- Try Different Coatings: Experiment with white chocolate, dark chocolate, or even crushed Oreos for a fun twist.
Frequently Asked Questions about this Butterfinger Balls Recipe (FAQs)
1. Can I use crunchy peanut butter?
Yes! Crunchy peanut butter will add even more texture to the filling.
2. Can I make these without Butterfinger bars?
If you don’t have Butterfinger bars, you can substitute with crushed peanut brittle, toffee bits, or even Reese’s Pieces for a similar flavor.
3. How long do they last in the fridge?
Butterfinger Balls will stay fresh in the fridge for up to one week.
4. Can I freeze them with the chocolate coating?
Yes! They freeze well, and the chocolate coating helps preserve them.
5. What if I don’t have a microwave to melt the chocolate?
You can melt the chocolate using a double boiler on the stovetop.
Conclusion & Call to Action
Butterfinger Balls are a quick, easy, and irresistible dessert that is sure to be a favorite in your household. Whether you’re making them for a party, a holiday, or just a personal treat, they never disappoint.
Now it’s your turn to give them a try! Let me know in the comments how they turned out, and if you share your creation on social media, don’t forget to tag me. I’d love to see your delicious Butterfinger Balls! Happy snacking!
Print
Butterfinger Balls – Easy No-Bake Dessert Recipe
- Total Time: 45 minutes
- Yield: ~24 balls
- Diet: Vegetarian
Description
Butterfinger Balls are a delicious, no-bake treat made with creamy peanut butter, crushed Butterfinger candy bars, and a smooth chocolate coating. These bite-sized truffles are perfect for holiday desserts, party snacks, or edible gifts. With just a few simple ingredients and minimal effort, you can make a batch in under an hour.
Ingredients
- 1 ½ cups crushed Butterfinger bars (about 5 full-sized bars)
- 1 cup creamy peanut butter
- 4 tablespoons butter, softened
- 1 teaspoon vanilla extract
- 1 ½ cups powdered sugar
- 2 cups chocolate chips (milk or semi-sweet)
- 1 tablespoon coconut oil or vegetable shortening
Instructions
- Crush the Butterfinger Bars: Place them in a ziplock bag and crush with a rolling pin or use a food processor.
- Mix the Filling: In a bowl, combine peanut butter, softened butter, vanilla extract, and powdered sugar. Stir until smooth, then mix in the crushed Butterfingers.
- Form Balls: Scoop out portions and roll into 1-inch balls. Place them on a parchment-lined tray and freeze for 30 minutes.
- Melt the Chocolate: Microwave chocolate chips with coconut oil in 30-second intervals, stirring until smooth.
- Coat the Balls: Dip each Butterfinger ball in melted chocolate, let excess drip off, and place back on the tray.
- Chill & Serve: Refrigerate for 30 minutes until the chocolate sets, then enjoy!
Notes
- Use regular peanut butter instead of natural for a firmer texture.
- Store in an airtight container in the fridge for up to a week or freeze for up to 3 months.
- Sprinkle extra crushed Butterfinger on top for added crunch.
- Prep Time: 15 minutes
- Cook Time: 30 minutes
- Category: Dessert, No-Bake Treat
- Method: Mixing, Freezing
- Cuisine: American