
There’s something about Oreo ice cream sandwiches that feels like a little moment of joy frozen in time. That perfect blend of crunchy Oreo cookies and creamy, sweet ice cream makes every bite feel like a celebration. Whether you grew up eating store-bought ice cream sandwiches or they remind you of childhood summer days, there’s no denying their irresistible charm.
But what if I told you that you can make them at home—easily, with just a few simple ingredients, and without an ice cream maker? That’s right! This homemade Oreo ice cream sandwich recipe requires zero fancy equipment and delivers a perfect balance of textures and flavors that rival anything you’ll find in the freezer aisle. Plus, you get to control the ingredients, ensuring fresher, more natural flavors with none of the unnecessary preservatives found in commercial brands.
I remember the first time I attempted homemade ice cream sandwiches. I thought they would be complicated and time-consuming, but I quickly realized that with the right method, they are one of the easiest frozen treats to make. You don’t need a ton of experience in the kitchen—just a love for Oreos and ice cream!
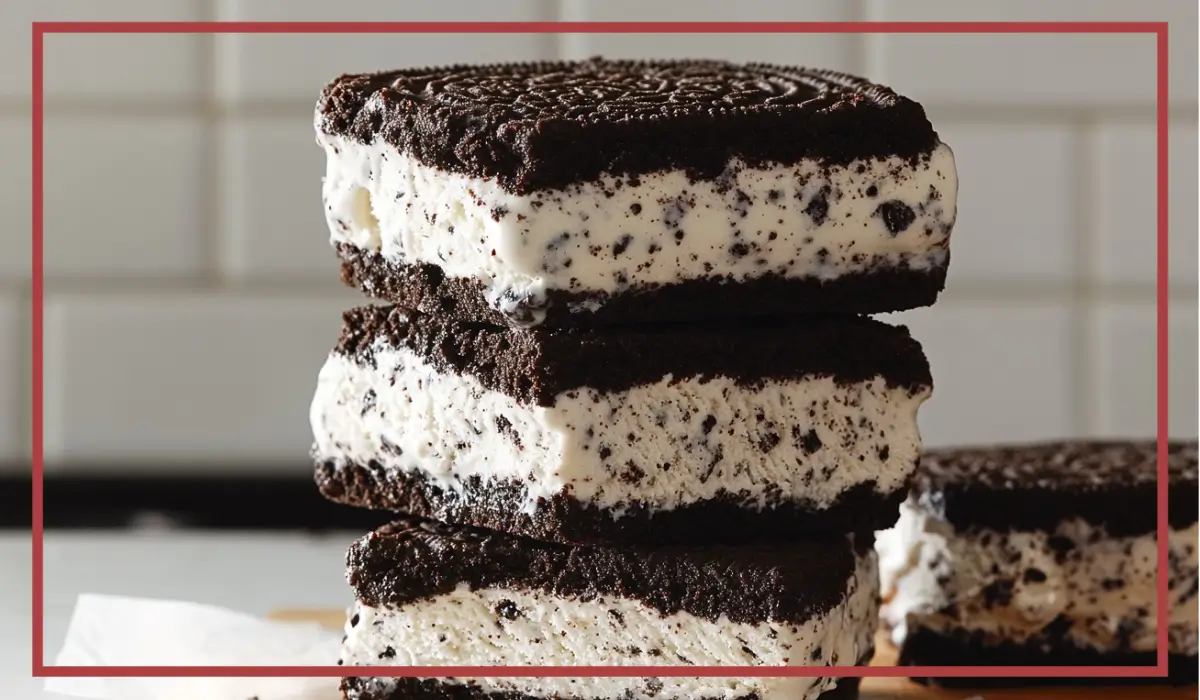
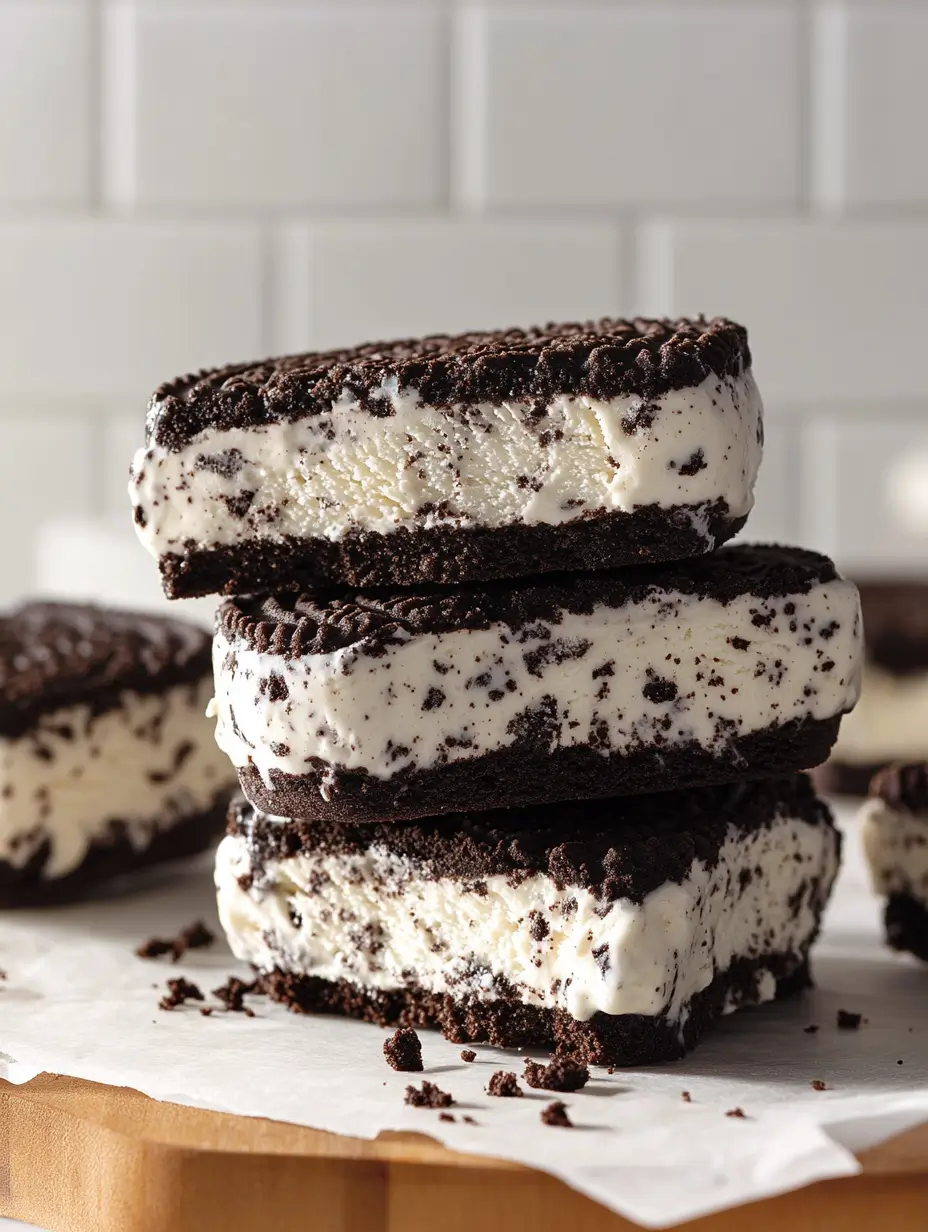
These ice cream sandwiches are perfect for hot summer days, birthday parties, or just keeping a stash of indulgent treats in your freezer. They also make a fantastic make-ahead dessert that you can pull out whenever a craving strikes. With a thick, crunchy Oreo crust and a creamy, no-churn vanilla ice cream filling loaded with Oreo pieces, these sandwiches deliver the ultimate combination of crunch and creaminess in every bite.
If you’ve never made your own ice cream sandwiches before, this is the perfect place to start. This recipe is simple, foolproof, and endlessly customizable. Whether you’re making them for a gathering or just for yourself, they’re guaranteed to be a hit.
Why You’ll Love This Recipe
There are plenty of reasons to fall in love with this homemade Oreo ice cream sandwich recipe. Here are just a few:
1. No Ice Cream Maker Needed
Most homemade ice cream recipes require an ice cream maker, which can be expensive and time-consuming. This no-churn method delivers rich, creamy ice cream without any special equipment.
2. The Perfect Texture: Crunchy and Creamy
Store-bought ice cream sandwiches can sometimes become too soft or soggy, but these retain their signature crunch while still allowing the ice cream to be smooth and scoopable.
3. Only a Few Simple Ingredients
You only need a handful of pantry staples like Oreos, butter, heavy cream, vanilla, and condensed milk to create this decadent homemade version.
4. Make-Ahead Friendly
These sandwiches are perfect for meal prepping—make a batch and store them in the freezer so you can enjoy a sweet treat whenever you like.
5. Customizable to Your Taste
Want to mix things up? You can easily change the flavors by using different types of Oreos, adding mix-ins like chocolate chips, or even drizzling the sandwiches with melted chocolate.
6. No Artificial Ingredients or Preservatives
Unlike store-bought versions, these ice cream sandwiches are free from artificial flavors, preservatives, and unnecessary additives, making them a healthier alternative.
7. Great for Parties and Gatherings
If you want a dessert that will impress guests, these homemade Oreo ice cream sandwiches are a guaranteed crowd-pleaser.
Health Benefits of Making Your Own Ice Cream Sandwiches
While Oreo ice cream sandwiches are an indulgence, making them from scratch allows you to control the ingredients and create a healthier version. Here’s why making them at home is better:
1. Fewer Artificial Ingredients
Most store-bought ice cream sandwiches contain preservatives, artificial flavors, and stabilizers to extend their shelf life. When you make them at home, you use only real, fresh ingredients with none of the extras.
2. Control Over Sugar Levels
Many commercial ice cream brands add excess sugar and high-fructose corn syrup. With a homemade version, you can adjust the sweetness to your preference by reducing the amount of condensed milk.
3. More Nutritious Options
You can easily make a healthier version by using coconut milk, Greek yogurt, or plant-based alternatives instead of heavy cream. If you want more fiber and antioxidants, try adding chopped nuts or fresh fruit to the mix.
4. Better for Special Diets
If you’re lactose-intolerant, you can use dairy-free whipped topping. If you need a gluten-free version, swap regular Oreos for gluten-free Oreos—it’s that simple!
5. Portion Control
Instead of eating a full pint of ice cream, homemade sandwiches allow you to pre-portion the servings, making it easier to enjoy in moderation.
Preparation Time, Servings, and Nutritional Information
Total Time: 6 hours (including freezing time)
Active Prep Time: 20 minutes
Servings: 8 sandwiches
Estimated Nutritional Information (Per Sandwich)
- Calories: 380
- Carbohydrates: 45g
- Protein: 4g
- Fat: 20g
- Sugar: 30g
Ingredients List
To make these delicious Oreo Ice Cream Sandwiches, you’ll need:
- 50 Oreo cookies (crushed into fine crumbs)
- 170g unsalted butter (melted)
- 500g heavy whipping cream
- 1 tbsp vanilla extract
- 150g sweetened condensed milk
Step-By-Step Cooking Instructions
1: Prepare the Oreo Crust
- Crush the Oreos into fine crumbs using a food processor or by placing them in a ziplock bag and crushing with a rolling pin.
- Set aside 100g of the crushed Oreos to mix into the ice cream later.
- In a bowl, mix the remaining Oreo crumbs with melted butter until the mixture resembles wet sand.
- Line a 9×9-inch square baking pan with parchment paper, ensuring there’s some overhang for easy removal later.
- Press half of the Oreo mixture firmly into the bottom of the pan. Freeze for 15 minutes to set.
2: Make the No-Churn Oreo Ice Cream
- In a large bowl, whip the heavy cream and vanilla extract until stiff peaks form.
- Gently fold in the sweetened condensed milk using a spatula until fully incorporated.
- Fold in the reserved 100g of crushed Oreos, making sure not to overmix.
3: Assemble the Ice Cream Sandwiches
- Pour the ice cream mixture over the chilled Oreo crust, spreading it evenly.
- Freeze for 1-2 hours, until slightly firm.
- Once set, gently spread the remaining Oreo crumb mixture over the ice cream, pressing lightly to create an even top layer.
- Freeze for at least 6 hours or overnight for the best texture.
4: Slice & Serve
- Lift the frozen block out of the pan using the parchment paper.
- Run a sharp knife under hot water, dry it off, and slice into 8 equal pieces.
- Enjoy immediately or store in the freezer!
How to Serve
Homemade Oreo ice cream sandwiches are incredibly versatile, and there are plenty of ways to serve them depending on the occasion. Whether you’re enjoying them as a casual snack or presenting them as a show-stopping dessert, here are a few ideas to take them to the next level.
1. Straight from the Freezer
The easiest way to enjoy these ice cream sandwiches is straight out of the freezer. The Oreo layers stay crunchy, and the ice cream is perfectly firm yet creamy. If they’ve been in the freezer for a long time, let them sit at room temperature for about 2 minutes to slightly soften before biting in.
2. Drizzle with Melted Chocolate
For a more indulgent treat, melt dark chocolate, milk chocolate, or white chocolate, and drizzle it over the sandwiches before serving. You can even sprinkle crushed Oreos, chopped nuts, or shredded coconut on top while the chocolate is still warm to create a deliciously textured coating.
3. Roll in Extra Toppings
Want to make your Oreo ice cream sandwiches even more special? Roll the exposed edges of the ice cream in mini chocolate chips, sprinkles, or crushed Oreos. This adds an extra crunch and a pop of color, making them perfect for parties and celebrations.
4. Serve with Fresh Fruit
Pairing your ice cream sandwiches with fresh berries, banana slices, or a scoop of fruit compote adds a touch of freshness that balances the rich flavors. A few strawberries or raspberries on the side make the dessert look even more appealing.
5. Ice Cream Sundae Style
If you’re feeling extra fancy, serve these Oreo ice cream sandwiches as part of a sundae platter. Cut them into halves or quarters, stack them up, and drizzle with caramel or fudge sauce. Add a dollop of whipped cream and a cherry on top for the ultimate dessert presentation.
6. Pair with a Warm Beverage
The contrast between hot and cold can be delightful. Try enjoying your Oreo ice cream sandwich with:
- A hot cup of coffee or espresso – The bitterness balances the sweetness.
- Hot chocolate – A cozy winter-friendly pairing.
- Warm milk – A nostalgic choice that makes you feel like a kid again.
Pairing Suggestions
While Oreo ice cream sandwiches are already a satisfying treat on their own, pairing them with complementary flavors can enhance the experience. Here are some fantastic pairings to try.
1. Beverages That Pair Well
- Cold Brew Coffee or Iced Latte – The slight bitterness of coffee balances the sweetness.
- Milkshakes – A cookies-and-cream milkshake with an Oreo ice cream sandwich? Yes, please!
- Vanilla Almond Milk – A dairy-free option that pairs well with the chocolatey Oreo flavor.
- Strawberry Lemonade – The citrusy, refreshing taste contrasts the richness of the ice cream.
2. Dessert Pairings
- Brownies – A warm fudgy brownie alongside a cold Oreo ice cream sandwich is the definition of indulgence.
- Cheesecake Bites – The tanginess of cheesecake complements the sweet and creamy ice cream.
- Chocolate-Dipped Strawberries – A great way to add a fruity, luxurious touch.
3. Snack Pairings
- Salty Popcorn – The salty-sweet contrast is incredibly addictive.
- Pretzels or Salted Nuts – A crunchy, salty contrast to the smooth ice cream.
- Peanut Butter or Nutella – A spread of peanut butter or Nutella on top of your sandwich before eating adds another layer of decadence.
Storage, Freezing & Reheating Instructions
One of the best things about these homemade Oreo ice cream sandwiches is that they store well in the freezer, making them perfect for prepping ahead of time. However, proper storage is key to keeping them fresh and delicious.
1. How to Store in the Freezer
- Once the sandwiches are fully frozen, wrap each one individually in plastic wrap or parchment paper. This prevents freezer burn and keeps them fresh.
- For extra protection, place the wrapped sandwiches in an airtight container or a resealable freezer bag. This keeps them from absorbing any unwanted flavors from the freezer.
- Store for up to 3 weeks for the best taste and texture.
2. How to Serve After Freezing
- Take the sandwiches out a couple of minutes before eating to allow them to slightly soften for a better texture.
- If they’re too frozen to bite into, let them sit at room temperature for 3-5 minutes before enjoying.
3. Can You Reheat an Ice Cream Sandwich?
Ice cream sandwiches aren’t meant to be reheated, but if you want a softer texture, you can microwave them on low power for 5-10 seconds. This makes the cookie layer softer while keeping the ice cream cold.
Common Mistakes to Avoid
Making homemade Oreo ice cream sandwiches is fairly simple, but a few small mistakes can affect the final result. Here’s what to avoid.
1. Not Freezing Long Enough
Patience is key! If you don’t let the layers fully freeze before slicing, you’ll end up with a melted mess. Make sure to give it at least 6 hours or, ideally, overnight.
2. Overmixing the Ice Cream Base
When folding the condensed milk into the whipped cream, be gentle! Overmixing can deflate the mixture, resulting in a denser, less airy ice cream.
3. Using a Dull Knife to Cut the Sandwiches
For clean slices, always use a sharp knife warmed under hot water. This prevents the cookie layer from cracking and helps slice through the ice cream smoothly.
4. Not Pressing the Oreo Crust Firmly Enough
If the Oreo crust isn’t packed tightly before freezing, it can crumble when slicing. Press it firmly into the pan to ensure a solid base.
5. Storing Without Wrapping
Leaving the sandwiches exposed in the freezer will cause freezer burn and make them taste stale. Always wrap them well in plastic wrap or parchment paper.
Pro Tips
1. Use Double-Stuffed Oreos for Extra Creaminess
Want an even richer flavor? Try using double-stuffed Oreos for a thicker, creamier ice cream filling.
2. Add a Layer of Peanut Butter or Nutella
Before adding the ice cream, spread a thin layer of peanut butter, Nutella, or caramel sauce on the Oreo crust for an extra flavor boost.
3. Try Different Oreo Flavors
This recipe works well with Golden Oreos, Mint Oreos, or Peanut Butter Oreos for a fun twist.
4. Freeze the Knife Before Cutting
For the cleanest slices, put your knife in the freezer for 10 minutes before cutting.
5. Make Mini Versions for Kids
Use a muffin tin to create bite-sized Oreo ice cream sandwiches for smaller portions.
Frequently Asked Questions (FAQs)
1. Can I Use Store-Bought Ice Cream Instead of Making My Own?
Absolutely! Just let the store-bought ice cream soften slightly before spreading it onto the Oreo crust.
2. Can I Make These Dairy-Free?
Yes! Use coconut cream instead of heavy cream and a dairy-free condensed milk alternative.
3. How Do I Keep the Sandwiches From Melting Too Quickly?
Keep them in the freezer until just before serving. Wrapping them individually also helps prevent quick melting.
4. Can I Use a Different Cookie?
Definitely! Try using graham crackers, chocolate chip cookies, or even brownies instead of Oreos.
5. What’s the Best Way to Store Leftovers?
Wrap each sandwich individually and store them in an airtight container in the freezer for up to 3 weeks.
Conclusion & Call to Action
Homemade Oreo ice cream sandwiches are easy to make, endlessly customizable, and incredibly delicious. Whether you’re making them for a party, a family dessert, or just to keep in your freezer for sweet cravings, this recipe is sure to become a favorite.
I’d love to hear how your Oreo ice cream sandwiches turned out! Leave a comment, share your experience, or tag me on social media with your creations. Enjoy your homemade frozen treats!
Print
Oreo Ice Cream Sandwiches – Easy No-Churn Dessert Recipe
- Total Time: 6 hours (including freezing 6 hours (including freezing))
- Yield: 8 sandwiches 1x
- Diet: Vegetarian
Description
These homemade Oreo Ice Cream Sandwiches feature a crunchy Oreo crust and a rich, no-churn vanilla ice cream filling packed with Oreo pieces. They’re easy to make, freezer-friendly, and perfect for summer treats or party desserts.
Ingredients
- 50 Oreo cookies (crushed)
- 170g unsalted butter (melted)
- 500g heavy whipping cream
- 1 tbsp vanilla extract
- 150g sweetened condensed milk
Instructions
- Make the Oreo Crust: Crush the Oreos into fine crumbs and mix with melted butter. Press half of the mixture into a lined 9×9-inch pan. Freeze for 15 minutes.
- Prepare the Ice Cream: Whip heavy cream and vanilla extract until stiff peaks form. Fold in condensed milk and reserved Oreo crumbs.
- Assemble the Layers: Pour the ice cream mixture over the frozen Oreo base. Freeze for 1-2 hours, then add the remaining Oreo crumb layer on top.
- Freeze Until Firm: Freeze for at least 6 hours or overnight.
- Slice and Serve: Lift out the frozen block, slice into sandwiches, and enjoy!
Notes
- Use double-stuffed Oreos for extra creaminess.
- For clean slices, run your knife under hot water before cutting.
- Store in an airtight container in the freezer for up to 3 weeks.
- Prep Time: 20 minutes
- Cook Time: 0 minutes
- Category: Dessert
- Method: No-Bake
- Cuisine: American