
Christmas Tree Charcuterie Board is an incredible way to bring festive cheer to your holiday gatherings. This visually stunning and delicious arrangement of meats, cheeses, fruits, and nuts is sure to impress your guests. Not only does it serve as a beautiful centerpiece, but it also allows everyone to indulge in their favorite snacks. With its unique shape and vibrant colors, this charcuterie board is not just food; it’s a celebration of the season!
The joy of a Christmas Tree Charcuterie Board lies in its versatility. You can customize it based on your preferences and dietary restrictions. Whether you prefer a mix of savory and sweet or a focus on artisanal cheeses, the possibilities are endless. This guide will walk you through the process of creating your own Christmas Tree Charcuterie Board, ensuring that it becomes the highlight of your holiday festivities.
Imagine gathering around this delightful board with family and friends, sharing stories, laughter, and delicious bites. The charm of the Christmas Tree shape adds a fun twist to your typical charcuterie setup, making it a memorable experience for everyone involved. So, let’s dive into why you’ll love this recipe and how to bring your own festive charcuterie board to life!
Why You’ll Love This Recipe
Creating a Christmas Tree Charcuterie Board is more than just assembling food; it’s about bringing people together. Here are several reasons why this recipe will become your go-to for holiday celebrations:
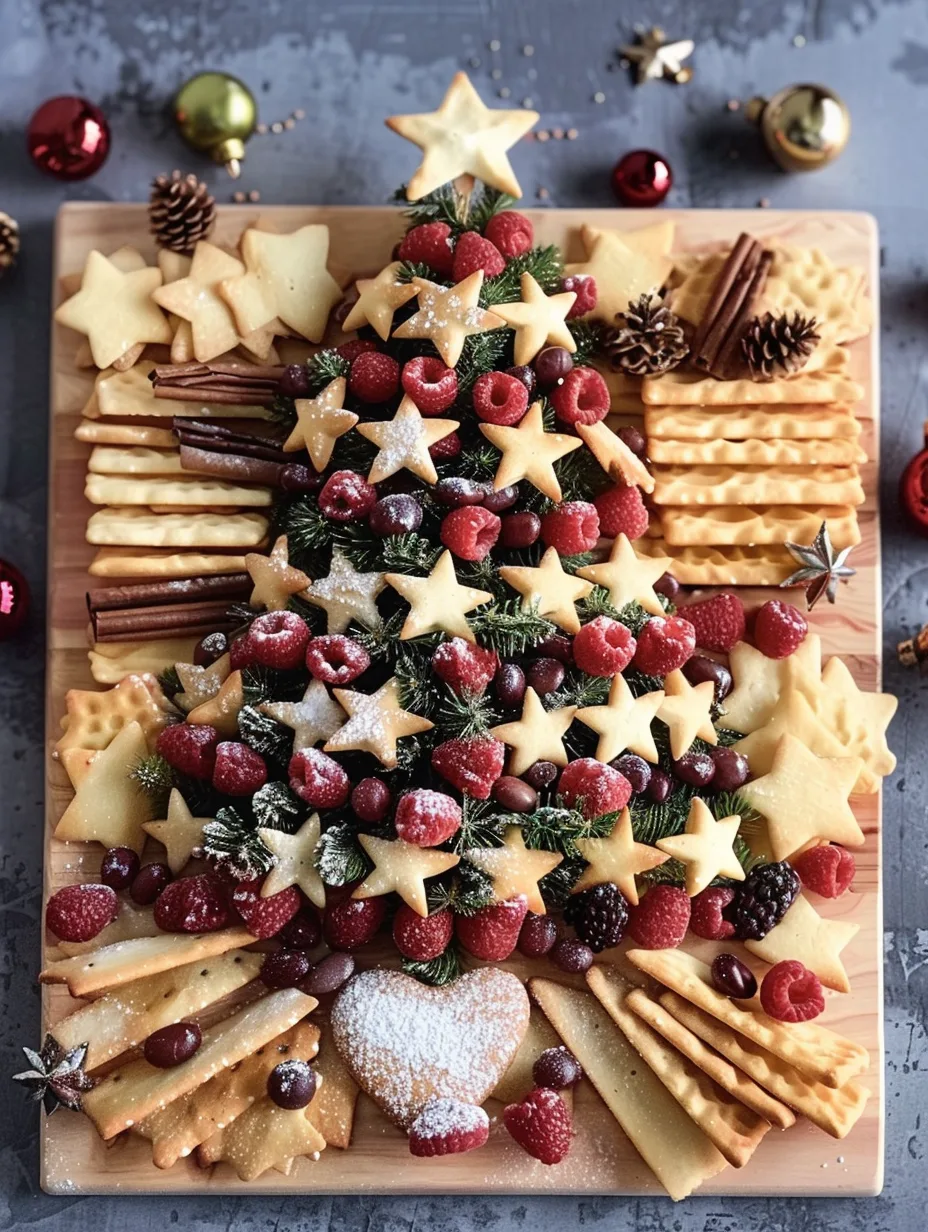
1. Visual Appeal: The tree shape creates an eye-catching centerpiece for any celebration.
2. Customizable Options: Tailor the ingredients to suit your tastes, dietary needs, or guest preferences.
3. Easy to Prepare: This recipe requires minimal cooking, making it simple and stress-free.
4. Great for All Ages: Both kids and adults enjoy picking from a variety of flavors and textures.
5. Interactive Eating: Allows guests to mingle and serve themselves, fostering a relaxed atmosphere.
6. Seasonal Ingredients: Incorporate seasonal fruits and festive colors to enhance the holiday spirit.
By focusing on these elements, you’ll see why the Christmas Tree Charcuterie Board is perfect for any holiday gathering. It’s about more than just food; it’s about connection, creativity, and celebration.
Preparation and Cooking Time
Creating a Christmas Tree Charcuterie Board is quick and straightforward. Here’s a breakdown of the time needed for preparation:
– Preparation Time: 30-45 minutes
– Assembly Time: 15-20 minutes
– Total Time: Approximately 1 hour
This time may vary based on how elaborate you want your board to be. However, the overall process is enjoyable and doesn’t require extensive cooking skills.
Ingredients
– Assorted cheeses (cheddar, brie, gouda)
– Cured meats (salami, prosciutto, pepperoni)
– Fresh fruits (grapes, strawberries, apple slices)
– Nuts (almonds, walnuts, pecans)
– Dried fruits (cranberries, apricots)
– Crackers or breadsticks
– Fresh herbs (rosemary, thyme) for decoration
– Optional: Chocolate, olives, or pickles for additional variety
Step-by-Step Instructions
Creating your Christmas Tree Charcuterie Board can be a fun and creative process. Follow these steps to assemble a beautiful and delicious board:
1. Choose Your Base: Select a large wooden board or a festive platter to serve as the base for your charcuterie.
2. Shape the Tree: Begin by arranging a triangle shape with crackers or breadsticks at the bottom to form the tree trunk.
3. Layer the Cheeses: Cut cheese into various shapes (slices, cubes, or wedges) and begin placing them in a tree-like pattern, starting from the bottom and working your way up.
4. Add the Meats: Fold or roll the cured meats and place them around the cheeses, filling in gaps for a full look.
5. Incorporate Fresh Fruits: Strategically add fresh fruits around the board to add color and freshness. Grapes can hang like ornaments, while apple slices can be placed strategically.
6. Sprinkle in Nuts and Dried Fruits: Fill in any remaining spaces with nuts and dried fruits, adding texture and flavor.
7. Garnish with Fresh Herbs: Use rosemary or thyme sprigs to decorate the top of your tree and add a festive touch.
8. Final Touches: Consider adding small bowls for olives, pickles, or chocolate for extra variety and to keep the board organized.
9. Serve with Style: Place small tongs or toothpicks for easy serving and enjoy the festive atmosphere!
How to Serve
When it comes to serving your Christmas Tree Charcuterie Board, presentation and atmosphere are key. Here are some tips to elevate the experience:
1. Setting the Scene: Place your charcuterie board on a decorated table or counter, surrounded by holiday-themed decor for a festive vibe.
2. Pairing Suggestions: Offer wine or holiday-themed beverages that complement the flavors of your board, such as red wine or spiced cider.
3. Encourage Sharing: Invite guests to gather around the board, making it a social activity where everyone can pick their favorites.
4. Use Decorative Elements: Enhance the board with small ornaments, candles, or holiday napkins to create a cozy atmosphere.
5. Refill as Needed: Keep an eye on the board and replenish items as they are consumed to keep the festive spirit alive throughout the gathering.
Creating and serving a Christmas Tree Charcuterie Board is not only about the food; it’s about fostering connections and celebrating the joyous season with loved ones. Enjoy making your board, and savor the delightful flavors and memories it brings!
Additional Tips
– Use Fresh Ingredients: Fresh fruits and high-quality cheeses will make your Christmas Tree Charcuterie Board taste even better. Look for seasonal produce to enhance flavors.
– Vary the Shapes: Cut cheeses and fruits into different shapes to create visual interest. Consider using cookie cutters for festive shapes.
– Balance Flavors: Ensure a mix of sweet and savory items. This will cater to different palates and make the board more appealing.
– Use Colorful Garnishes: Fresh herbs or edible flowers can add a pop of color to your board, making it even more inviting.
– Plan Ahead: Prepare some components in advance, such as slicing cheeses or washing fruits, to save time on the day of your gathering.
Recipe Variation
There are countless ways to customize your Christmas Tree Charcuterie Board. Here are some ideas:
1. Themed Variations: Create a “Winter Wonderland” board with all-white cheeses, coconut flakes, and white chocolate-covered pretzels.
2. Mediterranean Twist: Use feta, olives, hummus, and pita chips for a Mediterranean-inspired version.
3. Sweet Treat Board: Focus on sweets by including chocolate-covered fruits, cookies, and candies for a dessert-style charcuterie board.
Freezing and Storage
– Storage: Keep leftovers in an airtight container in the refrigerator. Consume within 2-3 days for the best quality.
– Freezing: While charcuterie boards are best enjoyed fresh, you can freeze leftover meats and cheeses. Wrap them tightly in plastic wrap or foil. They can last up to one month in the freezer.
Special Equipment
To create your Christmas Tree Charcuterie Board effectively, having the right tools can help:
– Cutting Board or Platter: A large, flat surface is essential for assembly.
– Cheese Knife: A good cheese knife helps slice through various cheese textures easily.
– Serving Utensils: Tongs and toothpicks make it easier for guests to serve themselves.
– Small Bowls: Use small bowls for dips, olives, or pickles to keep everything organized.
Frequently Asked Questions
Can I make the Christmas Tree Charcuterie Board ahead of time?
Yes, you can prepare it a few hours in advance. Just cover it with plastic wrap to keep it fresh.
What if I have guests with dietary restrictions?
You can easily customize the board to accommodate allergies or preferences, such as gluten-free crackers or vegan cheeses.
How do I keep fruits from browning?
To prevent browning, you can brush apple slices with lemon juice or use fresh fruits that are less prone to browning.
Is there a suggested wine pairing?
A light red wine, such as Pinot Noir, pairs well with the variety of flavors on the board.
Can I use leftovers from the board for another meal?
Absolutely! Leftover meats and cheeses can be used in salads or sandwiches, while fruits can be blended into smoothies.
Conclusion
Creating a Christmas Tree Charcuterie Board is a delightful way to celebrate the holiday season. With its vibrant colors, diverse flavors, and interactive nature, this board is perfect for bringing friends and family together. By customizing your ingredients and following the simple steps outlined, you can create a stunning centerpiece that will impress your guests. Enjoy the festive atmosphere and the joy of sharing delicious bites during your holiday gatherings!

Christmas Tree Charcuterie Board: An Amazing Ultimate Guide
- Total Time: 15 minutes
Ingredients
– Assorted cheeses (cheddar, brie, gouda)
– Cured meats (salami, prosciutto, pepperoni)
– Fresh fruits (grapes, strawberries, apple slices)
– Nuts (almonds, walnuts, pecans)
– Dried fruits (cranberries, apricots)
– Crackers or breadsticks
– Fresh herbs (rosemary, thyme) for decoration
– Optional: Chocolate, olives, or pickles for additional variety
Instructions
Creating your Christmas Tree Charcuterie Board can be a fun and creative process. Follow these steps to assemble a beautiful and delicious board:
1. Choose Your Base: Select a large wooden board or a festive platter to serve as the base for your charcuterie.
2. Shape the Tree: Begin by arranging a triangle shape with crackers or breadsticks at the bottom to form the tree trunk.
3. Layer the Cheeses: Cut cheese into various shapes (slices, cubes, or wedges) and begin placing them in a tree-like pattern, starting from the bottom and working your way up.
4. Add the Meats: Fold or roll the cured meats and place them around the cheeses, filling in gaps for a full look.
5. Incorporate Fresh Fruits: Strategically add fresh fruits around the board to add color and freshness. Grapes can hang like ornaments, while apple slices can be placed strategically.
6. Sprinkle in Nuts and Dried Fruits: Fill in any remaining spaces with nuts and dried fruits, adding texture and flavor.
7. Garnish with Fresh Herbs: Use rosemary or thyme sprigs to decorate the top of your tree and add a festive touch.
8. Final Touches: Consider adding small bowls for olives, pickles, or chocolate for extra variety and to keep the board organized.
9. Serve with Style: Place small tongs or toothpicks for easy serving and enjoy the festive atmosphere!
- Prep Time: 15 minutes
- Cook Time: 0 minutes
Nutrition
- Serving Size: 8-10
- Calories: 250 kcal
- Fat: 18g
- Protein: 8g