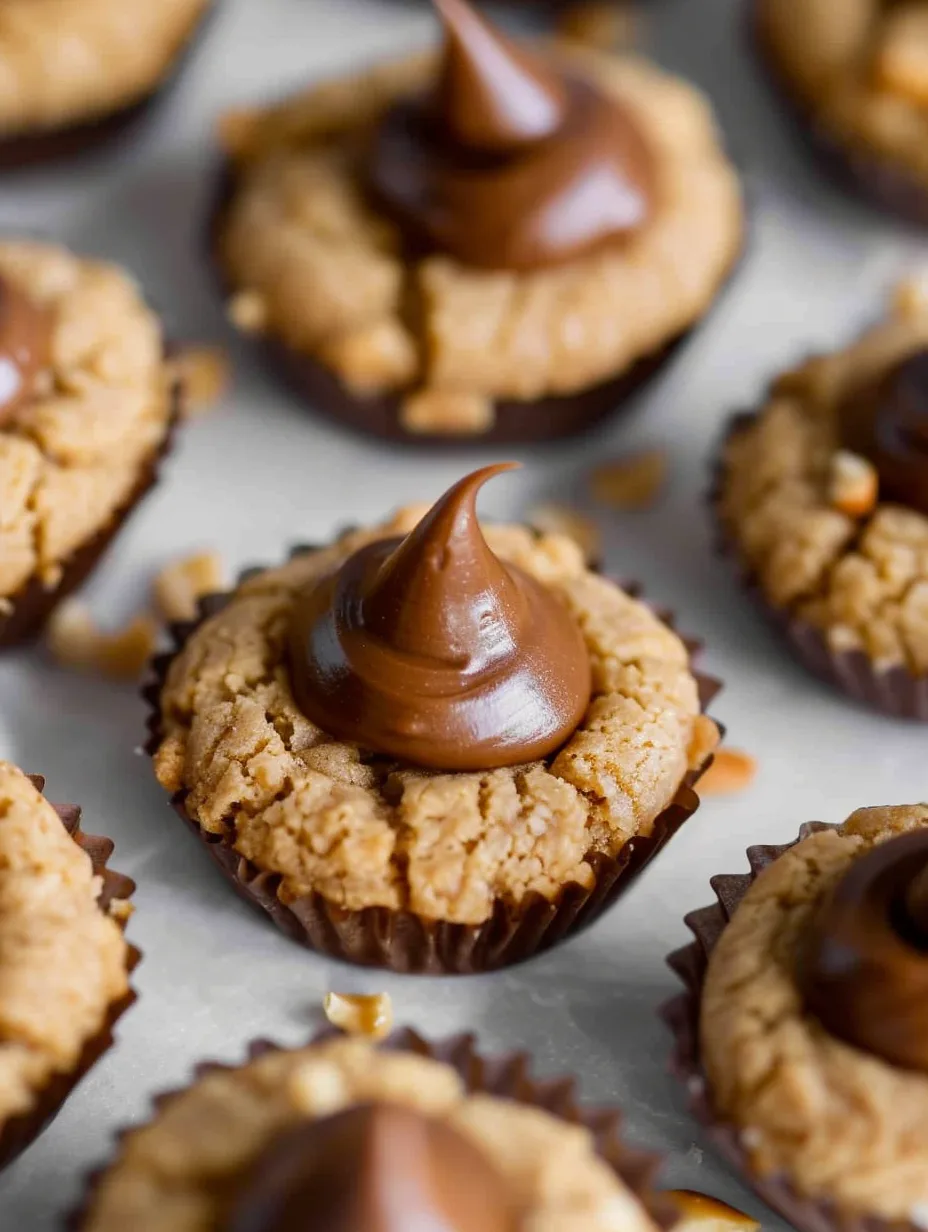
Classic Peanut Butter Blossoms are an amazing treat that combines rich peanut butter flavor with a delightful chocolate kiss on top. This iconic cookie is a favorite among many, celebrated for its sweet and salty flavor profile. The moment you bite into one, you are met with a chewy texture and a burst of chocolate that creates a truly irresistible experience. Whether you are baking for a holiday gathering or just to satisfy a sweet tooth, these cookies are sure to impress everyone who tries them.
There’s something magical about the combination of peanut butter and chocolate. The nuttiness of the peanut butter pairs beautifully with the sweetness of the chocolate, making each bite a perfect harmony of flavors. If you’ve never baked Classic Peanut Butter Blossoms before, you’re in for a treat! This recipe is not only easy to follow but also yields cookies that are consistently delicious.
In this article, we’ll explore why this recipe is a must-try, how to prepare it, and tips on serving these delightful cookies. With a few simple ingredients and step-by-step instructions, you’ll be on your way to baking your very own Classic Peanut Butter Blossoms that are sure to become a family favorite.
Why You’ll Love This Recipe
There are countless reasons to fall in love with Classic Peanut Butter Blossoms. Here are just a few that make this recipe stand out:
1. Simple Ingredients: Most ingredients are pantry staples, making it easy to whip up a batch whenever a craving strikes.
2. Quick to Prepare: These cookies come together in no time, so you can enjoy them fresh from the oven without much fuss.
3. Crowd-Pleaser: The combination of peanut butter and chocolate appeals to people of all ages, making them perfect for gatherings.
4. Customizable: You can experiment with different types of chocolate or add mix-ins like chopped nuts or candies for a twist.
5. Nostalgic Flavor: Many people have fond memories of these cookies, making them a heartwarming treat to share.
6. Perfect for Any Occasion: Whether it’s a holiday cookie exchange or a casual afternoon snack, these cookies fit the bill.
With these enticing elements, you’ll understand why Classic Peanut Butter Blossoms are such a beloved treat. Their delightful combination of textures and flavors is sure to bring joy to your baking adventures!
Preparation and Cooking Time
Making Classic Peanut Butter Blossoms is not only enjoyable but also relatively quick. Here’s a breakdown of the time you’ll need:
– Preparation Time: 15 minutes
– Cooking Time: 10-12 minutes
– Cooling Time: 5 minutes (before adding chocolate kisses)
This means you can have a delicious batch of cookies ready in about 30 minutes, making them a fantastic choice for last-minute baking!
Ingredients
– 1 cup creamy peanut butter
– 1 cup granulated sugar
– 1 cup packed brown sugar
– 1 large egg
– 2 teaspoons baking soda
– 1 teaspoon vanilla extract
– ½ teaspoon salt
– 1 ½ cups all-purpose flour
– 1 cup chocolate kisses (unwrapped)
– Granulated sugar (for rolling)
Step-by-Step Instructions
Creating Classic Peanut Butter Blossoms is straightforward if you follow these simple steps:
1. Preheat the Oven: Preheat your oven to 350°F (175°C) and line a baking sheet with parchment paper.
2. Mix the Peanut Butter and Sugars: In a large bowl, mix together the peanut butter, granulated sugar, and brown sugar until well combined.
3. Add the Egg and Vanilla: Beat in the egg and vanilla extract until the mixture is smooth.
4. Incorporate Dry Ingredients: Add the baking soda, salt, and flour. Stir until just combined and no flour streaks remain.
5. Shape the Cookies: Scoop out about a tablespoon of dough, roll it into a ball, and then roll in granulated sugar to coat.
6. Place on Baking Sheet: Arrange the sugar-coated dough balls on the prepared baking sheet, leaving space between each ball.
7. Bake the Cookies: Bake for 10-12 minutes, or until the edges are lightly golden.
8. Add Chocolate Kisses: Remove from the oven and gently press a chocolate kiss into the center of each cookie. Let them cool on the baking sheet for 5 minutes.
9. Transfer to a Wire Rack: After cooling slightly, transfer the cookies to a wire rack to cool completely.
These steps will guide you in creating delicious Classic Peanut Butter Blossoms that are sure to delight!
How to Serve
When it comes to serving Classic Peanut Butter Blossoms, consider the following tips to elevate your presentation and enjoyment:
1. Presentation: Arrange the cookies on a decorative platter or stand to make them visually appealing.
2. Accompaniments: Serve alongside a glass of cold milk or a warm cup of coffee to enhance the flavor experience.
3. Storage: Keep uneaten cookies in an airtight container at room temperature for up to a week to maintain freshness.
4. Gifting: Package them in a decorative tin or box for a thoughtful homemade gift during the holidays or for special occasions.
5. Decorate: For added flair, drizzle melted chocolate over the tops or sprinkle with sea salt for a sweet and salty twist.
By putting thought into how you serve these cookies, you can create a memorable experience for you and your guests! Enjoy the delightful taste of Classic Peanut Butter Blossoms, and watch them disappear in no time!
Additional Tips
– Use Fresh Ingredients: Ensure your peanut butter is fresh for the best flavor. Old peanut butter can alter the taste of your cookies.
– Let Cookies Cool: Allow the cookies to cool slightly before transferring them to a wire rack. This helps maintain their shape.
– Experiment with Toppings: Try adding a sprinkle of sea salt on top of the chocolate kisses for a sweet and salty contrast.
Recipe Variation
Don’t hesitate to get creative with your Classic Peanut Butter Blossoms! Here are some fun variations to try:
1. Dark Chocolate Kisses: Substitute regular chocolate kisses with dark chocolate for a richer flavor.
2. Peanut Butter Chips: Mix in peanut butter chips along with the chocolate kisses for an extra peanut butter punch.
3. Nutty Additions: Add chopped nuts like peanuts or walnuts into the dough for a delightful crunch.
Freezing and Storage
– Storage: Store your Classic Peanut Butter Blossoms in an airtight container at room temperature for up to a week. This helps keep them fresh and chewy.
– Freezing: To freeze, place the unbaked cookie dough balls on a baking sheet and freeze until solid. Then transfer them to a zip-top bag. They can be frozen for up to three months. When ready to bake, simply add a couple of extra minutes to the baking time.
Special Equipment
Having the right tools can make your baking experience smoother. Here’s what you’ll need:
– Mixing bowls for combining ingredients
– Baking sheets lined with parchment paper
– A cookie scoop or tablespoon for uniform cookie sizes
– A wire rack for cooling the cookies
– An oven thermometer to ensure accurate baking temperatures
Frequently Asked Questions
Can I use crunchy peanut butter?
Yes, if you prefer a bit of texture in your cookies, crunchy peanut butter works well too!
What if I don’t have chocolate kisses?
You can use chocolate chips or chunks as a delightful alternative that will still melt beautifully on top of the cookies.
Can I make these cookies gluten-free?
Absolutely! Substitute all-purpose flour with a gluten-free flour blend. Just ensure the blend contains a binding agent for the best results.
How do I know when my cookies are done?
The edges should be lightly golden, while the centers may look slightly underbaked. They will continue to firm up as they cool.
Can I double the recipe?
Of course! Simply double each ingredient and ensure you have enough baking sheets and space in your oven.
Conclusion
Classic Peanut Butter Blossoms are a timeless treat that brings joy to both the baker and the eater. With their perfect combination of chewy peanut butter and sweet chocolate, they are sure to become a staple in your baking repertoire. Whether you’re preparing for a special occasion or simply indulging in a sweet craving, these cookies are an excellent choice. Enjoy the process of making them and the smiles they bring!

Classic Peanut Butter Blossoms: An Amazing Ultimate Recipe
- Total Time: 57 minute
Ingredients
– 1 cup creamy peanut butter
– 1 cup granulated sugar
– 1 cup packed brown sugar
– 1 large egg
– 2 teaspoons baking soda
– 1 teaspoon vanilla extract
– ½ teaspoon salt
– 1 ½ cups all-purpose flour
– 1 cup chocolate kisses (unwrapped)
– Granulated sugar (for rolling)
Instructions
Creating Classic Peanut Butter Blossoms is straightforward if you follow these simple steps:
1. Preheat the Oven: Preheat your oven to 350°F (175°C) and line a baking sheet with parchment paper.
2. Mix the Peanut Butter and Sugars: In a large bowl, mix together the peanut butter, granulated sugar, and brown sugar until well combined.
3. Add the Egg and Vanilla: Beat in the egg and vanilla extract until the mixture is smooth.
4. Incorporate Dry Ingredients: Add the baking soda, salt, and flour. Stir until just combined and no flour streaks remain.
5. Shape the Cookies: Scoop out about a tablespoon of dough, roll it into a ball, and then roll in granulated sugar to coat.
6. Place on Baking Sheet: Arrange the sugar-coated dough balls on the prepared baking sheet, leaving space between each ball.
7. Bake the Cookies: Bake for 10-12 minutes, or until the edges are lightly golden.
8. Add Chocolate Kisses: Remove from the oven and gently press a chocolate kiss into the center of each cookie. Let them cool on the baking sheet for 5 minutes.
9. Transfer to a Wire Rack: After cooling slightly, transfer the cookies to a wire rack to cool completely.
These steps will guide you in creating delicious Classic Peanut Butter Blossoms that are sure to delight!
- Prep Time: 15 minutes
- Cook Time: 10-12 minutes
Nutrition
- Serving Size: 24 cookies
- Calories: 120 kcal
- Fat: 6g
- Protein: 3g

