
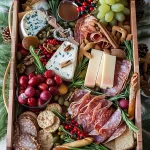
Christmas Cheese Board is a delightful way to celebrate the festive season, bringing together a variety of flavors, colors, and textures. This cheese board is not just a feast for the palate but also a feast for the eyes. It can be the centerpiece of your holiday gatherings, adding a touch of elegance and joy to your celebrations. As you gather with family and friends, a well-curated cheese board can spark conversations and create lasting memories.
Imagine a beautifully arranged platter filled with an array of cheeses, nuts, fruits, and accompaniments that complement each other perfectly. The Christmas Cheese Board is versatile and can be tailored to suit different tastes and preferences. Whether your guests prefer soft, creamy cheeses or robust, aged varieties, this guide will help you create a stunning cheese board that everyone will love.
The process of assembling a Christmas Cheese Board is simple yet artistic. It allows you to express your creativity while ensuring that everyone has something to enjoy. In this article, we’ll explore why you’ll love this recipe, the preparation and cooking time, a list of ingredients, step-by-step instructions, and finally, how to serve this amazing cheese board. So, let’s dive into the world of cheese and create a Christmas Cheese Board that will leave your guests in awe!
Why You’ll Love This Recipe
Creating a Christmas Cheese Board is an experience that combines art and gastronomy. Here are several reasons why this recipe is a must-try:
1. Versatile Ingredients: You can mix and match various cheeses, fruits, and nuts based on what you have on hand or what’s in season.
2. Easy to Assemble: It requires minimal cooking, making it perfect for busy holiday schedules.
3. Visually Stunning: The vibrant colors of the cheeses, fruits, and garnishes make it an eye-catching centerpiece.
4. Customizable: You can cater to dietary restrictions, including vegan options or gluten-free items.
5. Perfect for Sharing: It encourages communal eating and interaction among guests, enhancing the festive atmosphere.
6. Delicious Pairings: The combination of sweet, savory, and tangy flavors offers something for everyone, making it a crowd-pleaser.
7. Impressive Presentation: Your guests will be wowed by your ability to create such a beautiful and delicious spread.
With these reasons, it’s easy to see why a Christmas Cheese Board is a fantastic addition to your holiday festivities.
Preparation and Cooking Time
Creating your Christmas Cheese Board will take approximately 30-45 minutes, depending on how elaborate you want it to be. Here’s a breakdown of the time required:
– Preparation Time: 30-45 minutes
– Assembling Time: 10-15 minutes
These times may vary based on your experience and the size of your cheese board, but this framework should provide a good estimate for planning your holiday gathering.
Ingredients
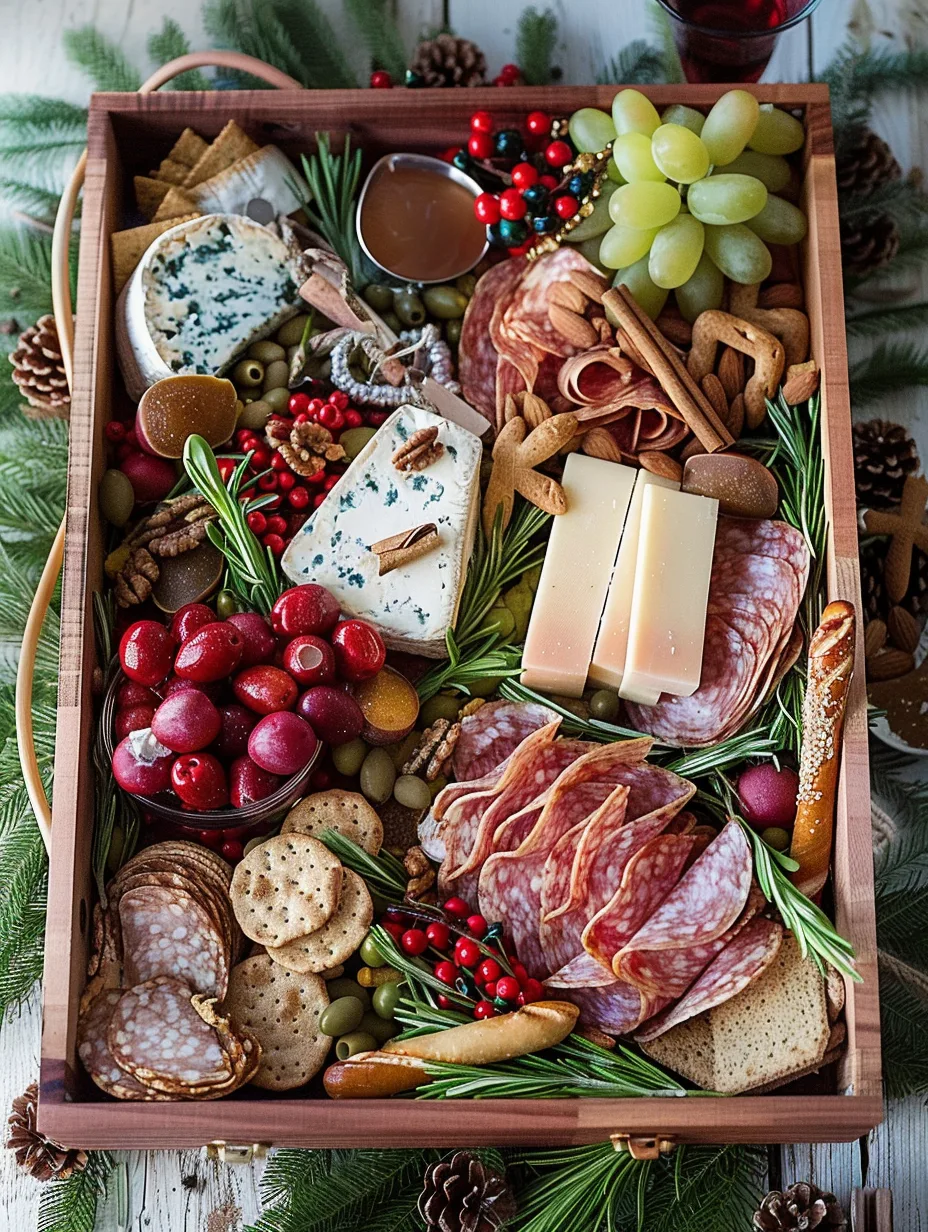
– 3 varieties of cheese (soft, semi-hard, and hard cheese)
– 1 cup assorted crackers or breadsticks
– 1 cup mixed nuts (almonds, walnuts, pecans)
– 1 cup fresh fruits (grapes, figs, apple slices)
– 1 cup dried fruits (apricots, cranberries)
– 1 jar of honey or fruit preserves
– Fresh herbs (rosemary, thyme) for garnish
Step-by-Step Instructions
Creating your Christmas Cheese Board is easy when you follow these steps:
1. Select a Board: Choose a large wooden cutting board or a marble platter that will showcase your ingredients beautifully.
2. Place the Cheeses: Begin by placing the three varieties of cheese on the board. Space them out evenly to allow room for the other ingredients.
3. Add Crackers: Arrange the assorted crackers or breadsticks around the cheeses, ensuring they are easily accessible.
4. Incorporate Nuts: Fill in the gaps with mixed nuts, creating a rustic look.
5. Add Fresh Fruits: Strategically place fresh fruits like grapes and apple slices around the board for color and freshness.
6. Include Dried Fruits: Sprinkle some dried fruits in clusters to add a touch of sweetness.
7. Drizzle Honey: Place a small bowl of honey or fruit preserves on the board for dipping.
8. Garnish: Finish by adding fresh herbs like rosemary or thyme for a fragrant touch.
9. Final Touches: Ensure everything is arranged attractively, adjusting as needed for balance and visual appeal.
These steps will guide you in creating an incredible Christmas Cheese Board that will impress your guests effortlessly.
How to Serve
Serving your Christmas Cheese Board can elevate the overall experience. Here are some tips for a memorable presentation:
1. Use a Cheese Knife: Provide a separate knife for each cheese to avoid mixing flavors.
2. Pair with Beverages: Consider serving with wine, cider, or sparkling water for refreshing options.
3. Offer Small Plates: Provide small plates and napkins for easy serving and enjoyment.
4. Encourage Interaction: Allow guests to serve themselves, encouraging them to explore different flavors and combinations.
5. Label the Cheeses: If you have a variety of cheeses, consider labeling them for your guests to identify their favorites.
By putting thought into how you serve the Christmas Cheese Board, you’ll create an unforgettable experience for your guests.
This festive cheese board is more than just food; it’s a celebration of flavors, colors, and togetherness that embodies the spirit of the holiday season. Enjoy crafting and sharing this wonderful creation with your loved ones!
Additional Tips
– Use Seasonal Ingredients: Incorporate seasonal fruits like pomegranate seeds or citrus slices for a festive touch.
– Experiment with Cheese Types: Don’t hesitate to try unique cheese varieties, like goat cheese or blue cheese, for added flavor depth.
– Include Spreads: Add a few spreads, such as hummus or mustard, to bring even more flavor options to your Christmas Cheese Board.
Recipe Variation
Feel free to customize your Christmas Cheese Board! Here are a few variations to try:
1. Themed Boards: Consider creating a themed board, such as a Mediterranean board with feta, olives, and pita bread.
2. Spicy Options: Include spicy cheeses or add jalapeños for a kick.
3. Sweet Treats: Incorporate chocolate-covered pretzels or caramel drizzles for a sweet contrast.
Freezing and Storage
– Storage: Keep leftover cheese covered in the refrigerator. Most cheeses are best consumed within a week.
– Freezing: While some cheeses can be frozen, it may change the texture. Soft cheeses like brie are not recommended for freezing. Hard cheeses, however, can last up to 6 months when wrapped properly.
Special Equipment
You will need a few essential tools to prepare your cheese board successfully:
– A large wooden or marble cheese board
– Cheese knives for slicing different types of cheese
– Small bowls for honey or preserves
– Tongs or toothpicks for serving
Frequently Asked Questions
Can I use non-dairy cheese for my Christmas Cheese Board?
Yes, there are many delicious non-dairy cheese alternatives available that work just as well.
What is the best way to cut cheese?
Cut cheese into small wedges or cubes for easy serving, ensuring to use separate knives to avoid mixing flavors.
How far in advance can I prepare my cheese board?
You can prepare elements of the board a few hours in advance. However, it’s best to assemble it close to serving time for freshness.
Can I include charcuterie on my cheese board?
Absolutely! Adding cured meats like salami or prosciutto can enhance the flavor profile of your board.
Conclusion
Creating a Christmas Cheese Board is a delightful way to enhance your holiday celebrations. With its beautiful presentation and a variety of flavors, it’s guaranteed to impress your guests. The versatility of this cheese board allows for endless creativity, making it a perfect addition to any festive gathering. Enjoy the process of assembling your cheese board and the joy it brings to your holiday festivities!
Christmas Cheese Board: An Incredible Ultimate Guide for 7 Amazing Ingredients
- Total Time: 41 minute
Ingredients
– 3 varieties of cheese (soft, semi-hard, and hard cheese)
– 1 cup assorted crackers or breadsticks
– 1 cup mixed nuts (almonds, walnuts, pecans)
– 1 cup fresh fruits (grapes, figs, apple slices)
– 1 cup dried fruits (apricots, cranberries)
– 1 jar of honey or fruit preserves
– Fresh herbs (rosemary, thyme) for garnish
Instructions
Creating your Christmas Cheese Board is easy when you follow these steps:
1. Select a Board: Choose a large wooden cutting board or a marble platter that will showcase your ingredients beautifully.
2. Place the Cheeses: Begin by placing the three varieties of cheese on the board. Space them out evenly to allow room for the other ingredients.
3. Add Crackers: Arrange the assorted crackers or breadsticks around the cheeses, ensuring they are easily accessible.
4. Incorporate Nuts: Fill in the gaps with mixed nuts, creating a rustic look.
5. Add Fresh Fruits: Strategically place fresh fruits like grapes and apple slices around the board for color and freshness.
6. Include Dried Fruits: Sprinkle some dried fruits in clusters to add a touch of sweetness.
7. Drizzle Honey: Place a small bowl of honey or fruit preserves on the board for dipping.
8. Garnish: Finish by adding fresh herbs like rosemary or thyme for a fragrant touch.
9. Final Touches: Ensure everything is arranged attractively, adjusting as needed for balance and visual appeal.
These steps will guide you in creating an incredible Christmas Cheese Board that will impress your guests effortlessly.
- Prep Time: 15 minutes
- Cook Time: –
Nutrition
- Serving Size: 8
- Calories: 250 kcal
- Fat: 18g
- Protein: 10g